
Fit L4-1.5L (2008)
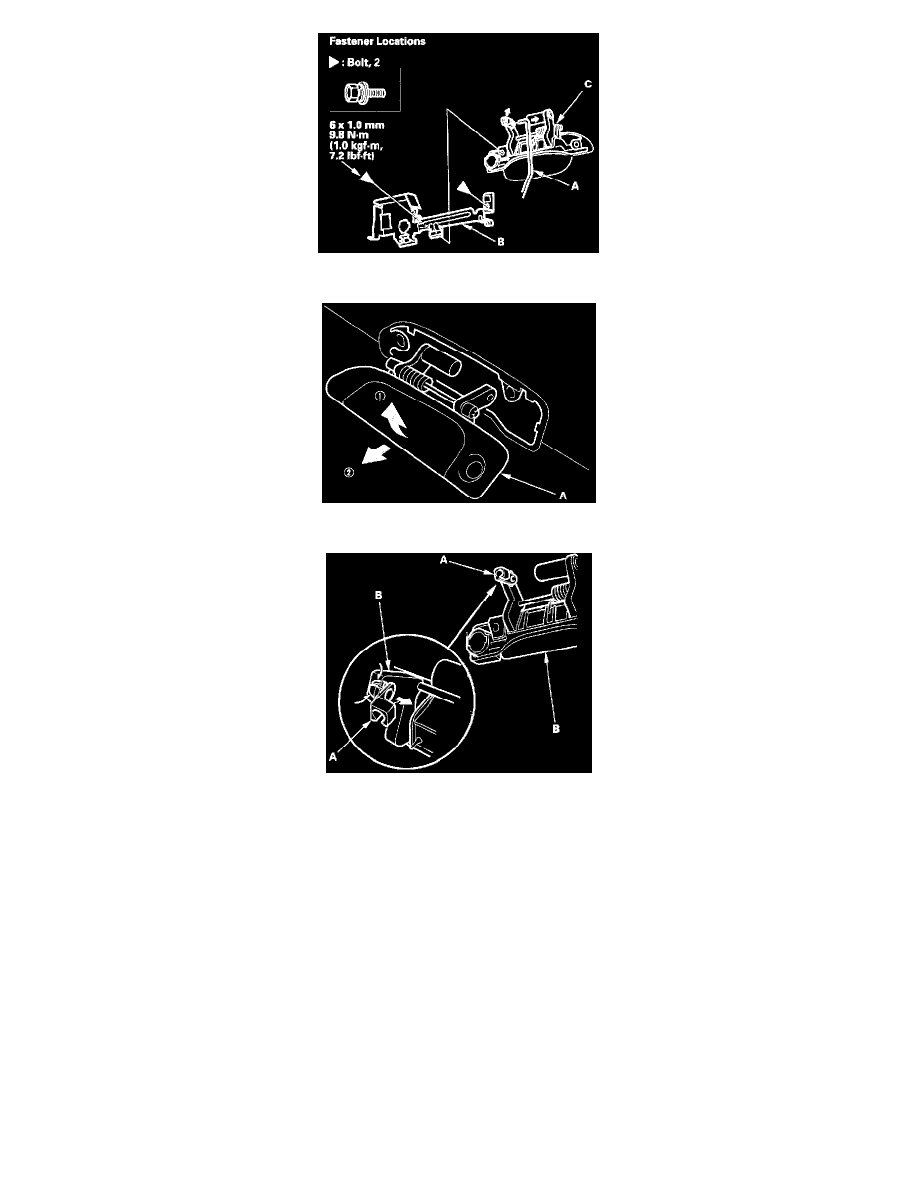
8. Disconnect the outer handle rod (A), and remove the bolts, then remove the outer handle protector (B) from the outer handle (C).
9. Pull out the outer handle (A) in the numbered sequence, and remove it.
10. Remove the rod fastener (A) from the outer handle (B), then replace it with a new one.
11. Install the handle in the reverse order of removal, and note these items:
-
Make sure the cylinder switch harness is routed properly.
-
Make sure the cylinder switch connector is plugged in properly, and each rod is connected securely.
-
Install the lock cylinder retaining clip on the handle, then install the took cylinder. Be sure the clip is fully seated in the slot on the lock
cylinder.
-
Make sure the door key cylinder/door locks operate properly.
-
Make sure the door handle works properly.
-
When installing the lock cylinder, leave the outer door handle bolts loose so the inner protector does not interfere with the lock cylinder, then
tighten the handle bolts.
-
When reinstalling the door panel, make sure the plastic cover is installed' properly and sealed around its outside perimeter to seal out water.