
Fit L4-1.5L (2008)
Trunk / Liftgate Latch: Service and Repair
Tailgate Latch Replacement
NOTE: Put on gloves to protect your hands.
Without Tailgate Lock Cylinder
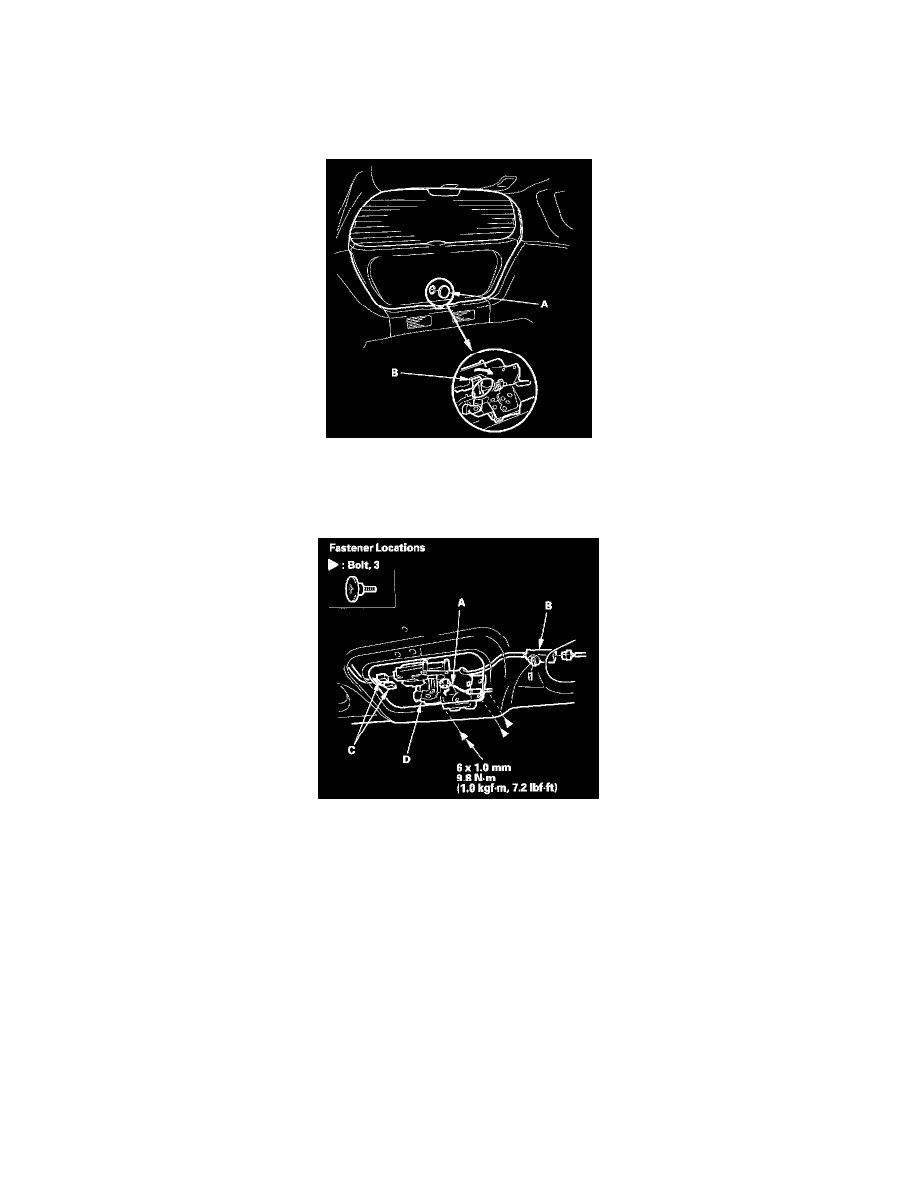
NOTE: If the tailgate latch can't be unlocked using the power door lock system, it can be unlocked manually. Remove the maintenance cap (A) from the
tailgate lower trim panel, then unlock the tailgate latch by turning the pivot of the lever (B) clockwise with a flat-tip screwdriver.
1. Remove the tailgate lower trim panel.
2. Disconnect the tailgate opener cable (A), tailgate latch switch connector (B), and tailgate actuator connectors (C), and detach the tailgate latch
switch connector from the tailgate. Take care not to kink the cable.
3. Remove the bolts, and pull the tailgate latch (D) out, then remove it.
4. Install the latch in the reverse order of removal, and note these items:
-
Make sure each connector is plugged in properly, and the opener cable is connected properly.
-
Make sure the opener cable actuates the latch before you close the tailgate.
-
Make sure the tailgate opens properly and locks securely.
With Tailgate Lock Cylinder
1. Remove the tailgate lower trim panel.