Fit L4-1.5L (2008)

Rocker Arm Assembly: Testing and Inspection
VTEC Rocker Arm Test
VTEC Rocker Arm Test
Special Tools Required
^
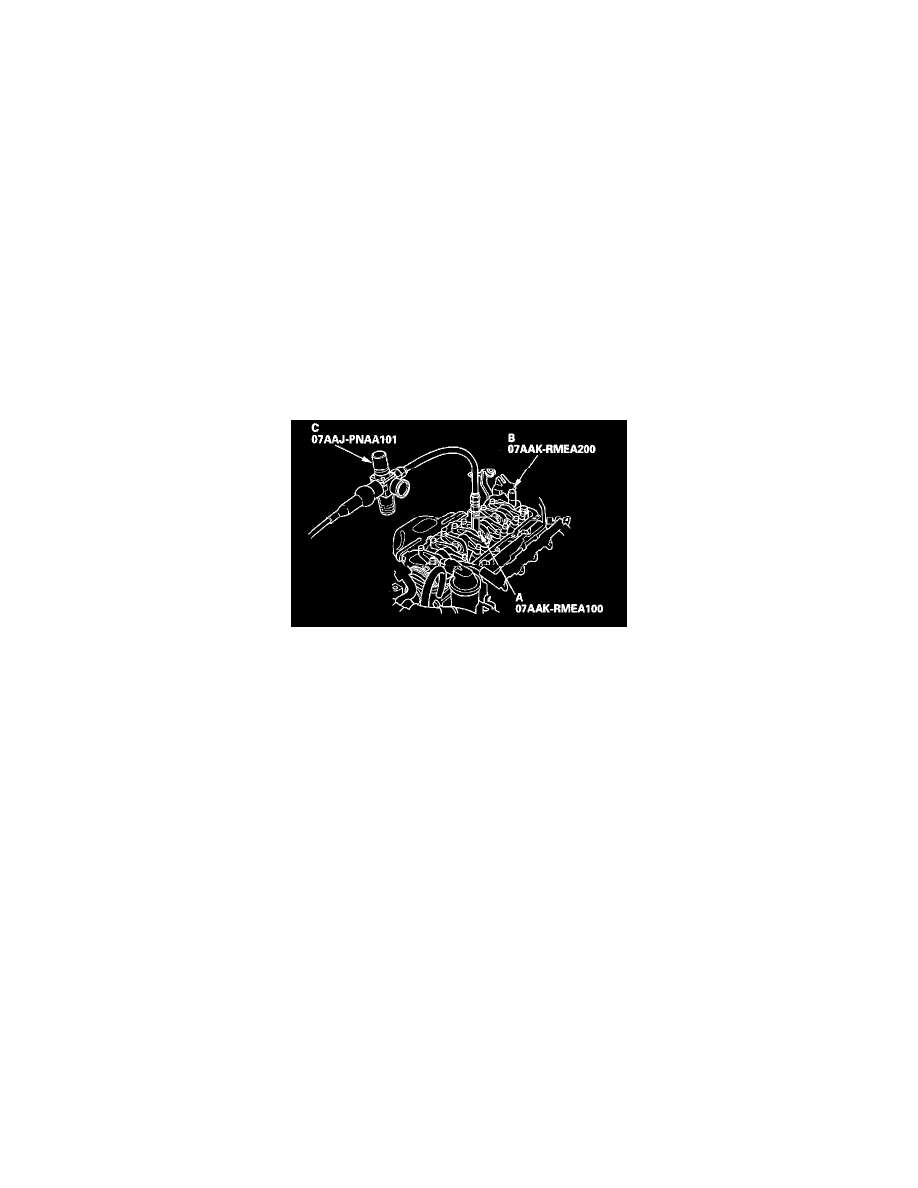
Air Pressure Regulator 07AAJ-PNAA101
^
VTEC air adapter 07AAK-RMEA100
^
VTEC air stopper 07AAK-RMEA200
1. Warm up the engine for 5 minutes.
2. Remove the cylinder head cover.
3. Rotate the crankshaft clockwise, and visually check that all the primary rocker arms and secondary rocker arms move freely.
^
If the primary rocker arm and secondary rocker arm move together, remove the primary and secondary rocker arms as an assembly, and check
that the pistons in the primary and secondary rocker arms move smoothly. If any rocker arm needs replacing, replace the primary and
secondary rocker arms as an assembly, then retest.
^
If all the primary rocker arms and secondary rocker arms move freely, go to step 4.
4. Check that the air pressure on the shop air compressor gauge indicates over 400 kPa (4 kgf/cm2, 57 psi).
5. Inspect the valve clearance.
6. Remove the No. 3 rocker shaft mounting bolt, then install the VTEC air adapter (A) with a washer (thickness about 1.5 mm (0.06 in.)).
7. Remove the No. 5 rocker shaft mounting bolt, then install VTEC air stopper (B).
8. Connect the air pressure regulator (C).
9. Loosen the valve on the regulator, and apply the specified air pressure.
Specified Air Pressure: 340 kPa (3.5 kgf/m2, 50 psi)
10. With the specified air pressure applied, rotate the crankshaft clockwise, and visually check that all the primary rocker arms and secondary rocker
arms move together.
If the primary rocker arm and secondary rocker arm move freely and independently of each other, remove the primary and secondary rocker arms
as an assembly, and check that the pistons in the primary and secondary rocker arms move smoothly. If any rocker arm needs replacing, replace
the primary and secondary rocker arms as an assembly, and test.
11. Remove the special tools.
12. Apply new engine oil to the threads and flange of the rocker shaft mounting bolts, then tighten the bolts to 29 Nm (3.0 kgf-m, 22 lbf-ft).
13. Install the cylinder head cover.
