
Fit L4-1.5L (2008)
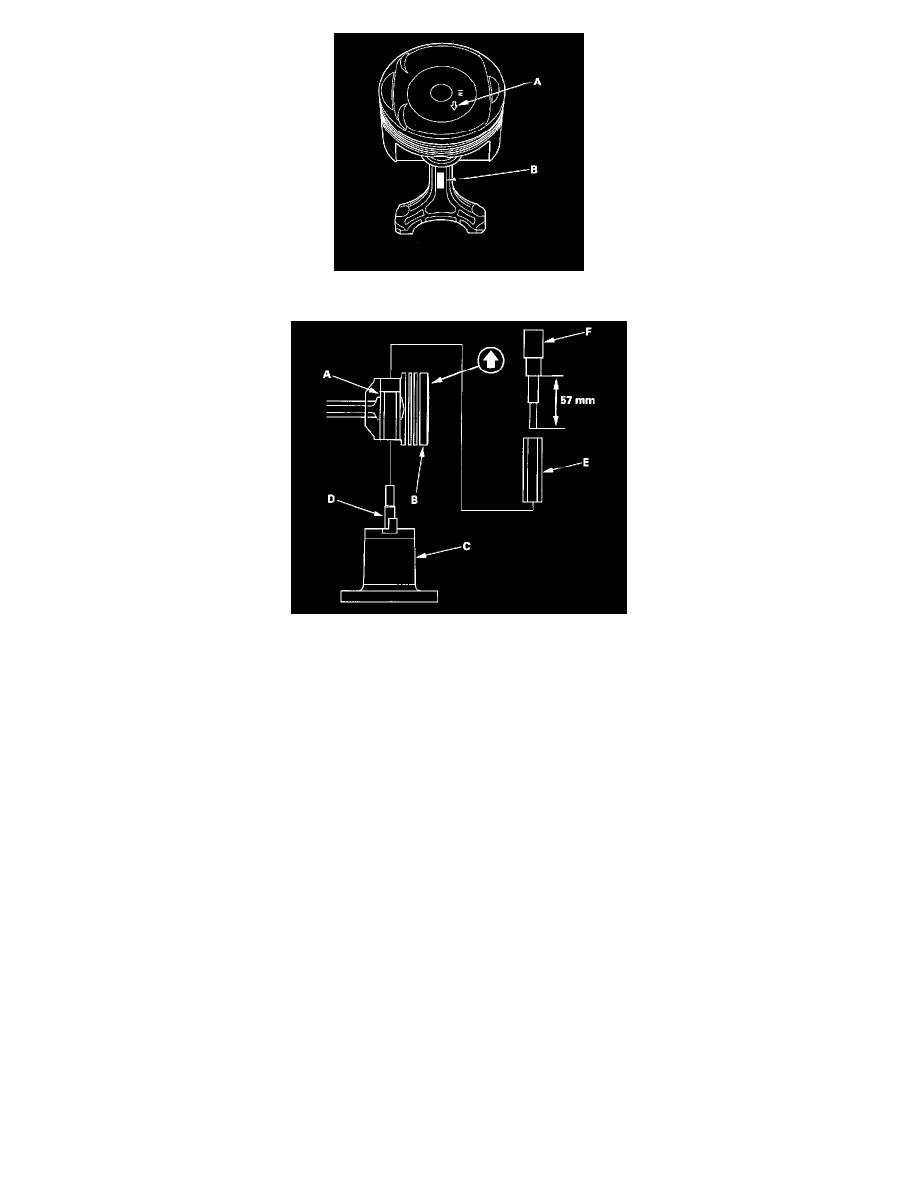
2. Insert the pilot collar (A) into the piston and the connecting rod.
3. With the arrow on top of the piston and the embossed mark on the connecting rod facing up, place the piston assembly (B) on the special tool (C).
Be sure you position the recessed flat area of the piston against the piston base head inserts (D) as shown.
4. Press the pin (E) in with the pin driver (F) and a hydraulic press.