
Fit L4-1.5L (2008)
Ignition Relay: Testing and Inspection
Ignition Coil Relay Circuit Troubleshooting
1. Check the No.33 (15 A) fuse in the subfuse box.
Is the fuse OK?
YES - Reinstall the fuse, then go to step 2.
NO - Replace the fuse. If the fuse continues to blow, locate and repair the short in the circuit between the subfuse box and the ignition coils.
2. Remove the ignition coil relay from the under-dash fuse/relay box, and test it.
Is the relay OK?
YES - Go to step 3.
NO - Replace the ignition coil relay.
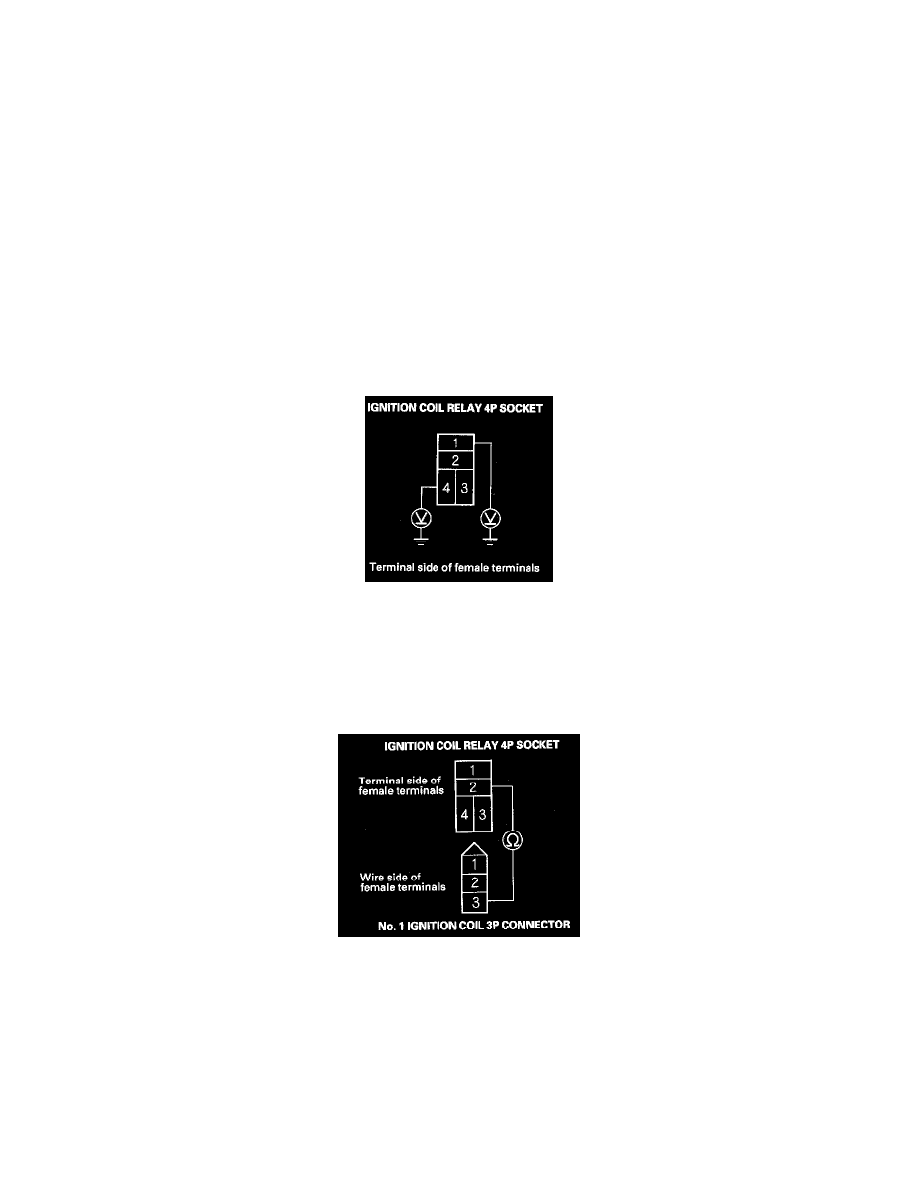
3. Measure the voltage between ignition coil relay 4P socket terminal No.1 and body ground, then terminal No.4 and body ground.
Is there battery voltage?
YES - Go to step 4.
NO - Replace the under-dash fuse/relay box.
4. Check for continuity between ignition coil relay 4P socket terminal No. 2 and the No. 1 ignition coil 3P connector terminal No. 3.
Is there continuity?
YES - Go to step 5.
NO - Repair open in the wire between ignition coil relay 4P socket terminal No. 2 and ignition coil 3P connector terminal No. 3.
5. Connect the Honda Diagnostic System (HDS) to the data link connector (DLC) (see step 2).
6. Turn the ignition switch ON (II).
7. Make sure the HDS communicates with the vehicle and the engine control module (ECMV powertrain control module (PCM). If it does not,
troubleshoot the DLC circuit
8. Jump the SCS line with the HDS, then turn the ignition switch OFF.