
Fit L4-1.5L (2008)
Steering Control Module: Service and Repair
EPS Control Unit Removal/Installation
1. Make sure you have the anti-theft code for the audio system.
2. Make sure the ignition switch is OFF, then disconnect the negative cable from the battery.
3. Remove the driver's dashboard undercover.
4. Remove the under-dash fuse/relay box).
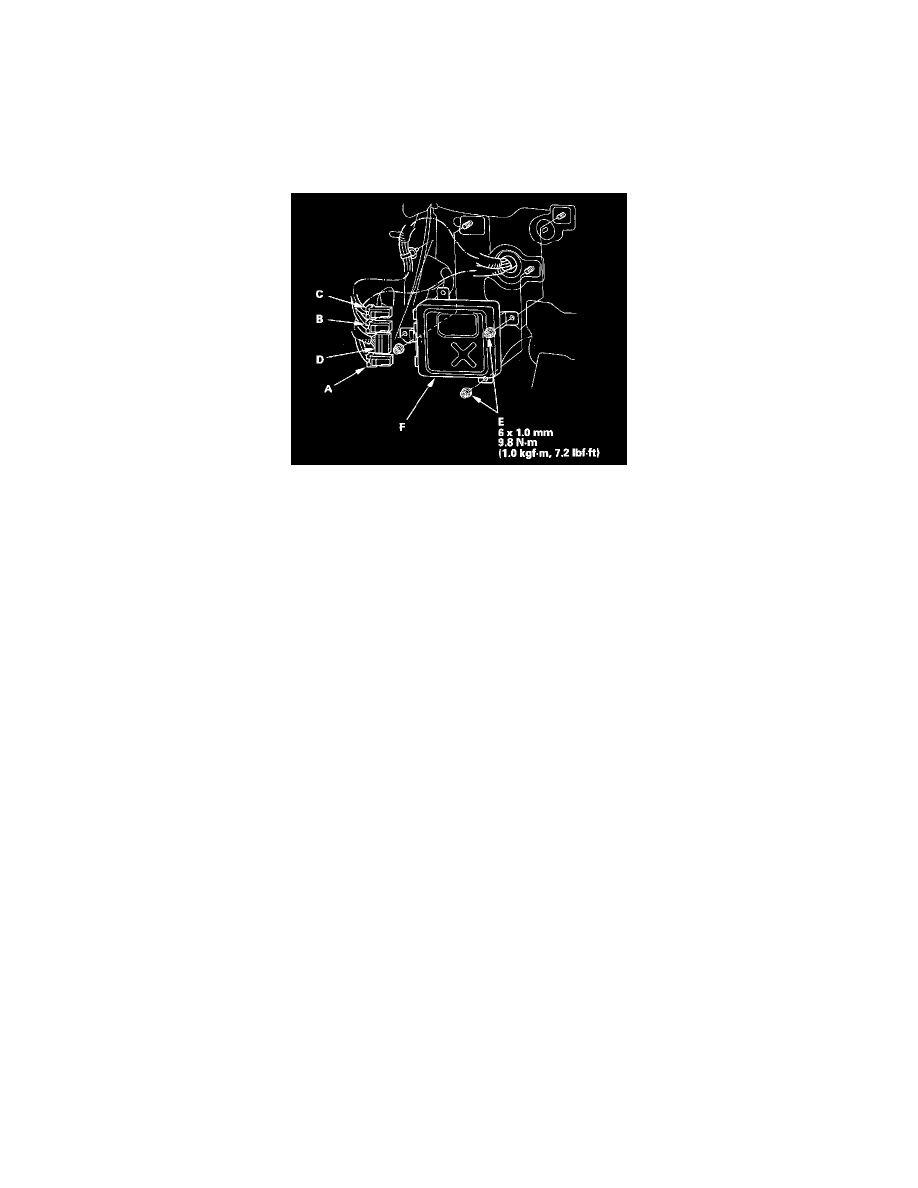
5. Disconnect EPS control unit connector A (2P), connector B (2P), connector C (2P), and connector D (28P).
6. Remove the nuts (E) from the EPS control unit (F).
7. Remove the EPS control unit.
8. Install the EPS control unit in the reverse order of removal.
NOTE: The EPS control unit has three 2P connectors; make sure they are correctly reconnected. The locations of the three 2P connectors are the
top: connector C (RED, WHT/RED wires), the middle: connector B (GRN wire), the lower: connector A (BLK, WHT/BLU wires).
9. Reconnect the negative cable to the battery, and do the following items:
^
Enter the anti-theft code for the audio system.
^
Set the clock.
^
If the EPS control unit is replaced, the EPS control unit must memorize the torque sensor neutral position.
10. After installation, start the engine, allow it to idle, and turn the steering wheel from lock-to-lock several times. Check that the EPS indicator does
not come on.