
Fit L4-1.5L (2008)
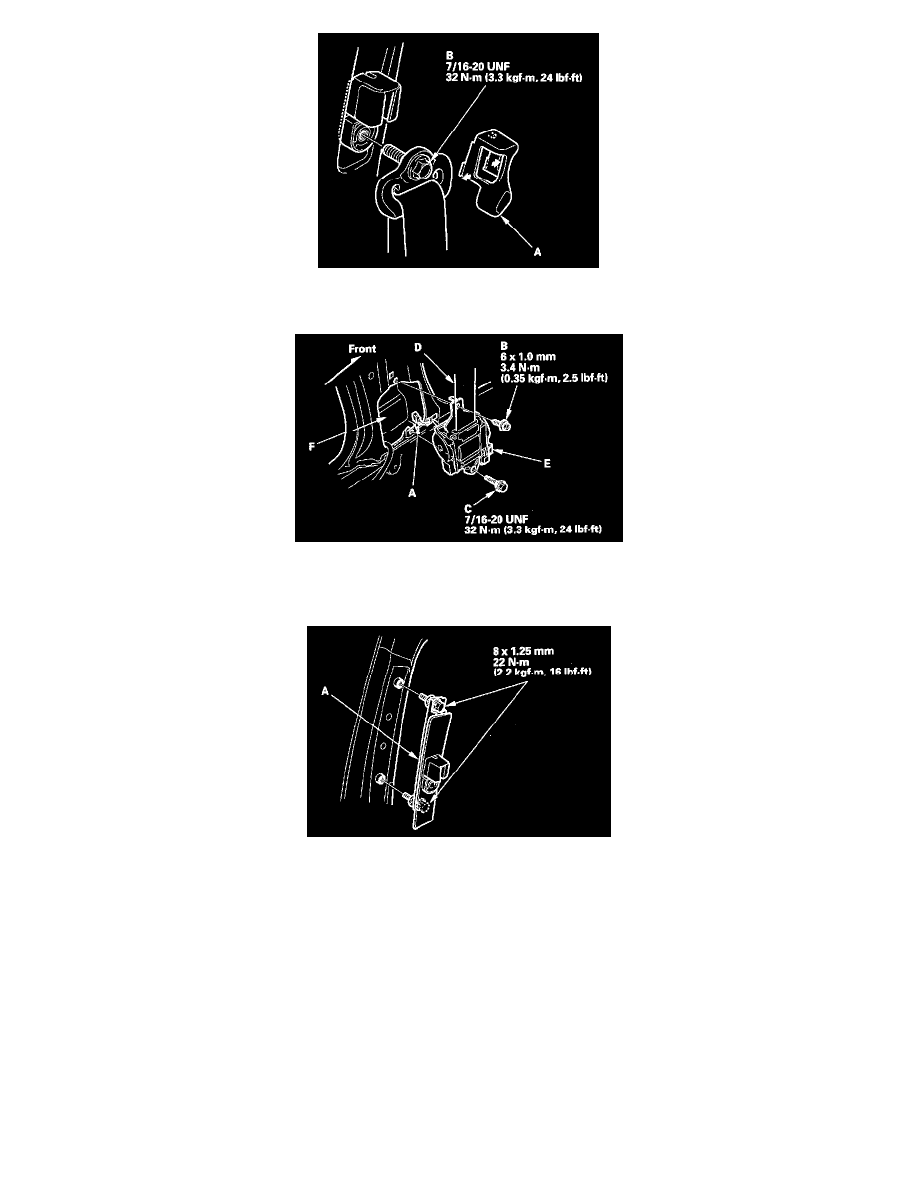
8. Disconnect the seat belt tensioner connector (A). Remove the upper retractor mounting self-tapping ET screw (B), and the lower retractor bolt (C),
then remove the front seat belt (D) and retractor (E).
9. If necessary, remove the left B-pillar lower seal (F).
10. Remove the left B-pillar upper trim.
11. Remove the shoulder anchor adjuster (A).
12. Install the seat belt in the reverse order of removal, and note these items:
-
Apply medium strength type liquid thread lock to the anchor bolts before reinstallation.
-
Tighten the bolts by hand first, then tighten to the specified torque.
-
Check that the retractor locking mechanism functions.
-
Assemble the washers, collars, and bushings on the upper and lower anchor bolts as shown.
-
If the threads on a retractor mounting self-tapping ET screw are worn out, use an oversized self-tapping ET screw, P/N 90133-SZ4-003, made
specifically for this application.
-
If the seat belt tensioner has been deployed, replace the B-pillar lower seal with a new one.
-
Before installing the anchor bolts, make sure there are no twists or kinks in the seat belt.
-
Make sure the seat belt tensioner connector and the lap belt tensioner connector are plugged in properly.
-
Reconnect the negative cable to the battery.
-
Enter the anti-theft codes for the audio system.
-
Set the clock.
-
Check for any DTCs that may have been set during repairs, and clear them.