
Fit L4-1.5L (2008)
^
If the measurement for the front camber is outside the specification, go to front camber adjustment.
^
If the measurement for the rear camber is outside the specification, check for bent or damaged suspension components.
Front Camber Adjustment
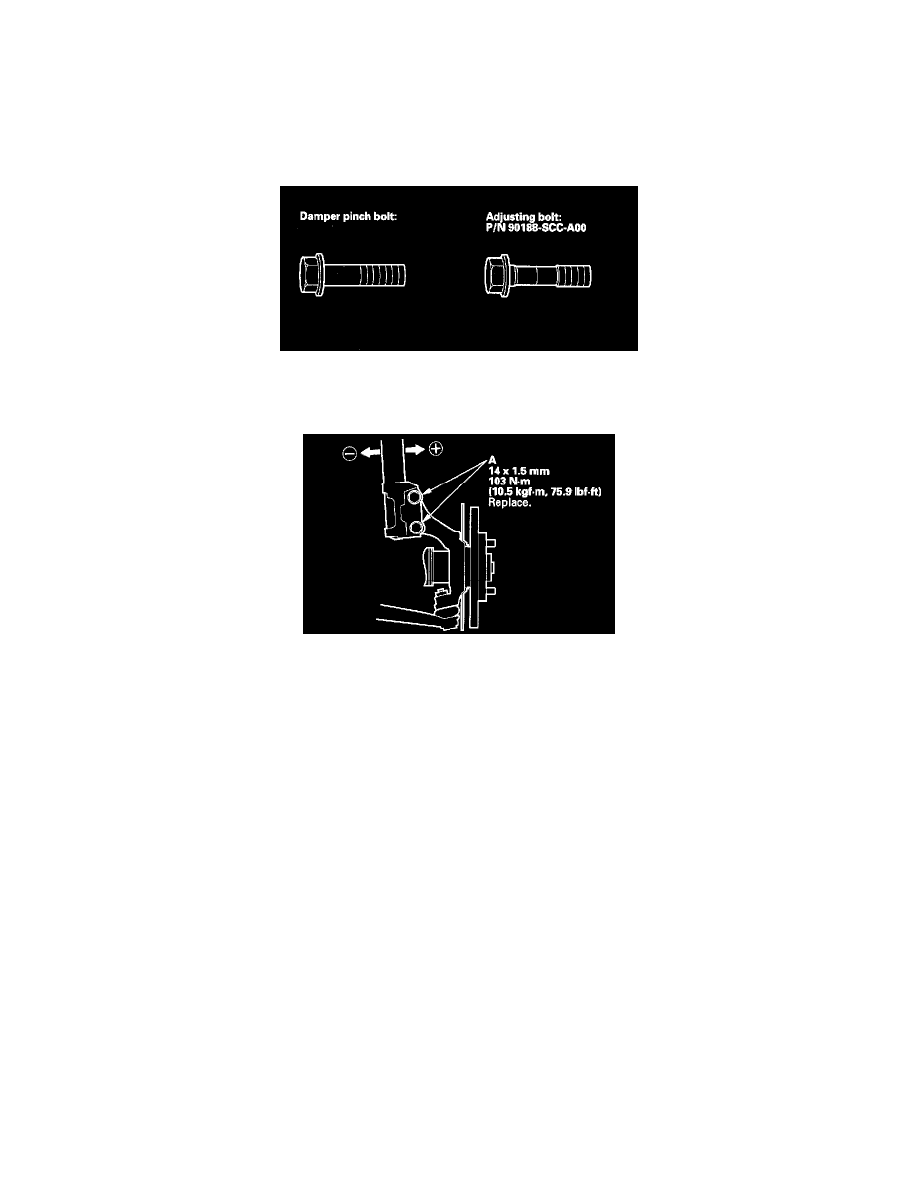
The front camber can be adjusted by exchanging one or both of the damper pinch bolts with a smaller diameter adjusting bolt. The difference between
the adjusting bolt diameter and the pinch bolt hole diameter allows for a small range of adjustment.
1. Raise the front of the vehicle, and support it with safety stands in the proper locations.
2. Remove the front wheels.
3. Loosen the flange bolts (A), and adjust the camber by moving the bottom of the damper within the range of the damper pinch bolt free play.
4. Tighten the flange nuts to the specified torque.
5. Reinstall the front wheels. Lower the front of the vehicle to the ground, and bounce the front of the vehicle up and down several times to settle the
suspension.
6. Measure the camber angle.
^
If the measurement is within specification, measure the toe-in.
^
If the measurement is not within specification, go to step 7.
7. Raise the front of the vehicle, and support it with safety stands in the proper locations.
8. Remove the front wheels.
9. Replace the damper pinch bolts with the adjusting bolts (A), and adjust the camber angle.
NOTE:
^
The camber angle can be adjusted up to ±20' (center of tolerance) by replacing one damper pinch bolt with the adjusting bolt.
^
The camber angle can be adjusted up to 40' by replacing both damper pinch bolts with the adjusting bolts.