
Fit L4-1.5L (2008)
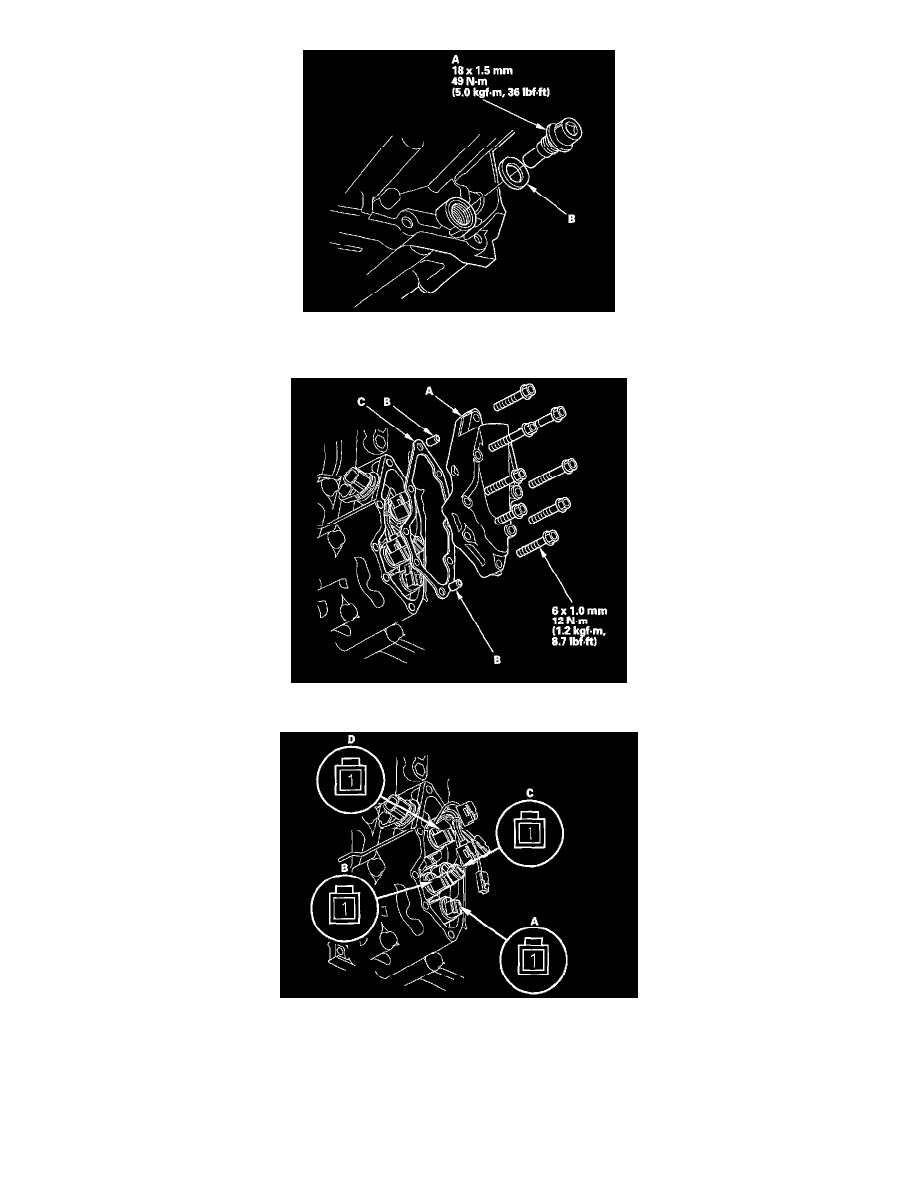
10. Reinstall the drain plug with a new sealing washer (B).
11. Remove the shift solenoid valve cover (A), dowel pins (B), and gasket (C).
12. Disconnect the connectors from shift solenoid valve A, shift solenoid valve B, shift solenoid valve C, and shift solenoid valve D.
13. Measure the resistance of each solenoid valve between the connector terminal and body ground.
Standard: 12 - 25 ohms
^
If the resistance is out of standard, go to step 16 and replace shift solenoid valve.
^
If the resistance is within the standard, go to step 14 and check solenoid valve for a clicking sound.
14. Connect a jumper wire from the positive battery terminal to each solenoid valve terminal individually.