
Fit L4-1.5L (2008)
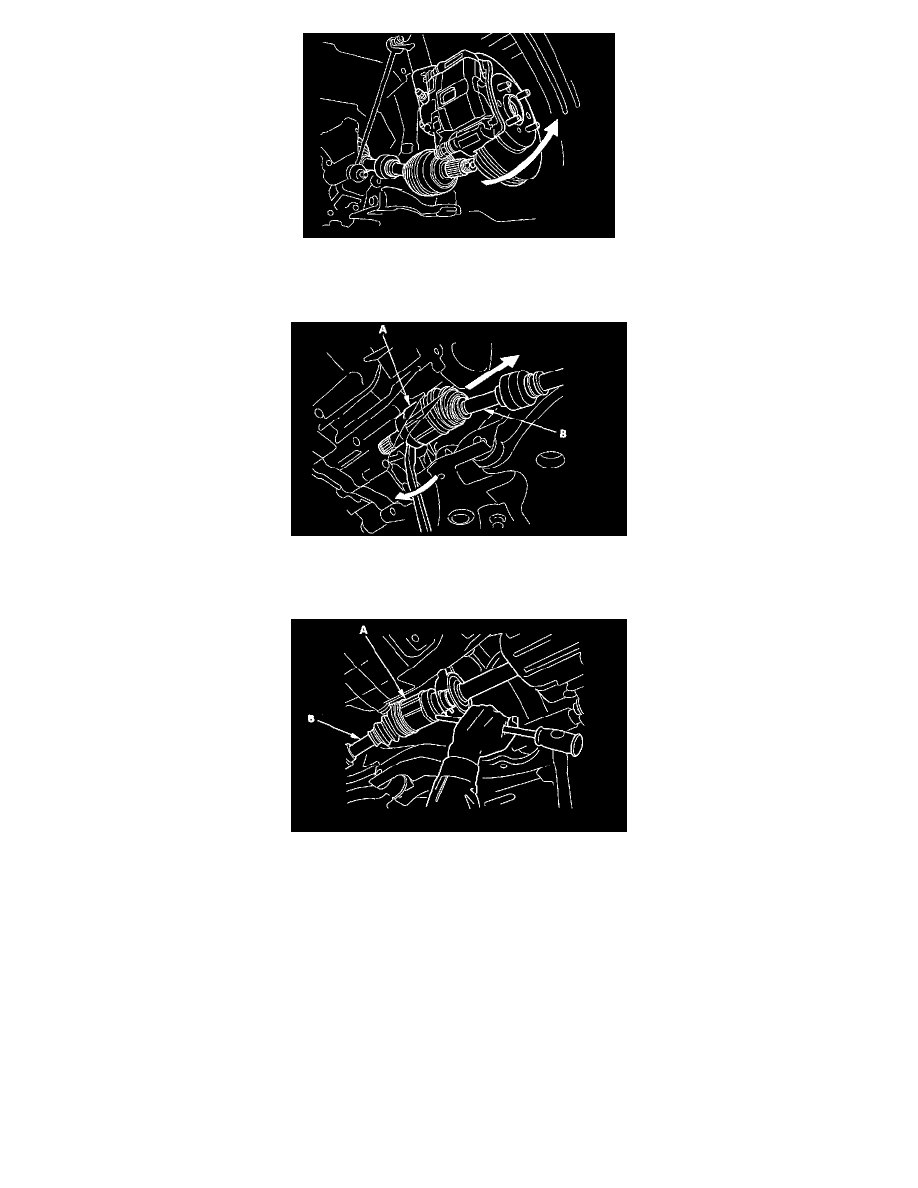
10. Left driveshaft: Pry the inboard joint (A) from the transmission housing with a prybar. Remove the driveshaft as an assembly.
NOTE: Do not pull by the driveshaft (B) or the inboard joint may come apart. Pull the driveshaft straight out to avoid damaging the oil seal.
11. Right driveshaft: Drive the inboard joint (A) off of the intermediate shaft using a drift and a hammer. Remove the driveshaft as an assembly.
NOTE: Do not pull by the driveshaft (B) or the inboard joint may come apart.
Driveshaft Installation
Driveshaft Installation
M/T Model
NOTE: Before starting installation, make sure the mating surfaces of the joint and the splined section are not dusty or dirty.
1. Apply about 5 g (0.18 oz) moly 60 paste (P/N 08734-0001) to the contact area of the outboard joint and the front wheel bearing.
NOTE: The paste helps to prevent noise and vibration.