
Fit L4-1.5L (2008)
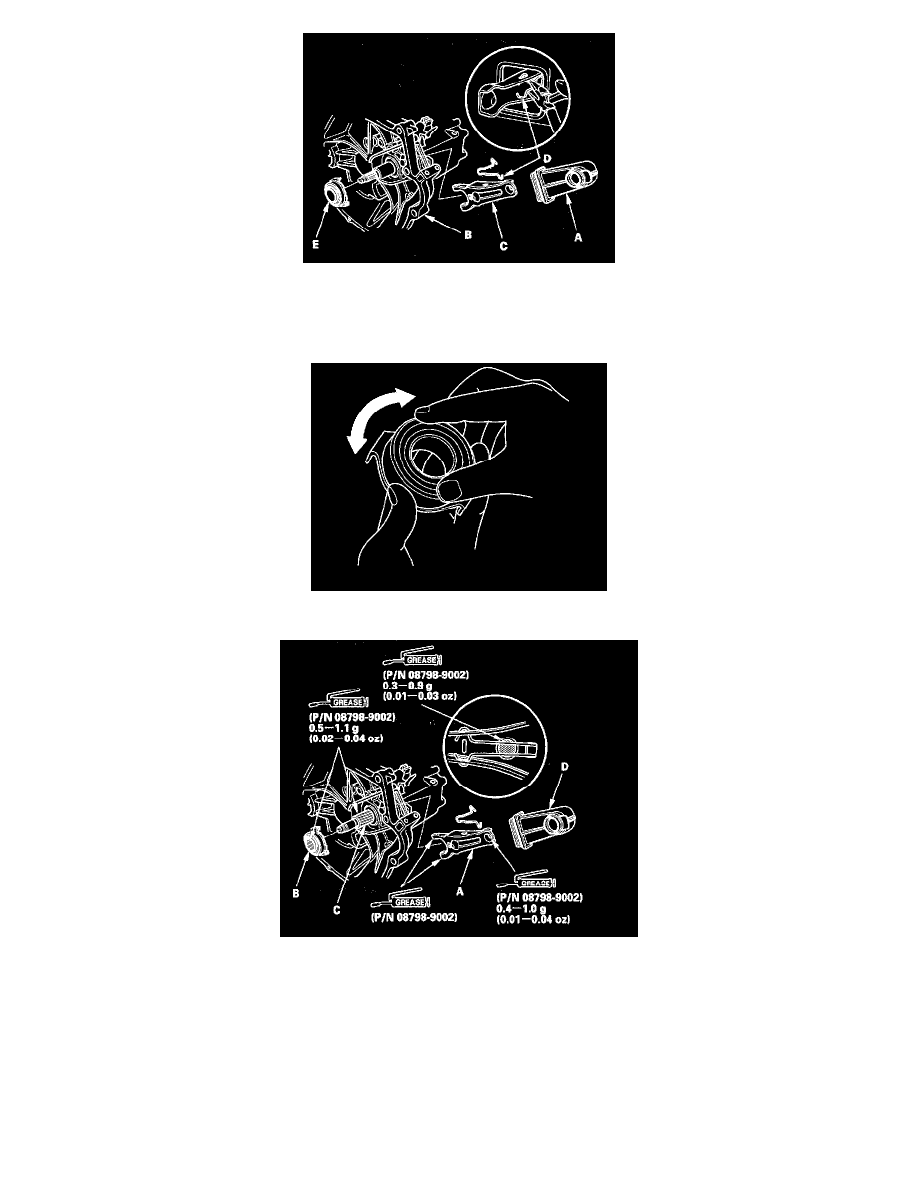
2. Remove the release fork (C) from the clutch housing by squeezing the release fork set spring (D) with pliers. Remove the release bearing (E).
3. Check the play of the release bearing by spinning it by your hand. If there is excessive play or noise, replace the release bearing with a new one.
NOTE: The release bearing is packed with grease. Do not wash it in solvent.
4. Apply super high temp urea grease (P/N 08798-9002) to the release fork (A), the release bearing (B), and release bearing guide (C).
5. With the release fork slid between the release bearing pawls; install the release bearing on the mainshaft while inserting the release fork through
the hole in the clutch housing.
6. Align the detent of the release fork with the release fork bolt, then press the release fork over the release fork bolt squarely.
7. Install the release fork boot (D). Make sure the boot seals around the release fork and clutch housing.
8. Move the release fork (A) right and left to make sure that it fits properly against the release bearing (B), and that the release bearing slides
smoothly.