
Odyssey L4-2.2L SOHC (1995)
Cruise Control Actuator: Testing and Inspection
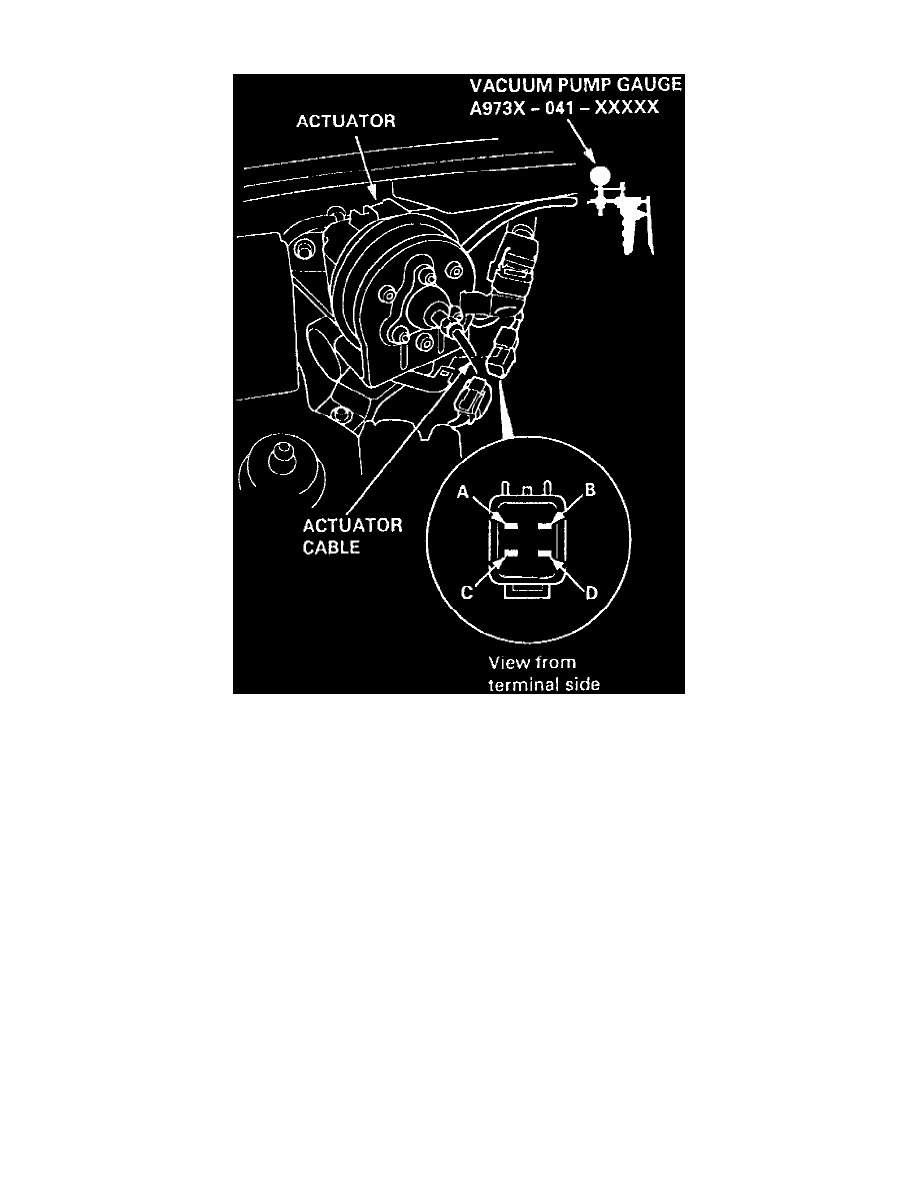
Fig. 11 Actuator Test Components
1. Disconnect actuator cable from actuator rod and 4-P connector.
2. Supply battery voltage to D terminal and ground A, B and C terminals, Fig. 11.
3. Connect a vacuum pump to check valve and apply vacuum to actuator.
4. Actuator rod should pull in completely. If rod pulls in only part way or not at all, check for leaking vacuum line or defective solenoid.
5. With voltage and vacuum still applied, try to pull actuator rod out by hand. Actuator rod should not move. If rod moves, it is defective and should
be replaced.
6. Disconnect ground from C terminal. Actuator rod should return. If actuator rod does not return and ventilator hose and filter are free, solenoid
valve assembly is defective.
7. Repeat test with battery ground wire disconnected from A terminal. Actuator rod should return. If actuator rod does not return and ventilator hose
and filter are free, solenoid valve assembly is defective.
8. If solenoid valve is replaced, use new O-rings at each solenoid.