
Odyssey EX V6-3.5L (1999)
^
Thru VIN2HKRL1...XH513409-Continue to step 13.
^
Above VIN2HKRL1...XH513409-Go to step 19.
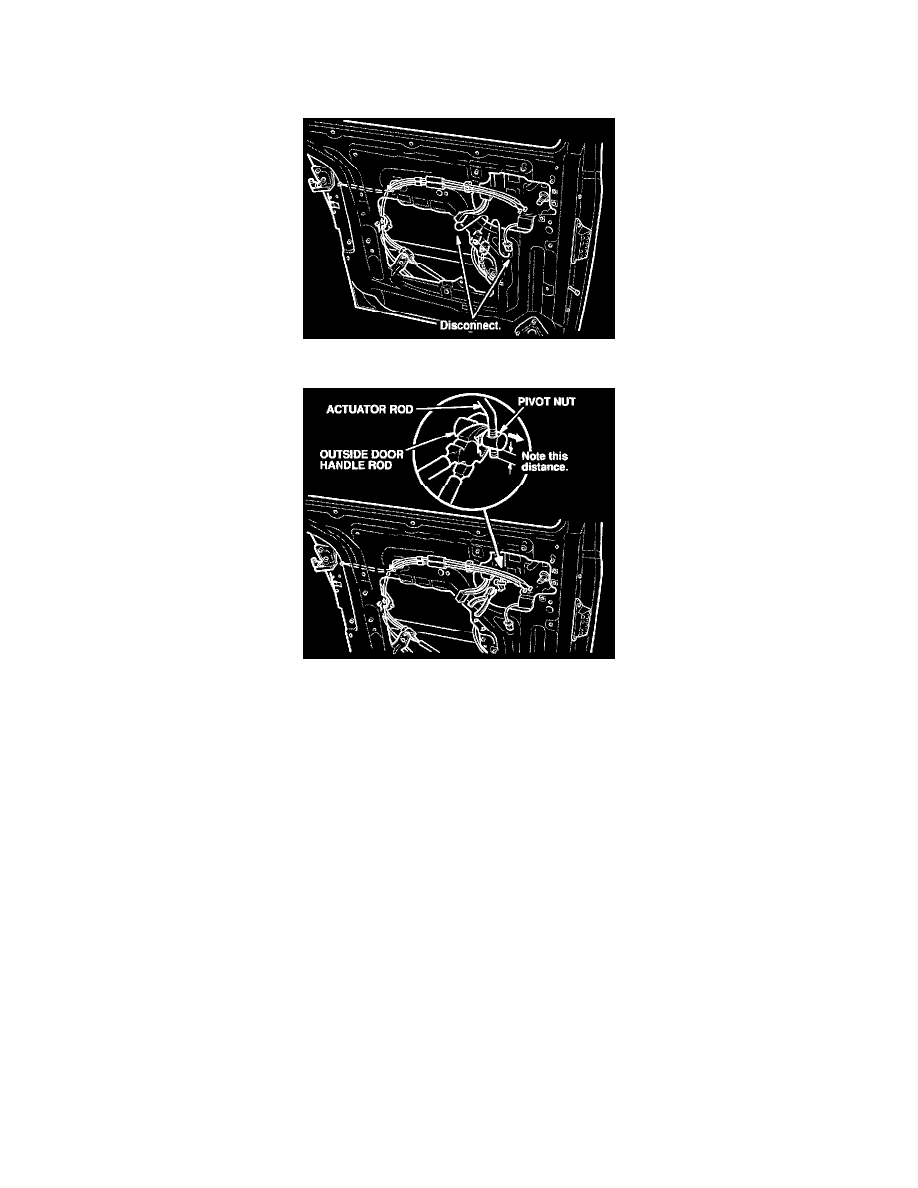
13.
Disconnect the door lock actuator 2P connector, and the release motor 4P connector from the door lock remote controller assembly.
14.
Note the distance that the actuator rod is screwed into the pivot nut. Then use a pair of diagonal cutters to remove the pivot nut from the door
handle rod. Gently squeeze the cutters, do not force the handle rod.
NOTICE
Do not stress or cut into the door handle rod. If you crack the plastic rod, you will have to replace the complete outer door handle assembly This
cannot be claimed as part of the campaign.
9.
Connect the lower roller lever cable to the new door latch assembly.
10.
Install the new door latch assembly in the door.
11.
Route the cables.
12.
Reconnect the 6P latch connector and the lower roller lever cable.
^
Thru VIN2HKRL1...XH513409-Continue to step 13.
^
Above VIN2HKRL1...XH513409-Go to step 19.
13.
Disconnect the door lock actuator 2P connector, and the release motor 4P connector from the door lock remote controller assembly.
14.
Note the distance that the actuator rod is screwed into the pivot nut. Then use a pair of diagonal cutters to remove the pivot nut from the door
handle rod. Gently squeeze the cutters, do not force the handle rod.
NOTICE
Do not stress or cut into the door handle rod. If you crack the plastic rod, you will have to replace the complete outer door handle assembly This
cannot be claimed as part of the campaign.