
Odyssey EX V6-3.5L (1999)
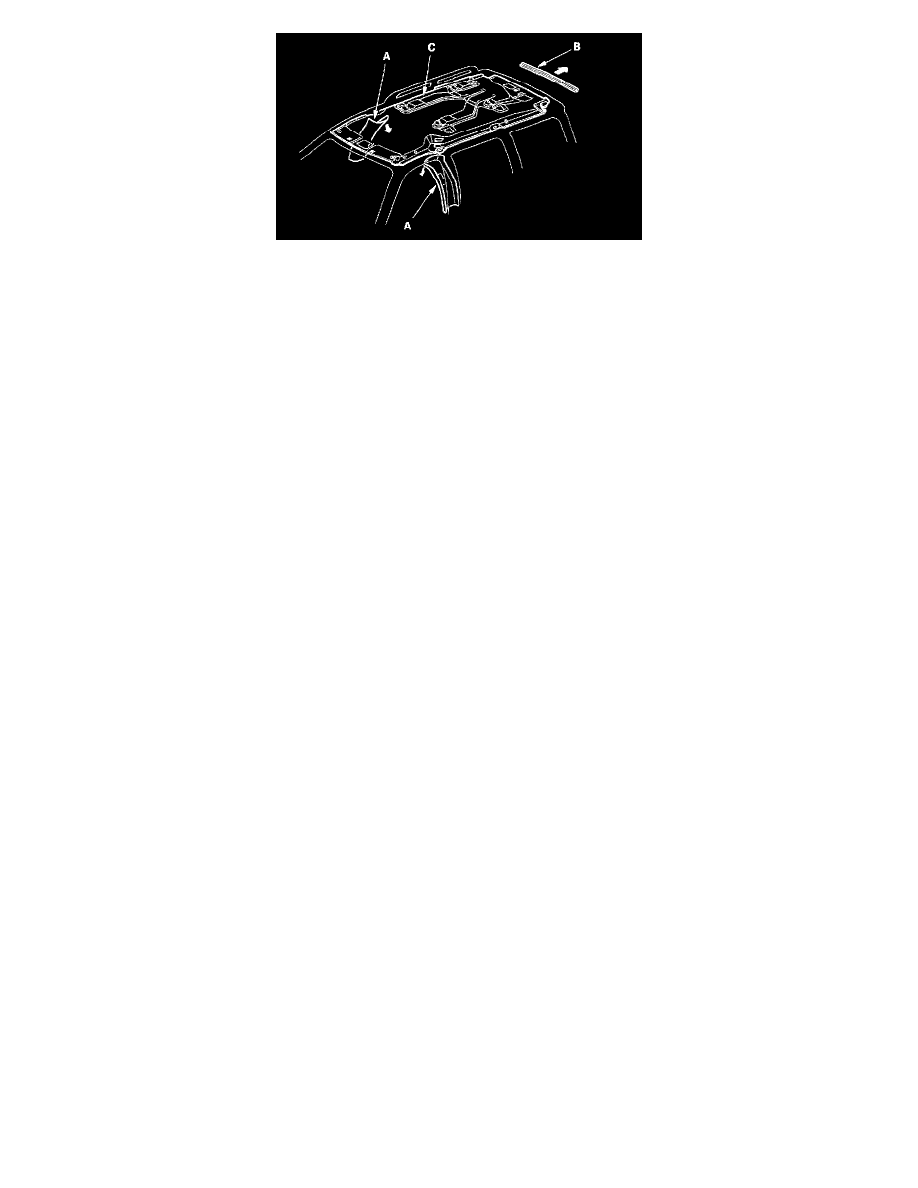
14. Remove the headliner:
1. Remove the upper portion of the center pillar trim (A) from each side.
2. Remove the rear roof trim (B).
3. Remove the headliner (C) through the tailgate opening.
15. Install the headliner in the reverse order of removal, and note these items:
-
When reinstalling the headliner through the tailgate opening, be careful not to fold or bend it. Also, be careful not to scratch the body.
-
If the threads on a visor, grab handle, or headliner (rear A/C passenger control panel opening) mounting ET screws are worn out, use an
oversized ET screw made specifically for this application.
Visor or grab handle mounting ET screw:
P/N 90137-S30-0030
Headliner mounting ET screw:
P/N 90133-SZ4-0030
-
Check that both sides of the headliner are securely attached to the trim.