
Odyssey EX V6-3.5L (1999)
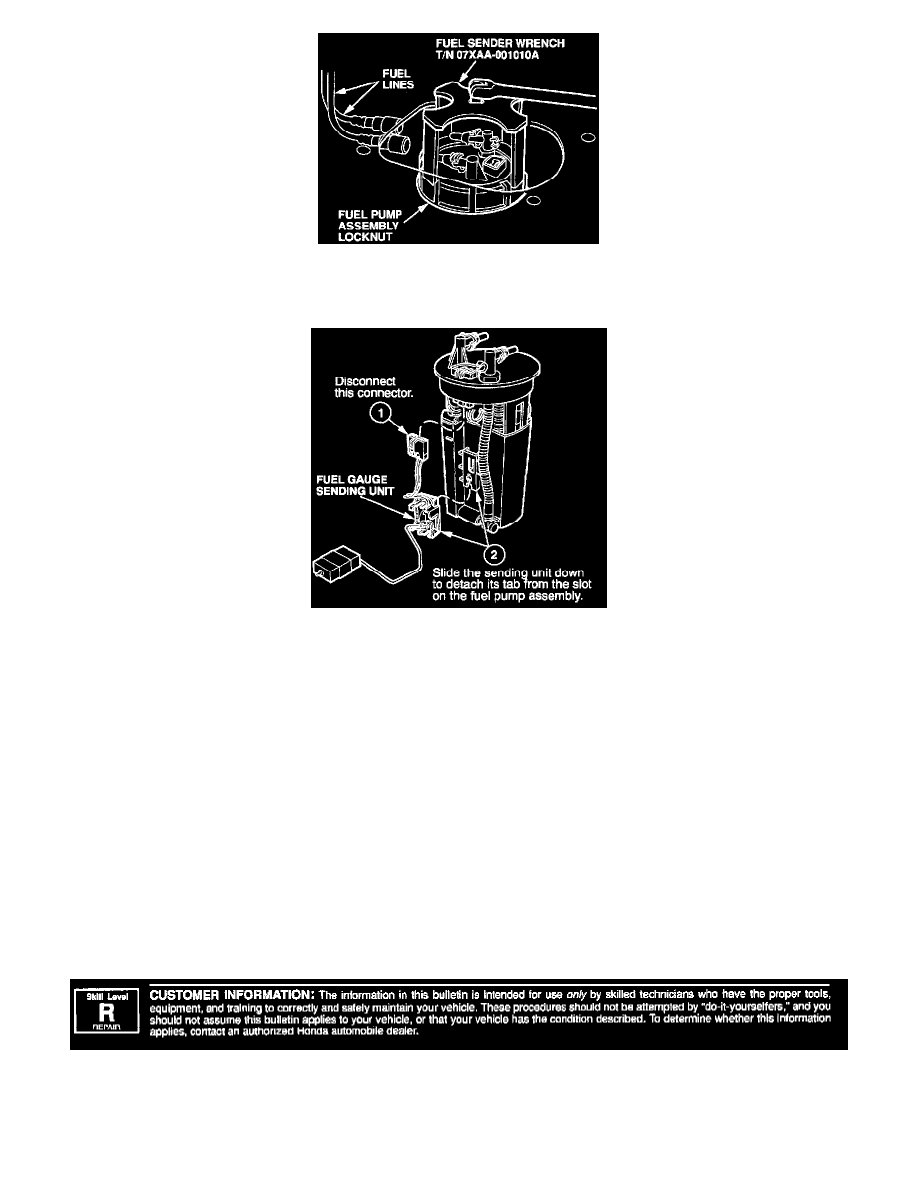
8.
Remove the fuel pump assembly locknut with the special tool, then lift the fuel pump assembly out of the fuel tank.
9.
** Discard the base gasket between the fuel pump assembly and the fuel tank. **
10.
Remove the fuel gauge sending unit from the fuel pump assembly.
11.
Install the new fuel gauge sending unit.
12.
** Place a new base gasket around the opening in the tank, then carefully insert the fuel pump assembly into the opening.
13.
Install the locknut over the fuel pump assembly, then use the special tool to torque the locknut to 93 N.m (69 ft-lb).
14.
Remove and discard the two fuel line retainers from the top of the fuel pump assembly.
15.
Insert new fuel line retainers into the connector side of the quick disconnect fittings, then connect the fuel lines to the fuel pump assembly (see
pages 11-218 and 11-219 of the service manual).
16.
Connect the 5P connector to the fuel pump assembly.
17.
Turn the ignition switch to ON (II), and make sure there are no leaks at the fuel lines and the base gasket.
18.
Turn the ignition switch off, then install the access panel, the carpet, and the seats. **
19.
Install the fuel fill cap, and tighten it until it clicks at least three times.
DISCLAIMER