
Odyssey EX V6-3.5L (1999)
4.
From the TEST MODE MENU-IMM screen, select
3: REPLACE BY 1 KEY.
5.
Follow the screen prompts on the PGM Tester. (All immobilizer key transponder codes are automatically downloaded from the original PCM to
the PGM Tester.) During this download process, make sure the ignition switch stays ON (II) and the PGM Tester stays connected.
6.
When the downloading is complete, turn the ignition switch to LOCK (0).
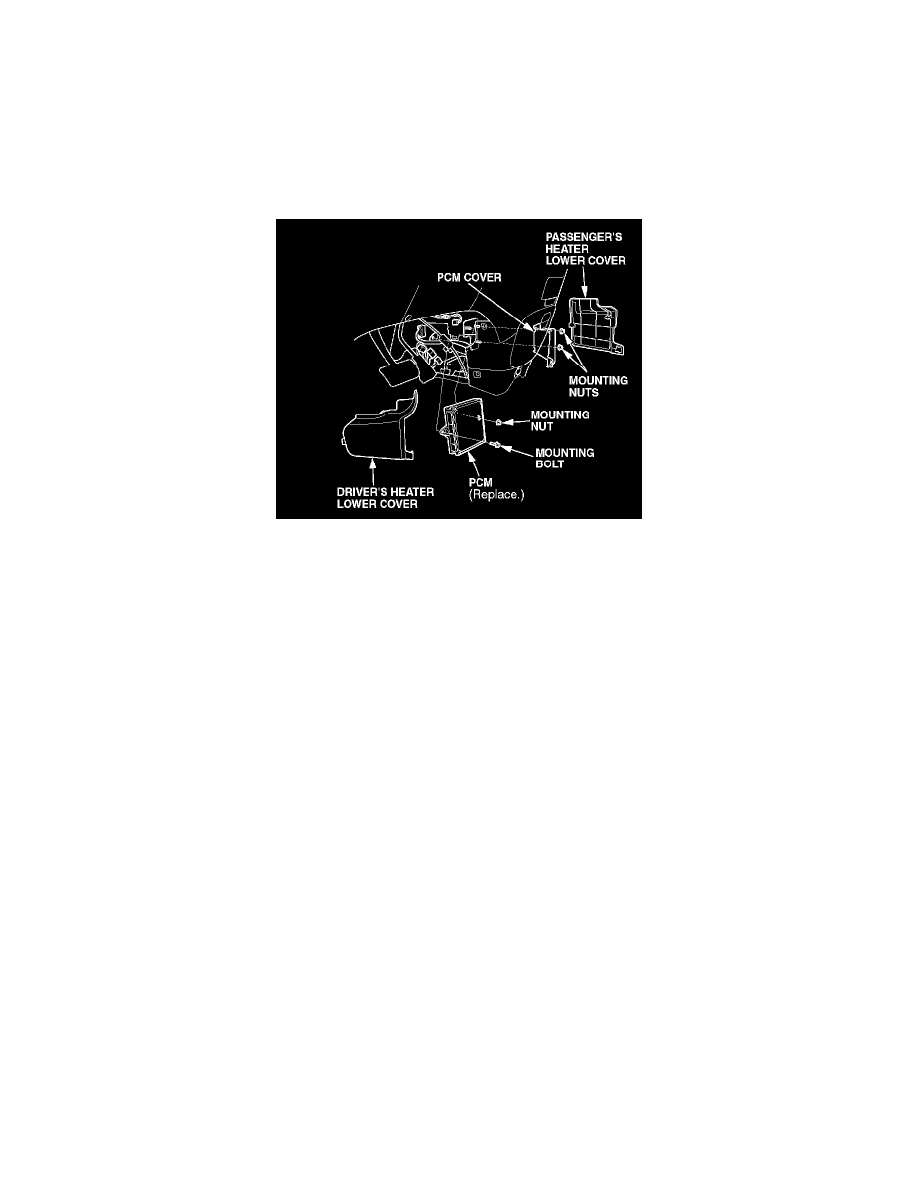
Replacing the PCM
1.
Pull back the carpet. Remove the driver's and passenger's heater lower covers to access the PCM.
2.
Remove the PCM cover (two nuts).
3.
Remove the PCM mounting nut and bolt.
4.
Unplug the harness connectors from the PCM, and remove the PCM.
5.
Plug the harness connectors into the new PCM.
6.
Install the new PCM. Torque the mounting nut and bolt to 12 N~m (8.7 lb-ft).
7.
Reinstall the PCM cover.
8.
Reinstall the driver's and passenger's heater lower covers.
Uploading to the New PCM/Verifying the Repair
1.
Turn the ignition switch to ON (II). Keep following the screen prompts on the PGM Tester. (All the transponder codes are automatically uploaded
to the new PCM.)
2.
When the uploading is complete, turn the ignition switch to LOCK (0), and disconnect the PGM Tester.
3.
Start the engine to make sure the new PCM has been properly rewritten.