Odyssey EX V6-3.5L (1999)

5.
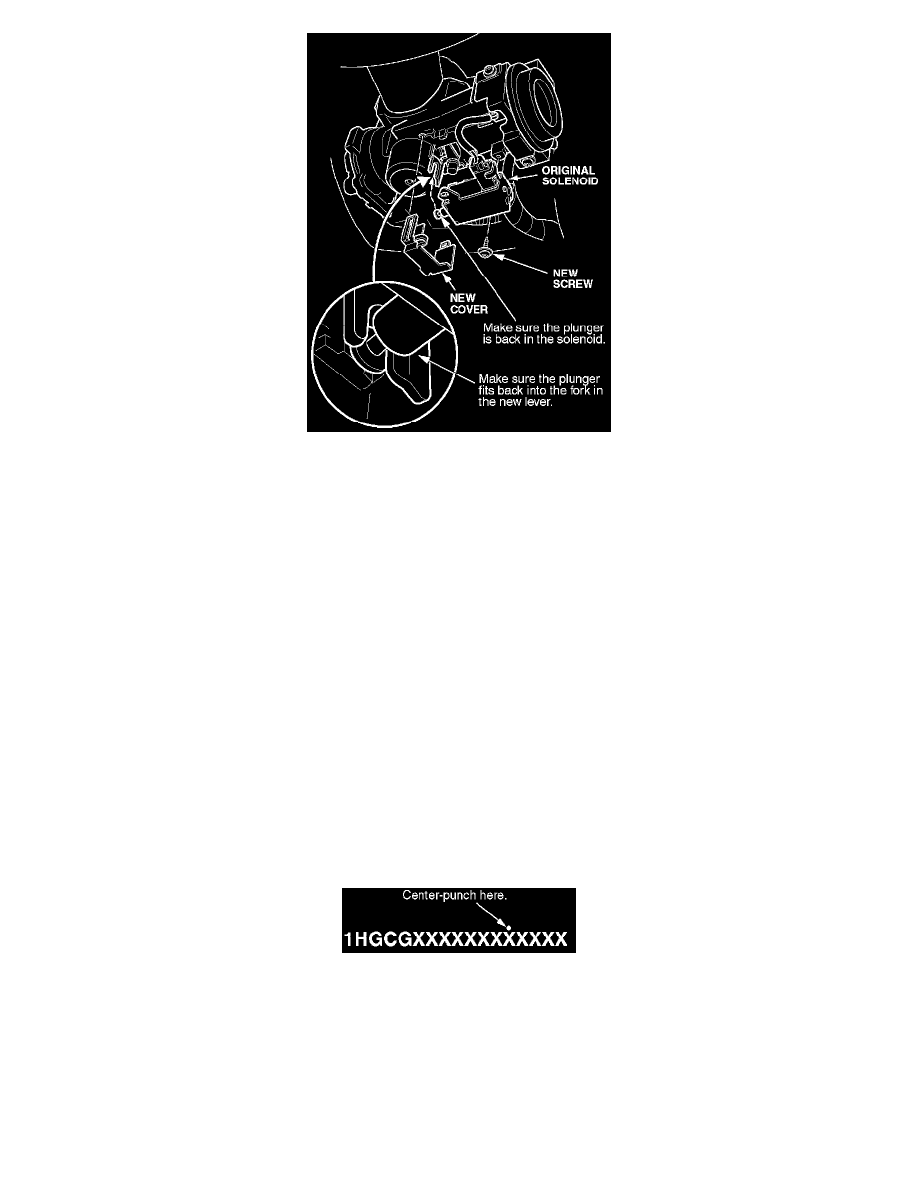
Insert the plunger into the interlock solenoid, then install the solenoid using a new screw. Make sure the groove of the solenoid plunger is in the
fork on the lever.
6.
Install the new plastic solenoid cover on the interlock solenoid.
7.
Set the parking brake, then turn the ignition switch to the ON (II) position.
8.
With the brake pedal pressed, shift the transmission to Neutral.
9.
Try to turn the ignition switch from the ON (II) position to the LOCK (0) position five times.
^
If you cannot turn the ignition switch to the LOCK (0) position, your repair was successful; go to step 12.
^
If you can turn the ignition switch to the LOCK (0) position, go to step 10.
10.
Remove the solenoid cover, and make sure the groove of the solenoid plunger is installed in the fork on the lever.
^
If needed, correct the position of the solenoid plunger, then go to step 11.
^
If the solenoid plunger is correctly installed, there is an electrical problem with the interlock system; refer to the Automatic Transmission
section of the appropriate service manual for troubleshooting information. Once the interlock is working normally, go to step 11.
11.
Install the solenoid cover.
12.
Install the steering column covers.
13.
Center-punch a completion mark above the 13th character of the engine compartment VIN.
REPAIR PROCEDURE B
1.
Remove the gauge block.
2.
Make sure you have the anti-theft code for the radio, then write down the radio station presets, and remove the key from the ignition switch.
3.
Disconnect the negative cable from the battery.
