
Odyssey EX V6-3.5L (1999)
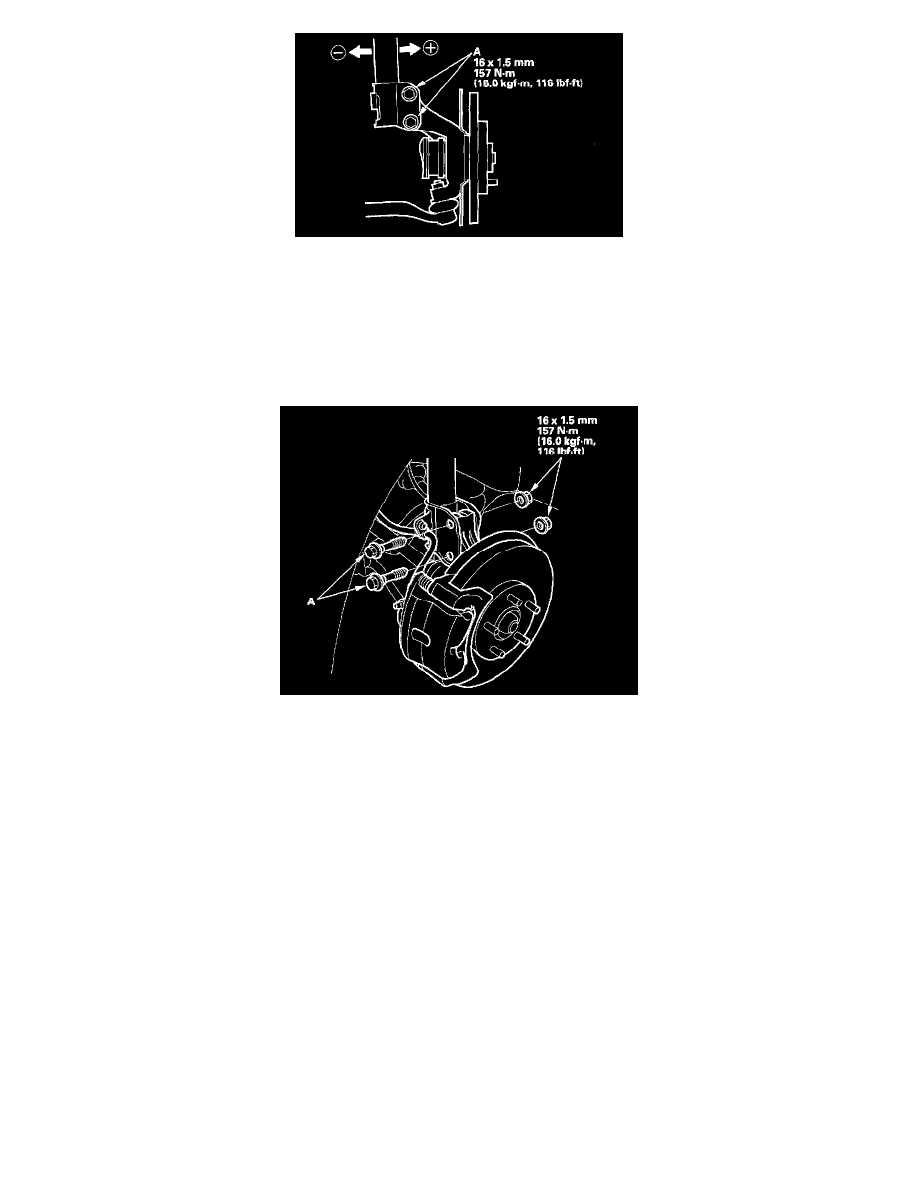
4. Loosen the flange nuts (A), and adjust the camber by moving the bottom of the damper within the range of the damper pinch bolt free play.
Tighten the flange nuts to the specified torque.
5. Reinstall the front wheels. Lower the front of the vehicle to the ground, and bounce the front of the vehicle several times to stabilize the
suspension.
6. Measure the camber angle.
-
If the measurement is within specification, measure the toe-in.
-
If the measurement is not within specification, go to step 7.
7. Raise the front of the vehicle, and make sure it is securely supported. Remove the front wheels.
8. Replace the damper pinch bolts with the adjusting bolts (A), and adjust the camber angle.
NOTE: The camber angle can be adjusted up to ± 30' (center of tolerance) by replacing one damper pinch bolt with the adjusting bolt. The
camber angle can be adjusted up to 1°00' by replacing both damper pinch bolts with the adjusting bolts.
9. Tighten the flange nuts to the specified torque.
10. Install the front wheels, and torque the wheel nuts to 108 Nm (80 ft. lbs.).
11. Lower the vehicle to the ground, and bounce the front of the vehicle several times to stabilize the suspension.
12. Measure the camber angle. If the camber angle is not within specification, repeat steps 8 though 12 to readjust the camber angle. If the camber
measurement is correct, measure toe-in, and adjust it if necessary.
Front Toe Inspection/Adjustment
Use commercially-available computerized four wheel alignment equipment to measure wheel alignment (caster, camber, toe, and/or turning angle).
Follow the equipment manufacturer's instructions.
1. Check the tire pressure.
2. Center the steering wheel spokes.
3. Check the toe with the wheels pointed straight ahead.
Front toe: 0 ± 2 mm (0 ± 0.08 inch)
-
If adjustment is required, go on to step 4.
-
If no adjustment is required, remove the alignment equipment.