
Odyssey EX V6-3.5L (1999)
1. Remove the damper.
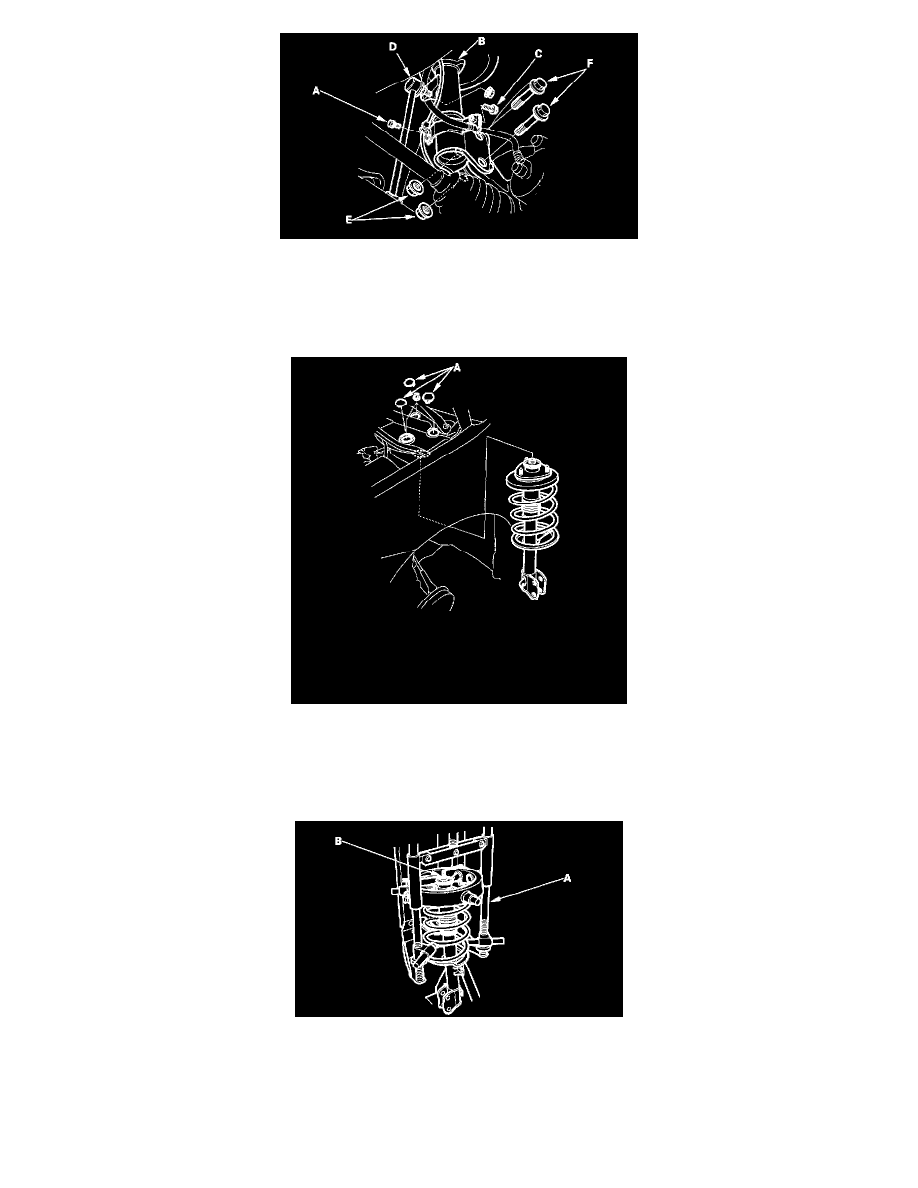
-1 Remove the wheel sensor wire (A) from the damper (B). Do not disconnect the wheel sensor.
-2 Remove the brake hose bracket (C) from the damper.
-3 Separate the stabilizer link (D) from the damper.
-4 Remove the flange nuts (E) and damper pinch bolts (F) from the damper.
2. Remove the service caps (A), and remove the damper by removing the three flange nuts.
NOTE: Damper springs are different, left and right. Mark the springs L and R before you continue.
Disassembly/Inspection
1. Compress the damper spring with a commercially available strut spring compressor (A) according to the manufacturer's instructions, then remove
the self-locking nut (B). Do not compress the spring more than necessary to remove the nut.
2. Release the pressure from the strut spring compressor, then disassemble the damper as shown in the Exploded View.
3. Reassemble all parts, except for the spring.
4. Compress the damper assembly by hand, and check for smooth operation through a full stroke, both compression and extension. The damper
should move smoothly. If it does not (no compression or no extension), the gas is leaking, and the damper should be replaced.