
Odyssey EX V6-3.5L (1999)
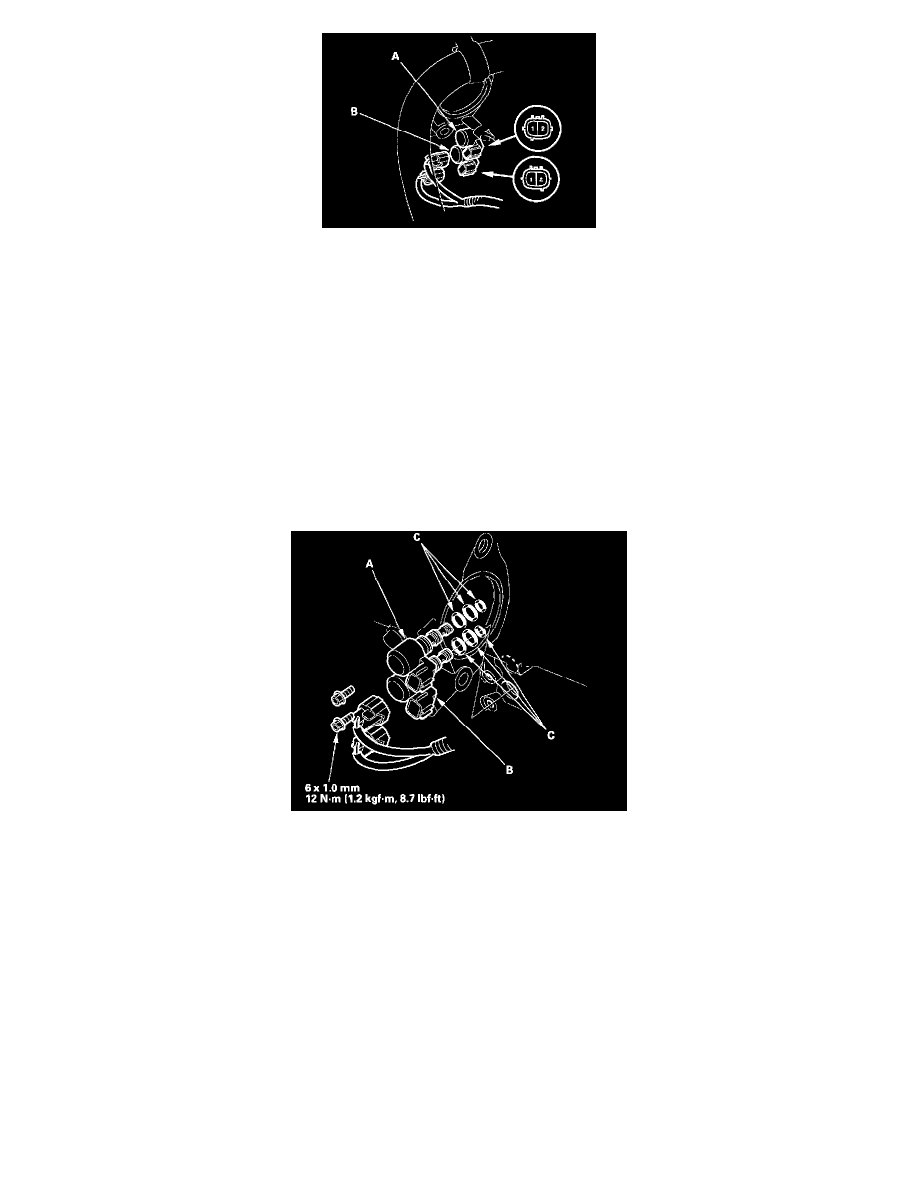
2. Disconnect the shift control solenoid valve B (A) or C (B) connector.
3. Measure the resistance between the No. 1 and No. 2 terminals of the shift control solenoid valve B or C.
STANDARD: 12 - 25 ohms
4. Replace the shift control solenoid valve B or C if the resistance is out of standard.
5. If the resistance is within the standard, connect the No. 2 terminal of the shift control solenoid valve B or C connector to the battery positive
terminal, and connect the No. 1 terminal to the battery negative terminal. A clicking sound should be heard. Replace the shift control solenoid
valve B or C if no clicking sound is heard.
Shift Control Solenoid Valves B/C Replacement
NOTE: If the shift control solenoid valve B and C are replaced or removed at the same time, be sure to reinstall them correctly. The connector color
of shift control solenoid valve B is black, and the connector color of shift control solenoid valve C is brown.
1. Remove the starter.
NOTE: If you are only replacing shift control solenoid valve C, starter removal is not needed.
2. Remove the mounting bolt and the shift control solenoid valve B.
3. Remove the mounting bolt and the shift control solenoid valve C.
4. Install a new shift control solenoid valve B (A) or C (B) with new O-rings (C). While installing the valves, do not allow dust or other foreign
particles to enter the transmission.
5. Check the connector for rust, dirt or oil, then reconnect it.
6. Install the starter, if removed.
A/T Clutch Pressure Control Solenoid Valve A/B Assembly Test