Odyssey LX V6-3.5L (2000)

Trim Panel: Service and Repair
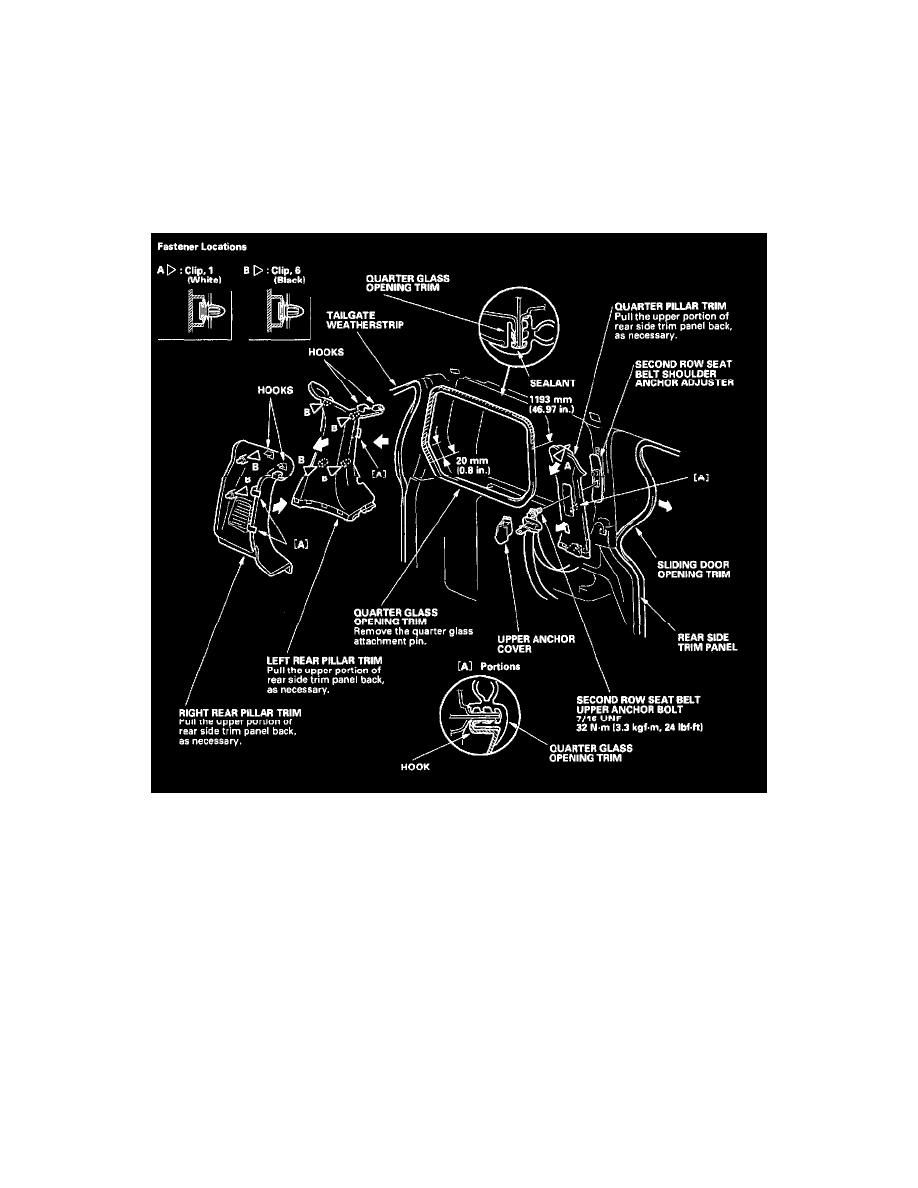
Trim Removal/Installation - Rear Side Upper Area
Trim Removal/Installation - Rear Side Upper Area
NOTE:
-
Put on gloves to protect your hands.
-
When prying with a flat-tip screwdriver, wrap it with protective tape to prevent damage.
-
Take care not to bend or scratch the trim and panels.
1. Remove the trim as shown.
2. Install the trim in the reverse order of removal, and note these items:
-
Replace any damaged clips.
-
Push the clips into place securely.
-
Apply liquid thread lock to the anchor bolt before reinstallation.
-
Before installing the anchor bolt, make sure there are no twists or kinks in the seat belt.
-
Before installing the quarter glass opening trim, fill the bottom of the channel with clear sealant in the area indicated by the arrows.
Sealant: Cemedine P/N 08712-0004, or equivalent.
