
Odyssey LX V6-3.5L (2000)
Drive Belt Tensioner: Testing and Inspection
Auto-tensioner Inspection
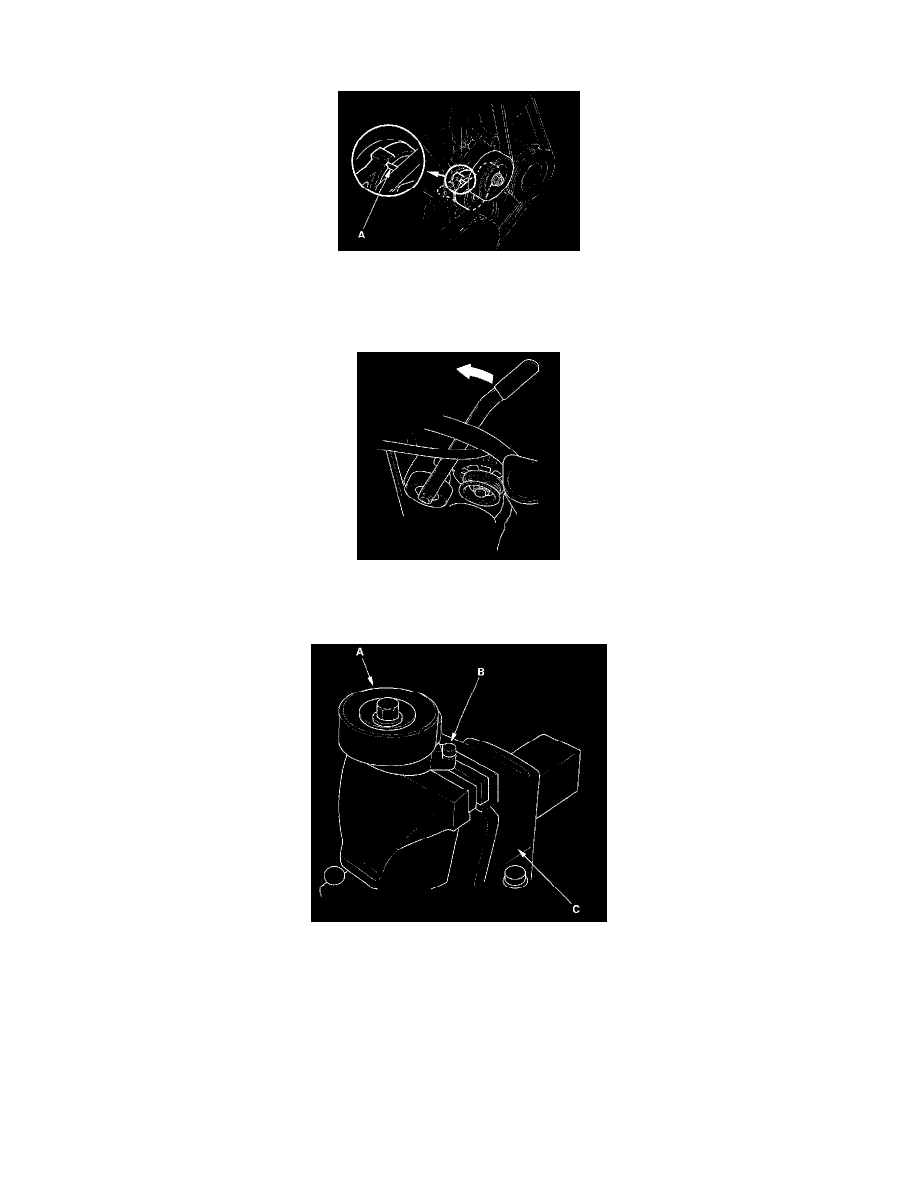
1. Check the position of the auto-tensioner indicator's pointer (A) with the engine not running. Start the engine, then check the position of the pointer
again. If the position changes, replace the auto-tensioner.
2. Check for abnormal noise from the tensioner pulley. If you hear abnormal noise, replace the auto-tensioner pulley.
3. Remove the alternator-compressor belt.
4. Move the auto-tensioner back and forth within its limit with the wrench in the direction shown. Check that the tensioner moves smoothly and
without any abnormal noise. If the tensioner does not move smoothly or there is abnormal noise, replace the auto-tensioner.
5. Remove the auto-tensioner.
6. Clamp the auto-tensioner (A) by using two bolts (6 mm diameter) (B) and vise (C) as shown. Do not clamp the auto-tensioner itself. A