
Odyssey LX V6-3.5L (2000)
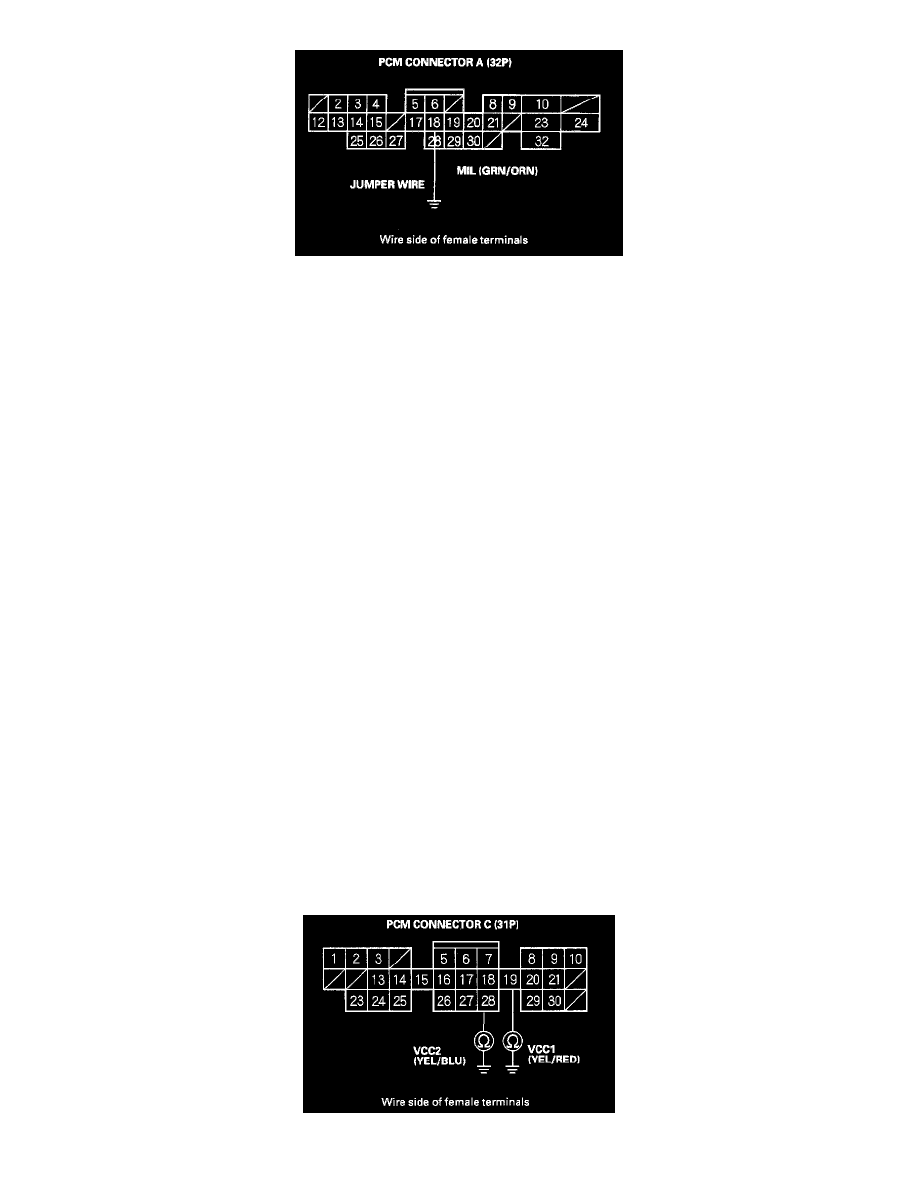
9. Connect PCM connector terminal A18 and body ground with a jumper wire.
10. Turn the ignition switch ON (II).
Is the MIL on?
YES - Substitute a known-good PCM and recheck. If the symptom/indication goes away, replace the original PCM.
NO - Check for an open in the wires between the PCM (A18) and the gauge assembly. Also check for a blown MIL bulb.
11. Turn the ignition switch OFF.
12. Inspect the ACG S (15 A) fuse in the under-hood fuse/relay box.
Is the fuse OK?
YES - Go to step 13.
NO - Check for these problems:
-
A short in the wire between the ACG S (15 A) fuse and the PGM-FI main relay.
-
A short in the wire between the PGM-FI main relay and the PCM, injectors, or IAC valve.
-
A blown ACG S (15 A) fuse in the driver's under-dash fuse/relay box.
13. Inspect the No.1 FUEL PUMP (15 A) fuse in the under-dash fuse/relay box.
Is the fuse OK?
YES - Go to step 14.
NO - Check for these problems:
-
A short in the wire between the No.1 FUEL PUMP (15 A) fuse and the PGM-FI main relay.
-
A short in the wire between the PGM-FI main relay and the fuel pump.
-
A blown the No.1 FUEL PUMP (15 A) fuse in the under-dash fuse/relay box.
-
A faulty PGM-FI main relay or a faulty fuel pump.
14. Disconnect the negative cable from the battery.
15. Disconnect PCM connector C (31P).
16. Check for continuity between body ground and PCM connector terminals C19 and C28 individually.