
Odyssey LX V6-3.5L (2000)
Powertrain Control Module: Component Tests and General Diagnostics
Final Procedure
How to End a Troubleshooting Session (required after any troubleshooting)
1. Reset the PCM as described.
2. Turn the ignition switch OFF.
3. Disconnect the OBD II scan tool or Honda PGM Tester from the DLC.
NOTE: The PCM is part of the immobilizer system. If you replace the PCM, it will have a different immobilizer code. In order for the engine to
start, you must rewrite the immobilizer code with the Honda PGM Tester.
How to Remove the ECM/PCM For Testing
How to Remove the PCM for Testing
If the inspection for a trouble code requires voltage or resistance checks at the PCM connectors, remove the PCM and test it:
1. Disconnect the negative cable from the battery.
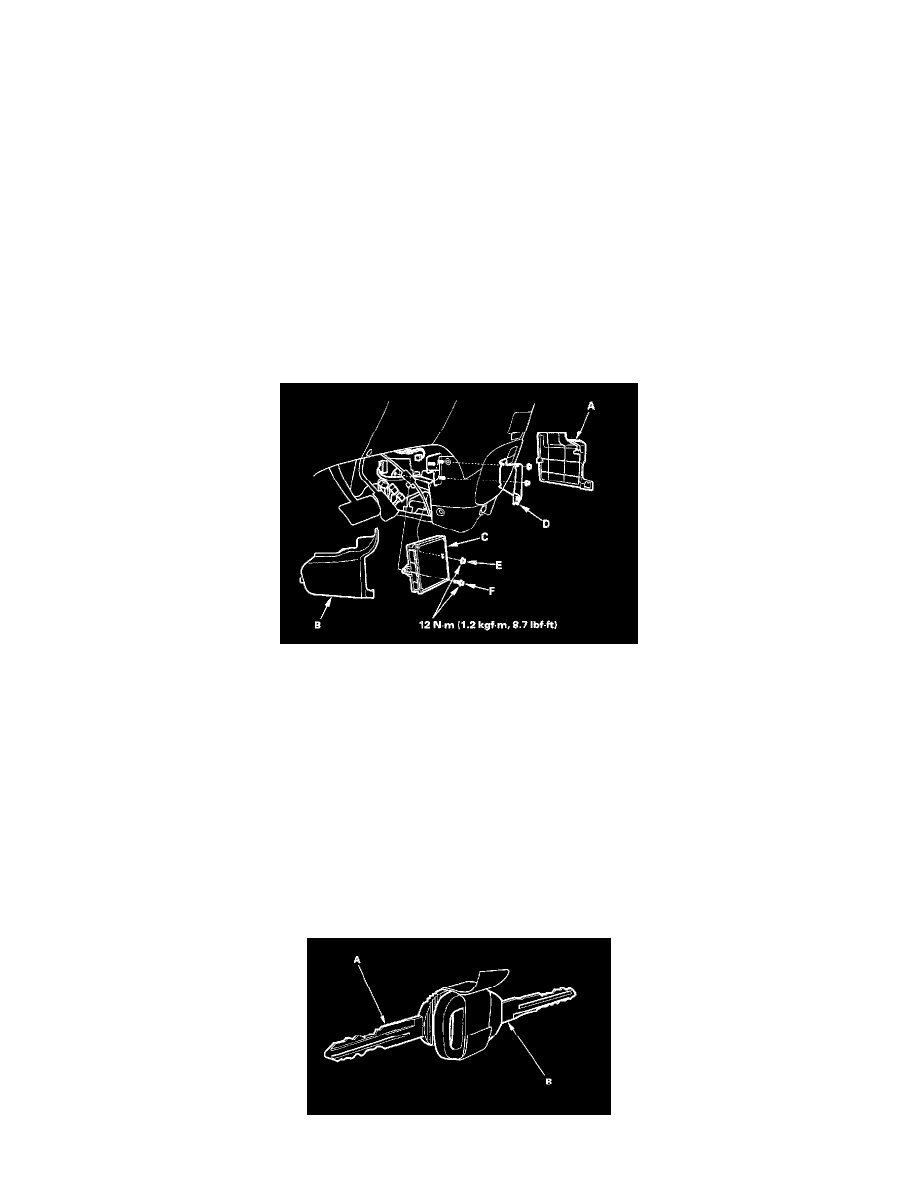
2. Pull back the carpet and remove the passenger's and driver's side center lower console covers (A and B) to expose the PCM (C).
3. Remove the PCM cover (D) from the passenger's side under-dash to access the PCM mounting nut (E).
4. Remove the PCM mounting bolt (F) and remove the PCM.
5. Reconnect the negative cable to the battery.
Known-Good ECM/PCM Substitution
How to Substitute the PCM for Testing Purposes
Use this procedure if you need a known-good PCM to test a vehicle. It allows you to swap a PCM from a "donor" vehicle without having to program it to
the test vehicle's ignition key.
1. Cut a temporary ignition key for the test vehicle with a non-immobilizer key blank.
2. Remove the PCM from the test vehicle.
3. Write the test vehicle's VIN on the PCM you just removed to avoid confusing it with the donor vehicle's PCM.
4. Remove the known-good PCM from the donor vehicle, and install it in the test vehicle.
5. Tape the donor vehicle's ignition key head-to-head to the test vehicle's temporary key (A). The PCM will recognize the code from the donor