
Odyssey LX V6-3.5L (2000)
NOTE: If you are not sure of the wire size, start with a large enough hole on the stripper that will not nick or cut off any strands of wires.
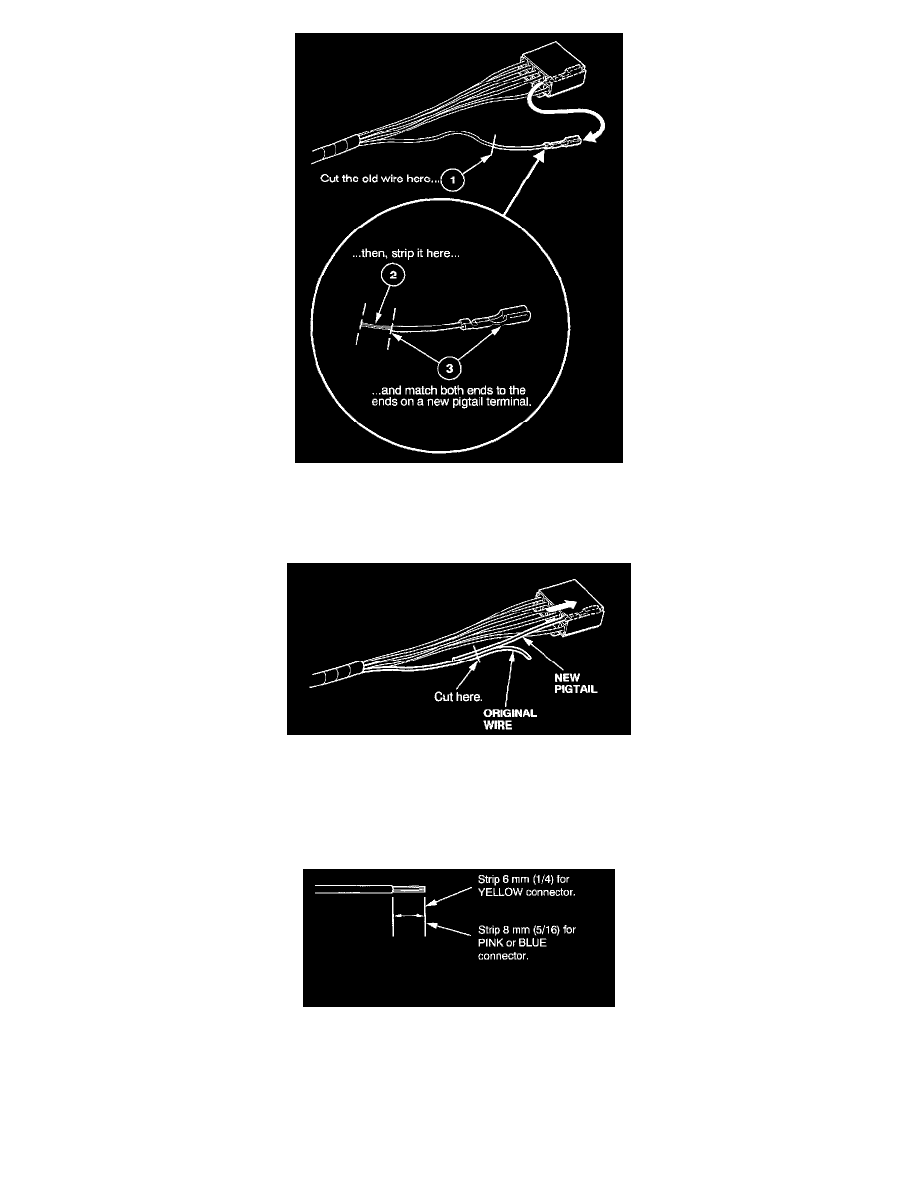
3. Select a pigtail terminal that matches the original wire at both ends (same kind of terminal and same diameter bare wire).
4. Select the smallest splice connector (yellow, pink, or blue) that will fit onto the stripped end of the original wire.
5. Insert the pigtail terminal into the connector cavity; push it in until it locks in place.
6. Lay the pigtail and the original wire side-by-side, and cut off both ends at once. If you are making more than one splice, do not cut each pigtail at
the same location; the resulting "lump" of splice connectors would interfere with rewrapping the harness. Instead, cut the first pigtail close enough
to the terminal so you will have room to make each remaining cut about 20 mm (3/4 inch) farther down on the next pigtail.
7. If you are using a yellow splice connector, strip about 6 mm (1/4 inch) of insulation off the ends of both wires. If you are using a pink or blue
splice connector, strip off about 8 mm (5/16 inch) of insulation.
NOTE: If you nick or cut off any strands of wire, try again with the next larger size hole on the stripper.