
Passport LX 4WD V6-3165cc 3.2L DOHC MFI (2001)
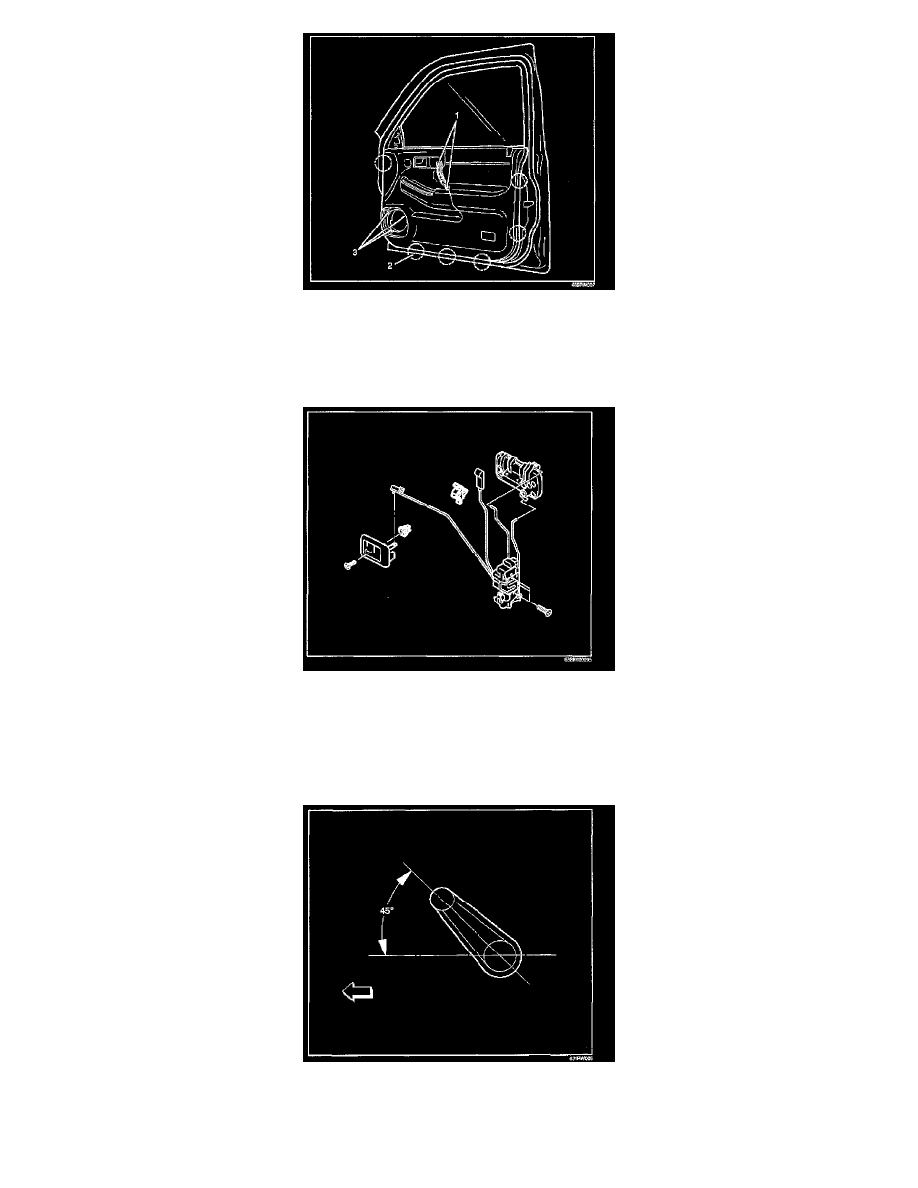
7. Remove the 5 screws (1), (3) and pull out the door trim panel at the 6 clip (2) positions.
8. Remove the waterproof sheet.
-
Taking notice of the door harness, peel the waterproof sheet off the door panel carefully.
9. Raise the glass up to the uppermost position, and then remove the rear guide rail.
10. Disconnect the locking links then remove the door lock assembly fixing screws and door lock assembly.
Installation
To install, follow the removal steps in the reverse order, noting the following points:
1. Apply chassis grease to the lock assembly and striker moving surface.
2. Install the regulator handle as shown in the illustration, if equipped without power windows.
3. Tighten the door lock assembly fixing screws to the specified torque.
Torque 7 N.m (61 lb in)