
Passport LX 4WD V6-3165cc 3.2L DOHC MFI (2001)
Brake Pedal Assy: Service and Repair
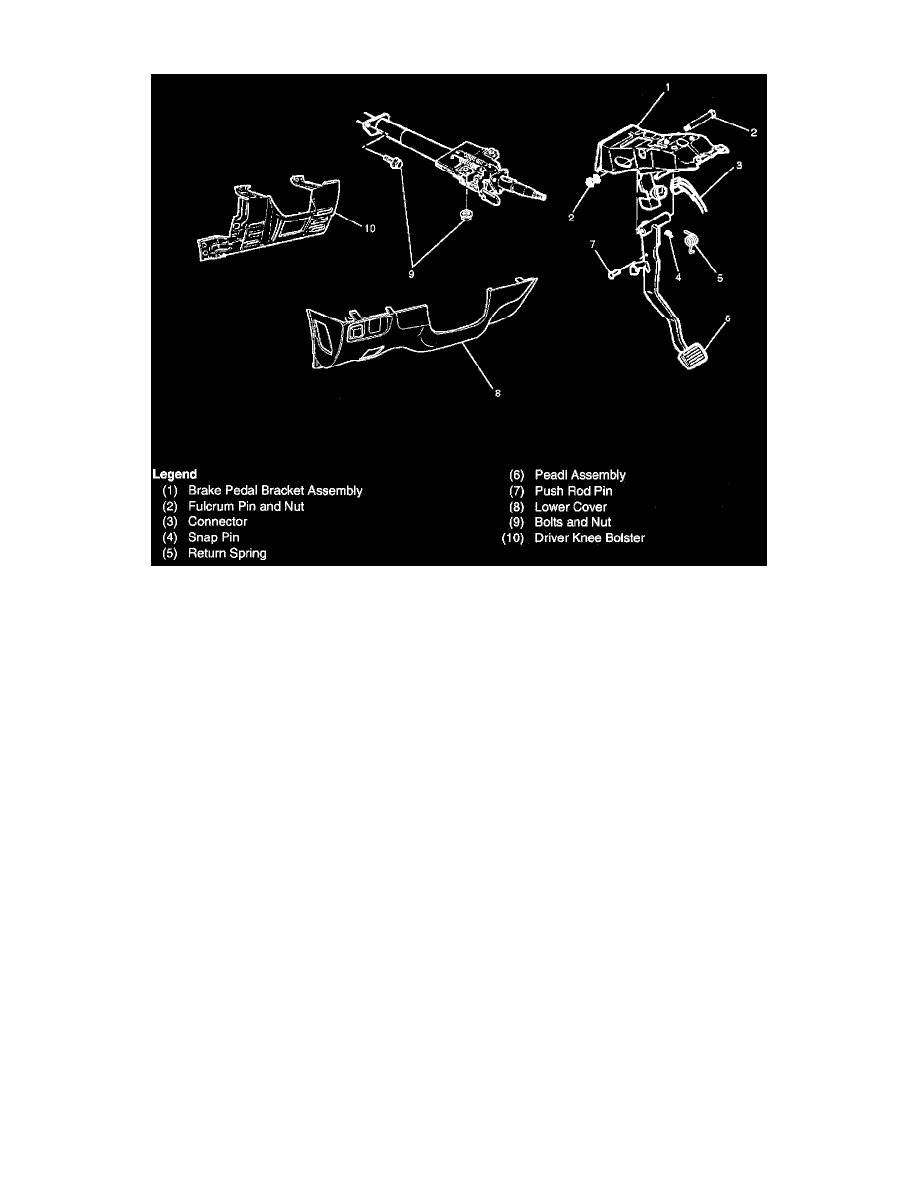
Removal
1. Disconnect the battery "-" terminal cable, and wait at least 5 minutes.
2. Disconnect the yellow 3 way Supplemental Restraint System (SRS) connector located under the steering column.
3. Remove the engine hood opening lever.
4. Remove lower cover (8).
5. Remove driver knee bolster (10).
6. Disconnect the stop light switch connector (3). Disconnect the anti-theft control module connector.
7. Remove snap pin (4) and push rod pin (7).
8. Remove the steering column shaft fixing bolt and nut (9) on the steering wheel side, and lower the steering column shaft.
9. Remove the brake pedal bracket assembly (1).
10. Remove return spring (5).
11. Remove fulcrum pin and nut (2).
12. Remove pedal assembly (6).
Installation
1. Apply grease to the entire circumference of the fulcrum pin.
2. Install pedal assembly (6) and fulcrum pin and nut (2). Tighten the nut (2) to the specified torque.
Torque: 35 Nm (26 ft. lbs.)
3. Install the brake pedal bracket assembly (1). Tighten the bolts and nuts specified torque.
Torque: 15 Nm (11 ft. lbs.)
4. Install return spring (5).
5. Adjust pedal free travel.
6. Tighten the steering column fixing bolt (9) (dash panel) to the specified torque.
Torque: 20 Nm (14 ft. lbs.)
7. Tighten the steering column fixing nut (9) (Cross Beam) to the specified torque.
Torque: 17 Nm (12 ft. lbs.)
8. Apply grease to the entire circumference of the Push rod pin (7).
9. Install push rod pin (7).
10. Install snap pin (4).
11. Connect the anti-theft control module connector.
12. Connect the stop light switch connector (3).
13. Install driver knee bolster (10) and lower cover (8).
14. Install the engine hood opening lever.