
Passport LX 4WD V6-3165cc 3.2L DOHC MFI (2001)
system for at least one minute.
8. Depress the brake pedal slowly once and hold it depressed.
9. Completely seal the delivery port of the master cylinder with your finger, where the pipe was disconnected then release the brake pedal slowly.
10. Release your finger from the delivery port when the brake pedal returns completely.
11. Repeat steps 8 through 10 until the brake fluid comes out of the delivery port during step 8.
NOTE: Do not allow the fluid level in the reservoir to go below the half-way mark.
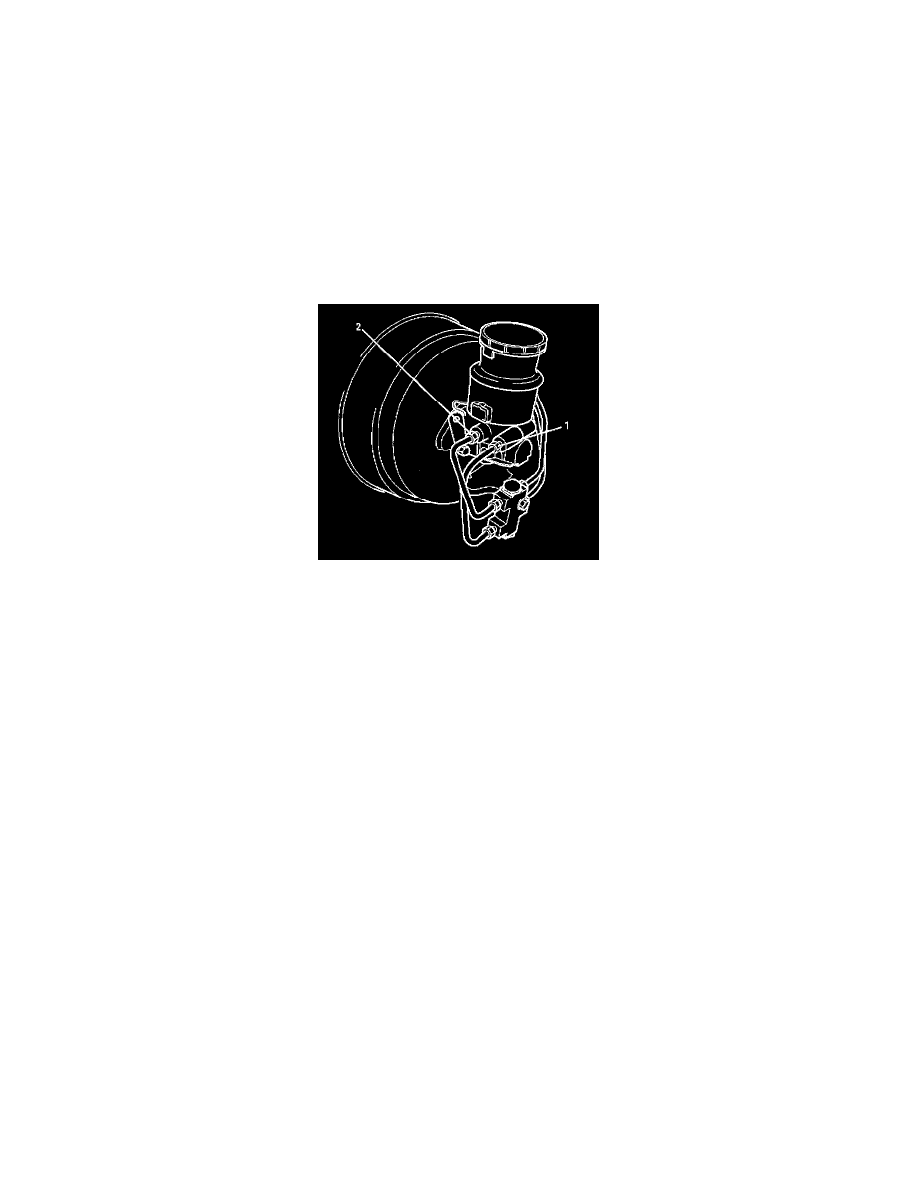
12. Reconnect the brake pipe (1) to the master cylinder and tighten the pipe.
13. Depress the brake pedal slowly once and hold it depressed.
14. Loosen the rear wheel brake pipe (1) at the master cylinder.
15. Retighten the brake pipe, then release the brake pedal slowly.
16. Repeat steps 13 through 15 until no air comes out of the port when the brake pipe is loosened.
NOTE: Be very careful not to allow the brake fluid to come in contact with painted surfaces.
17. Bleed the air from the front wheel brake pipe connection (2) by repeating steps 7 through 16.
Bleeding the Caliper
18. Bleed the air from each wheel in the order listed:
-
Right rear caliper or wheel cylinder
-
Left rear caliper or wheel cylinder
-
Right front caliper
-
Left front caliper
Conduct air bleeding from the wheels in the above order. If no brake fluid comes out, it suggests that air is mixed in the master cylinder. In this
case, bleed air from the master cylinder. In this case, bleed air from the master cylinder in accordance with steps 7 through 17, and then bleed air
from the caliper or wheel cylinder.
19. Place the proper size box end wrench over the bleeder screw.
20. Cover the bleeder screw with a transparent tube, and submerge the free end of the transparent tube in a transparent container containing brake fluid
.
21. Pump the brake pedal slowly three (3) times (once/sec), then hold it depressed.
22. Loosen the bleeder screw until fluid flows through the tube.
23. Retighten the bleeder screw.
24. Release the brake pedal slowly.
25. Repeat steps 21 through 24 until the air is completely removed. It may be necessary to repeat the bleeding procedure 10 or more times for front
wheels and 15 or more times for rear wheels.
26. Go to the next wheel in the sequence after each wheel is bled. Be sure to monitor reservoir fluid level.
27. Depress the brake pedal to check if you feel "sponginess" after the air has been removed from all wheel cylinders and calipers. If the pedal feels
"spongy", the entire bleeding procedure must be repeated.
28. After the bleeding operation is completed on the each individual wheel, check the level of the brake fluid in the reservoir and replenish up to the
"MAX" level as necessary.
29. Attach the reservoir cap. If the diaphragm inside the cap is deformed, reform it and install.
30. Stop the engine.