
Passport LX 4WD V6-3165cc 3.2L DOHC MFI (2001)
7.
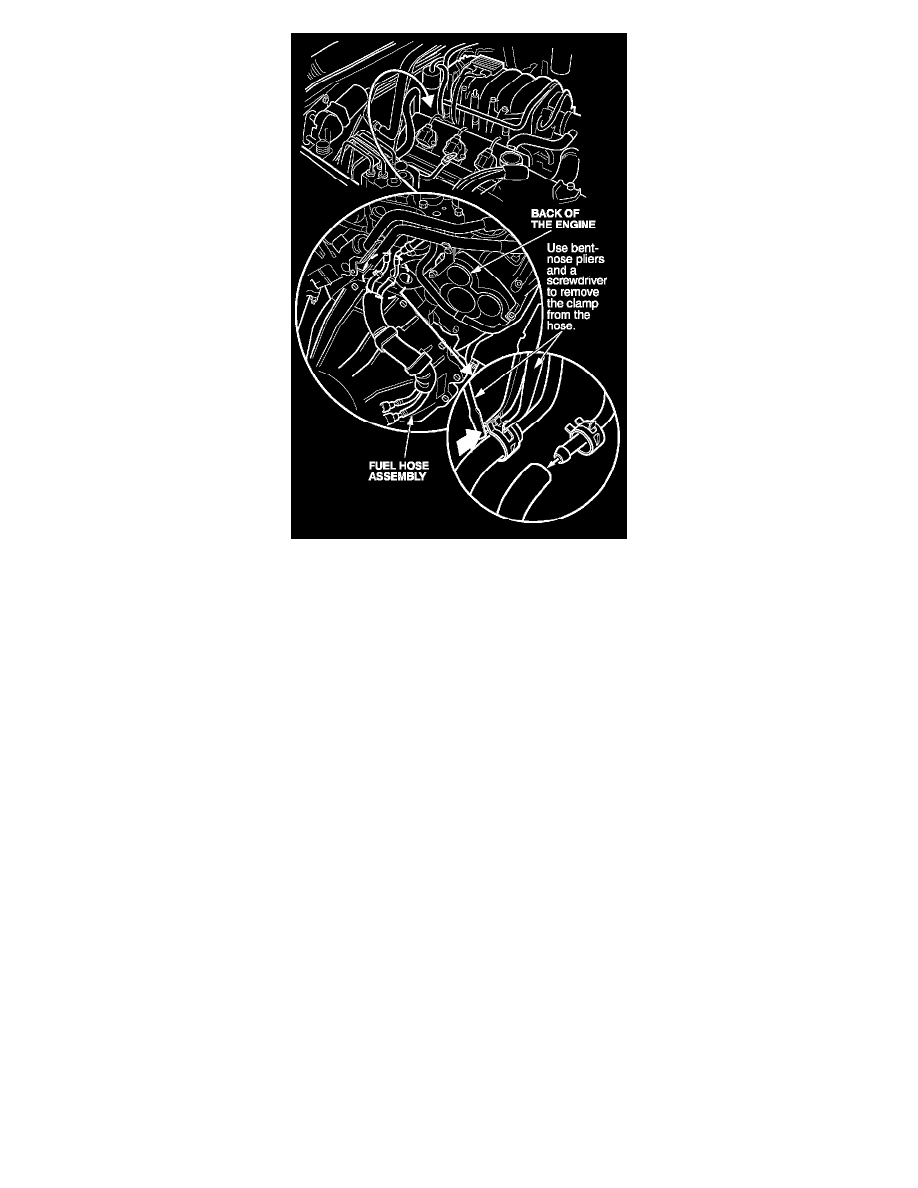
Working at the back of the engine, remove the hose clamps from the fuel hose assembly. Spray silicone lubricant on the clamps to make them
easier to remove.
8.
Remove the fuel hose assembly from the fuel lines. If necessary, carefully slit the hoses so they are easier to remove. Remove the fuel hose
assembly from the vehicle. Discard the assembly and the clamps.
9.
Install the new hose clamps on the hoses in the new fuel hose assembly. These clamps have plastic pieces over the ends to keep them expanded.
10.
Install the fuel hose assembly in the vehicle. Make sure it is routed properly through the brackets.
11.
Connect the fuel hose assembly to the fuel lines at the back of the engine. Slide the clamps into position, then remove the plastic holders from the
clamps. Make sure the hoses are clamped securely.
12.
Verify that the fuel hose assembly is aligned properly. The white mark on the assembly should align with the edge of the bracket.
13.
Lower the floor jack. Remove the jack and block of wood from under the vehicle.
14.
Install the plastic engine cover and the fuel pump relay.
15.
Raise the vehicle on the hoist.
16.
Verify that the fuel hose assembly is properly routed through the brackets.
17.
Connect the fuel hose assembly to the fuel lines (quick disconnect fittings). Listen for each fitting to click into place, then pull on the fitting to
make sure it is locked in place.
18.
Install the O2 harness sensor clip.
19.
Install the transmission mounting nuts. Torque the nuts to 41 N.m (30 lb-ft).
20.
Go to COMPLETION PROCEDURE.
COMPLETION PROCEDURE
1.
Lower the vehicle.