
Passport LX 4WD V6-3165cc 3.2L DOHC MFI (2001)
Steering Gear: Service and Repair
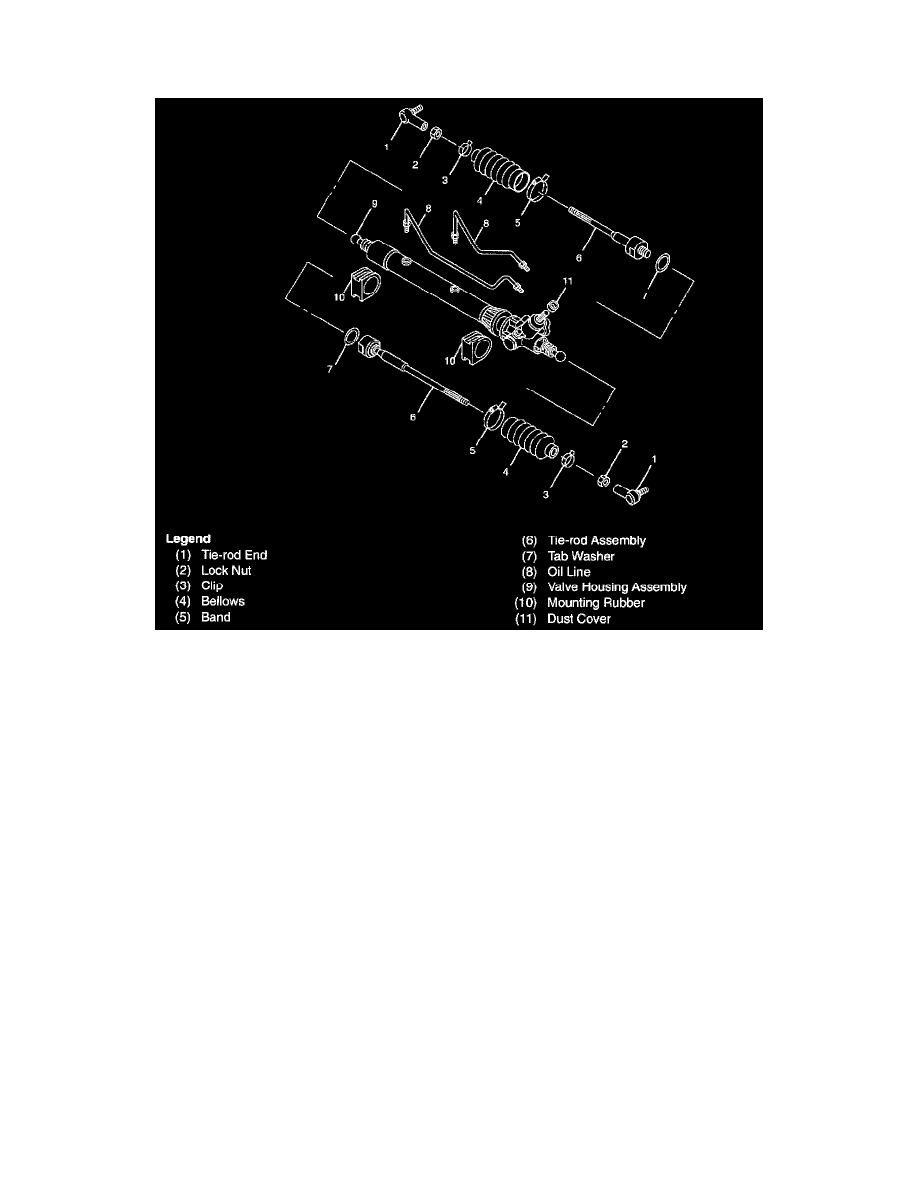
Overhaul
DISASSEMBLY
NOTE: The valve housing is made of aluminum and care should be exercised when clamping in a vise, etc. to prevent distortion or damage.
1. Loosen lock nut and remove tie-rod end.
2. Remove clip (3) and band (5), then remove bellows (4).
3. Remove tie-rod assembly. To remove, move the boot toward the tie-rod end, then remove tab washer.
4. Remove oil line, mounting rubber and dust cover.
INSPECTION AND REPAIR
Inspect the parts for wear, damage or any abnormal conditions.
Tie-rod End
If looseness or play is found when checked by moving the end of ball joint at tie-rod end, replace tie-rod end.
Tie-rod Assembly
If the resistance is insufficient or play is felt when checked by moving the ball on the tie-rod, replace the tie-rod assembly.
Rubber Parts
If wear or damage is found through inspection, replace with new ones.
REASSEMBLY
1. Install mounting rubber and dust cover (If removed).
2. Install oil line.
Torque: 13 Nm (113 inch lbs.)
3. Install tie-rod assembly with tab washer. Apply grease to ball joint, install tie-rod and tab washer, then tighten to specified torque.
Torque: 83 Nm (61 ft. lbs.)
After tightening, bend tab washer against width across flat of inner ball joint.
4. Apply a thin coat of grease to the shaft for smooth installation. Then install bellows.