
Passport LX 4WD V6-3165cc 3.2L DOHC MFI (2001)
3. Using an air nozzle, blow into the frame rail hole, up and down inside the frame, to move any debris away from the trailing link bracket area.
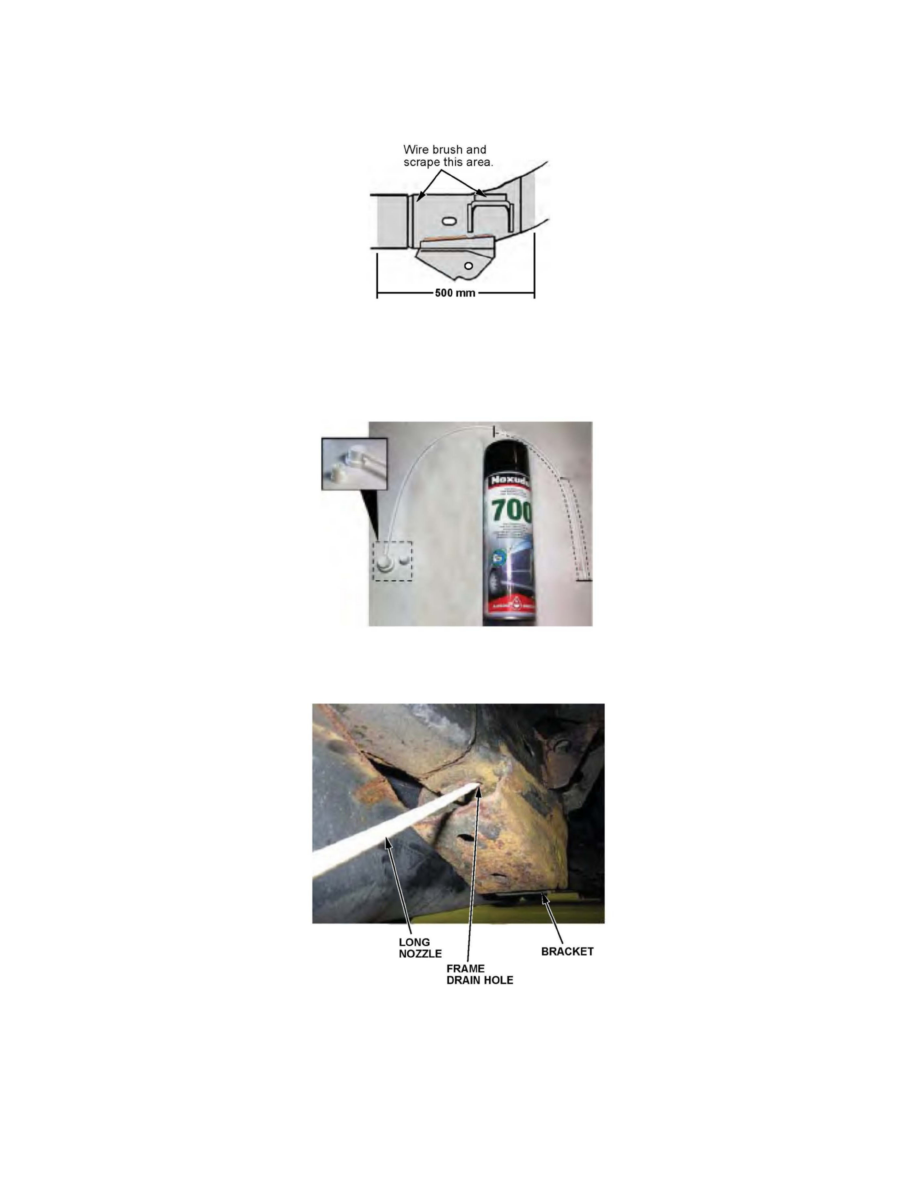
4. Using a wire brush and a scraper, remove any loose frame coating and rust from the outside frame rail and the lower trailing link frame bracket in the
20-inch (500 mm) section shown below.
5. Use a dry rag to remove any remaining dust or debris. If the area is wet, dry it with an air nozzle.
6. Attach the long nozzle to the Noxudol 700 can, then use a pen or tape to mark the nozzle at 12 inches (300 mm) and at 7 inches (200 mm) from the
nozzle end. These marks indicate how far you will insert the nozzle into the frame rails for some of the following steps.
7. Place a drain pan below the frame's drain hole next to the trailing link bracket. This will catch the excess Noxudol 700 that runs out of the frame's
drain hole, which is expected and normal.
8. Insert the Noxudol 700 spray nozzle about 12 inches (300 mm) into the frame drain hole located on the bottom of the frame rail, toward the rear of the
vehicle. Then spray the Noxudol while drawing out the nozzle. Spray two times.