
Pilot 2WD V6-3.5L (2006)
Driver/Vehicle Information Display: Service and Repair
Electrical Compass Calibration
1. Briefly press the button to toggle the display "ON/OFF".
NOTE: The compass display will default "ON" at each new ignition cycle.
2. With the BLUE CENTER LED displayed, press and hold the button for six seconds, or until a RED CENTER LED is displayed in the compass
window, then release the button. While the RED CENTER LED is "ON" release the button. The compass is now in calibration mode. To calibrate,
drive the vehicle in circles at less then 5 mph (8 km/h) until a BLUE CENTER LED is displayed. Typically 2-5 circles are required.
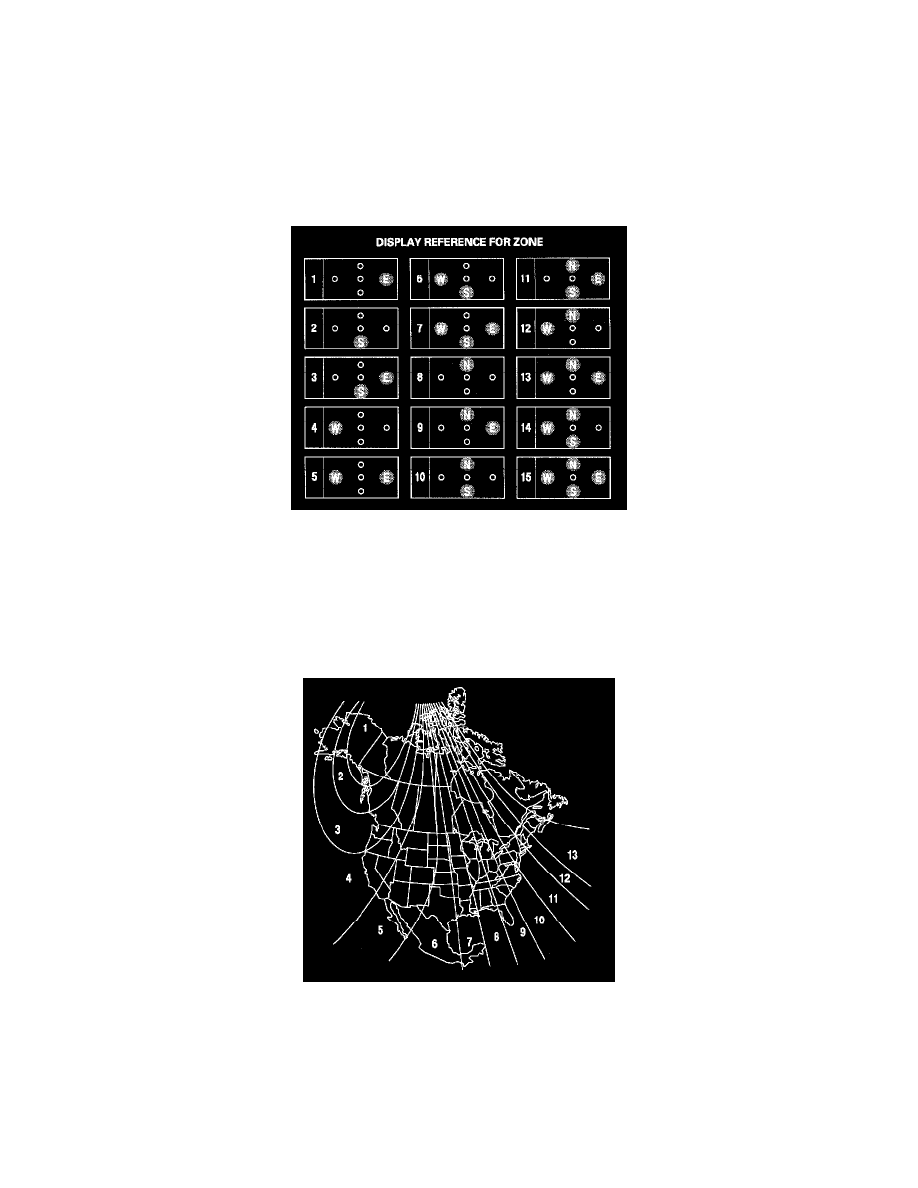
3. Find your current location and determine the correct zone number, for your geographic area, from the table "DISPLAY REFERENCE FOR
ZONE". Press and hold the button for three seconds (until ALL DIRECTION BLUE LEDs BLINK), then release the button. The BLINKING
LED(s) displayed is/are the current zone value. (see the table "DISPLAY REFERENCE FOR ZONE")
4. If a new zone value is desired, briefly press the button to increment the displayed value (Range 1-15) until you find your desired zone setting. No
button activity for four seconds ends the zone entry mode. The compass display will return to normal operation and the new zone number will be
set.
NOTE: See the table "DISPLAY REFERENCE FOR ZONE".
5. Zone selection is required to compensate for the difference between magnetic North and geographic North. This deviation is referred to as
declination and can be compensated for by selecting the zone that corresponds with your area.
See this illustration. Each zone represents about 5 degrees of declination.