
Pilot 2WD V6-3.5L (2006)
11. With the help of an assistant, remove the headliner (A).
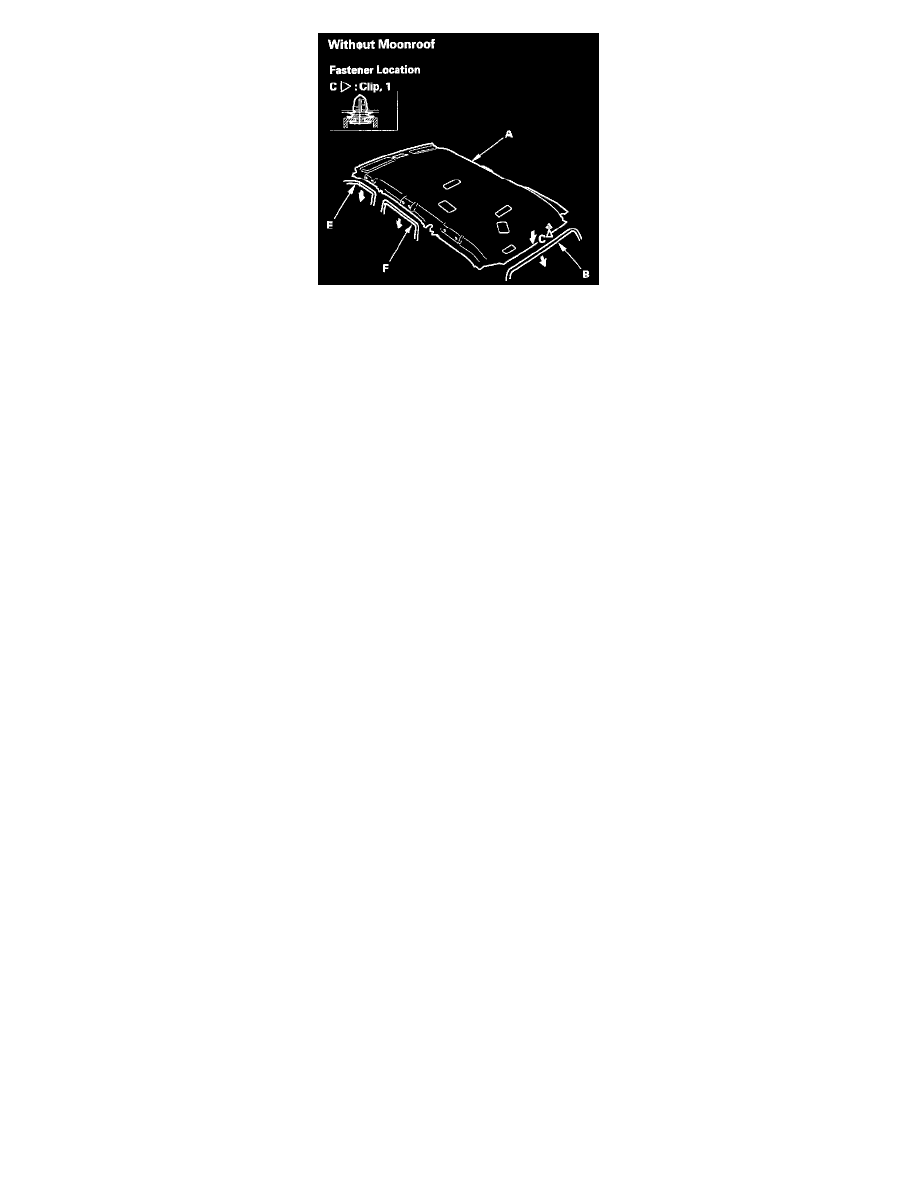
1. Remove the roof portion of the tailgate weatherstrip (B).
2. Pull the rear edge of the headliner down to detach the clips (C), and release the dual lock fasteners (D).
3. Remove the remaining front door opening trim (B) and rear door opening trim (F) from each opening.
4. Lower the headliner.
12. Remove the headliner through the tailgate opening. Take care not to damage the headliner.
13. Install the headliner in the reverse order of removal, and note these items:
-
Check if the clips are damaged or stress-whitened, and if necessary, replace them with new ones.
-
When reinstalling the headliner through the tailgate opening, be careful not to fold or bend it. Also, be careful not to scratch the body.
-
Hold the headliner in place with the grab handles installed loosely, then install the center second row seat belt cover. This will center the
headliner front to rear.
-
Push the clips and tabs into place securely.
-
If the threads on a visor mounting ET screw are worn out, use an oversized ET screw (P/N 90137-S30-003) made specifically for this
application.
-
Check that both sides of the headliner are securely attached to the trim.