Pilot 2WD V6-3.5L (2006)

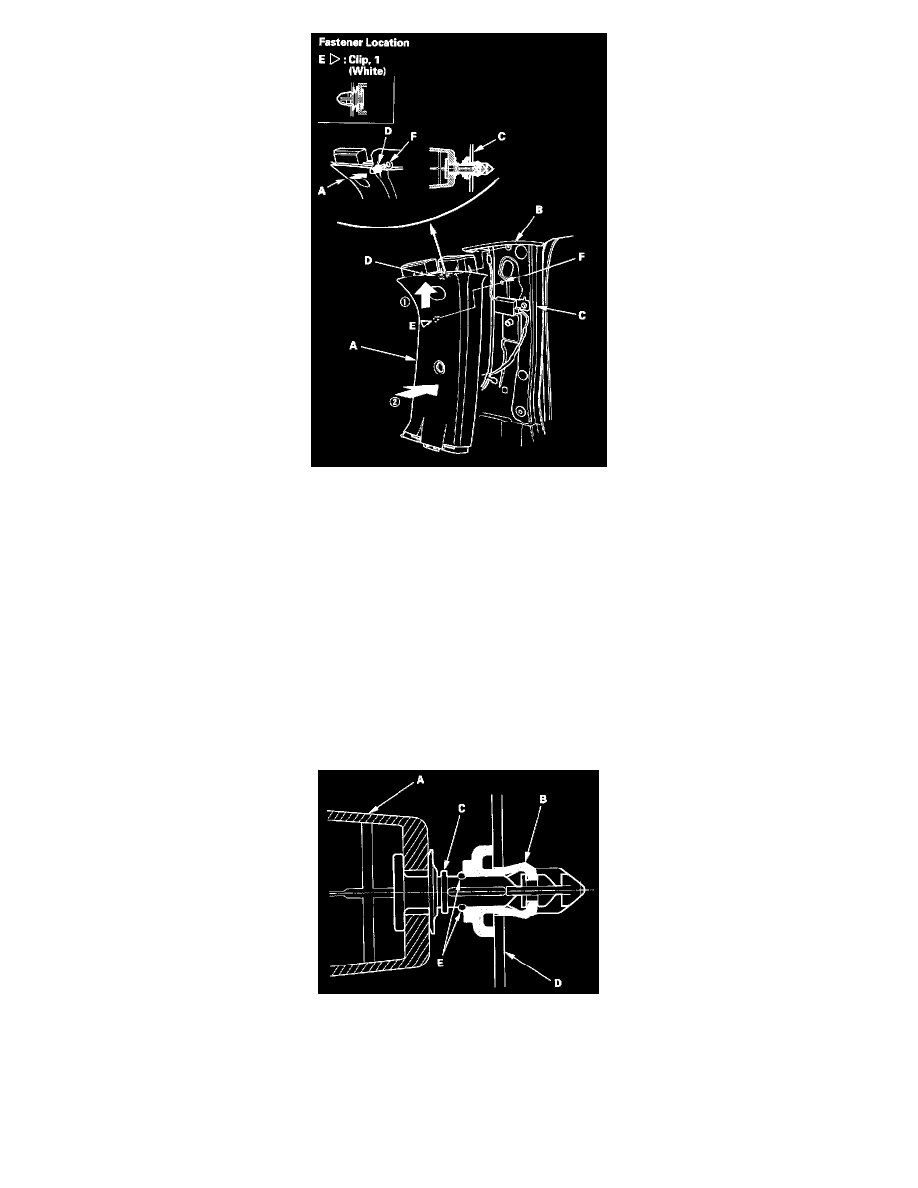
10. Reinstall the C-pillar trim (A).
1. Insert the upper of the trim into the headliner
2. Place the trim over the C-pillar (C), and fit its upper clip (D) and lower clip (E) into holes (F) in the C-pillar, then lightly push the trim into
place.
NOTE:
-
Make sure the side curtain airbag isn't tucked down under the clips and ribs.
-
Push lightly on the upper clip. If you push too hard, the clip will be damaged, and it will not hold the trim properly.
11. Reinstall the rear door opening seal.
Special Tools Required
KTC trim tool set SOJATP2O14 *
*Available through the American Honda Tool and Equipment Program.
D-Pillar Trim
SRS components are located in this area. Review the SRS component locations and the precautions and procedures before doing repairs or service.
NOTE:
-
Put on gloves to protect your hands.
-
Take care not to bend or scratch the trim and panels.
-
Use the appropriate tool from the KTC trim tool set to avoid damage when prying components.
-
Take care not to scratch the trim and panels.
-
The upper clip in the D-pillar trim (A) consists of a grommet (B) and a pin (C). The grommet expanded with the pin secures it to the body panel
