
Pilot 2WD V6-3.5L (2006)
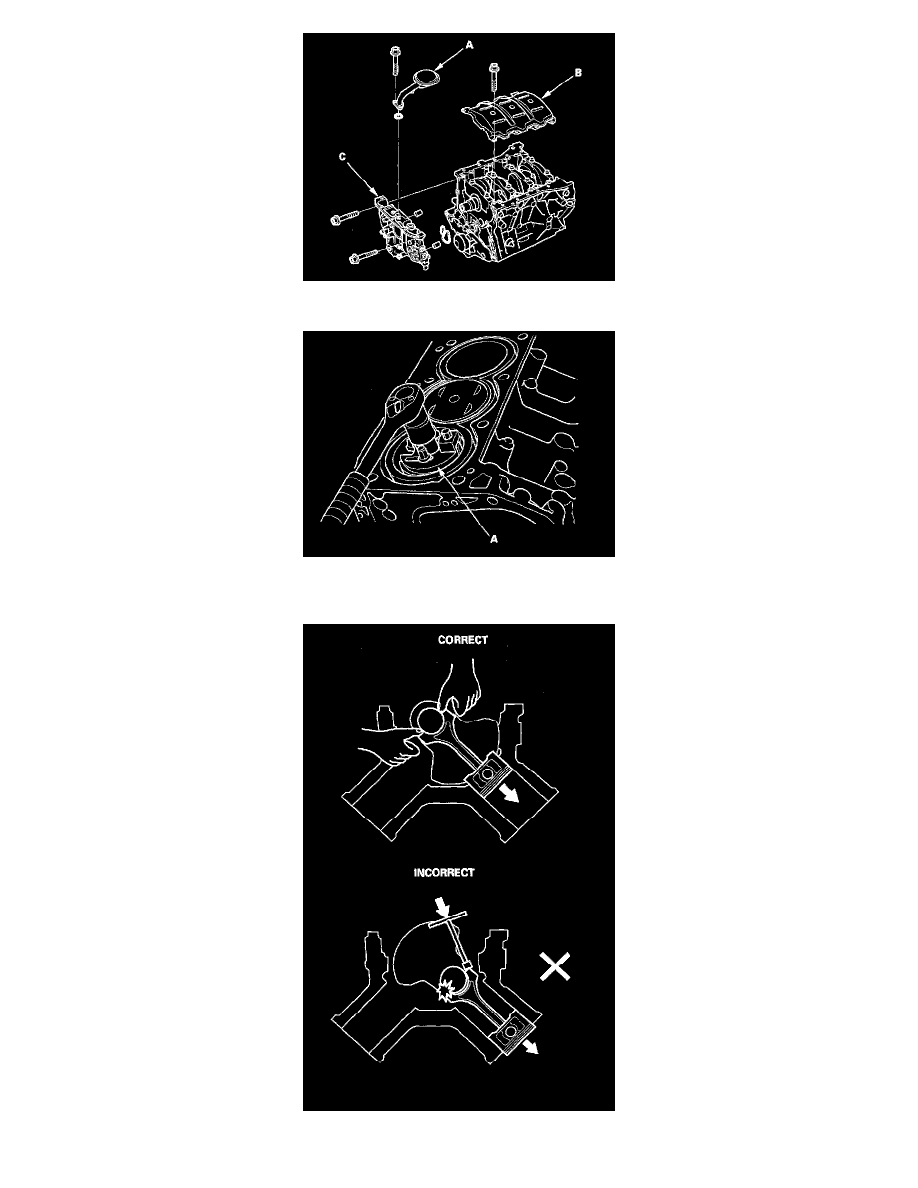
11. Remove the oil screen (A), baffle plate (B), and oil pump (C).
12. If you can feel a ridge of metal or hard carbon around the top of any cylinder, remove it with a ridge reamer (A). Follow the reamer manufacturer's
instructions. If the ridge is not removed, it may damage the piston as it's pushed out.
13. Remove the connecting rod caps after setting the crank pin at bottom dead center (BDC) for each cylinder. Remove the piston/connecting rod