
Pilot 2WD V6-3.5L (2006)
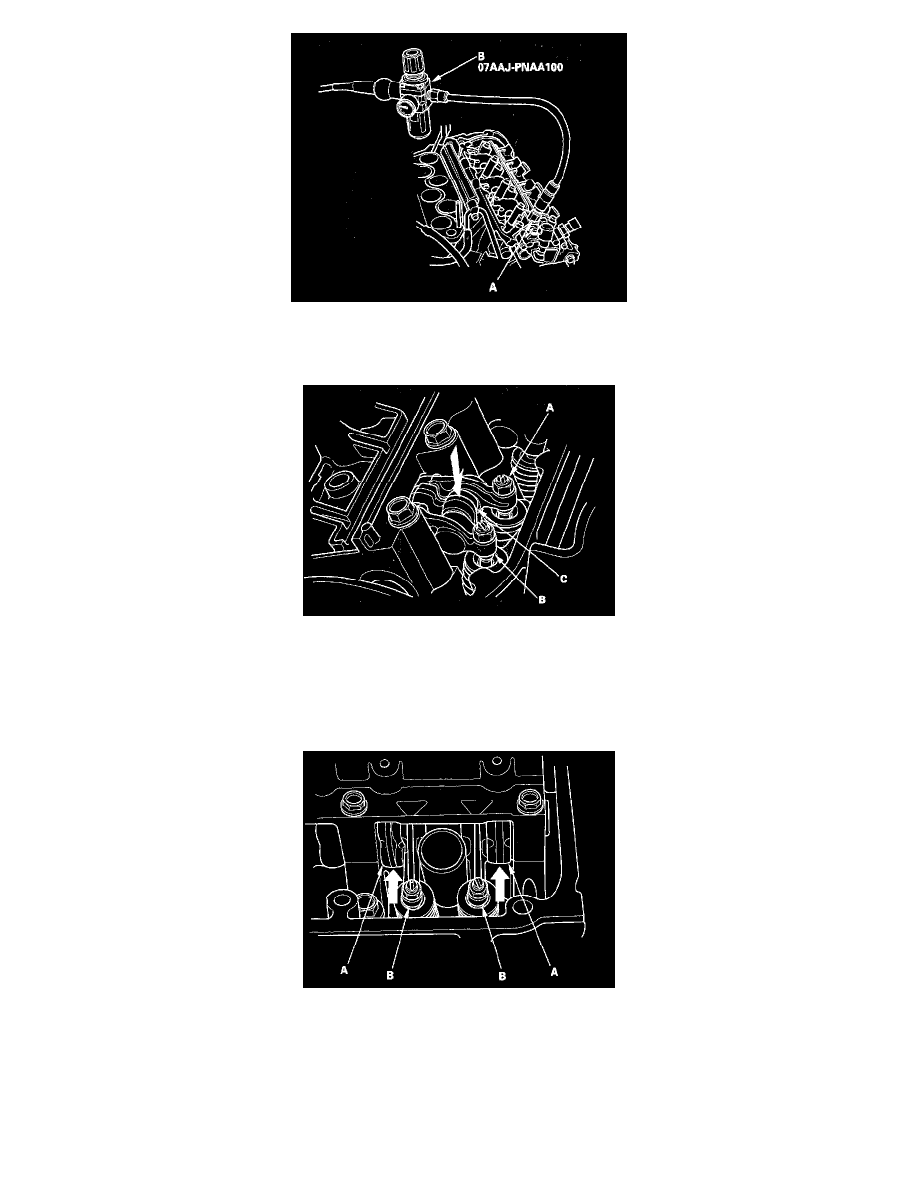
10. Install the adapter (10 x 1.0 mm) (A) to the inspection hole, then connect the air pressure regulator (B).
11. Loosen the valve on the regulator, and apply the specified air pressure.
Specified Air Pressure: 200 kPa (2.0 kgf/cm2, 28 psi)
12. With the specified air pressure applied, push on the intake secondary rocker arm (C) for the No. 1 cylinder. The intake secondary rocker arm
should move independently of the intake primary rocker arm A and intake primary rocker arm B.
-
If the intake secondary rocker arm does not move independently, remove the intake primary rocker arm A, intake primary locker arm B, and
intake secondary rocker arm as an assembly, and check that the pistons in the rocker arms move smoothly If any intake rocker arm needs
replacing, replace the primary and secondary rocker arms as an assembly, and retest.
-
If the intake secondary rocker arm moves freely, go to step 13.
13. With the specified air pressure applied, push on the exhaust secondary rocker arms (A) for the No. 1 cylinder. The exhaust secondary rocker arm
should move independently of the exhaust primary rocker arm (B).
-
If the exhaust secondary rocker arm does not move independently, remove the exhaust primary rocker arm and exhaust secondary locker arm
as an assembly, and check that the pistons in the rocker arms move smoothly. If any exhaust rocker arm needs replacing, replace the primary
and secondary rocker arms as an assembly, and retest.
-
If the exhaust secondary rocker arm moves freely, go to step 14.
14. Repeat step 12 and 13 for No. 2 and No. 3 cylinders with each piston at TDC. When the rocker arms pass the test, go to step 15.