
Pilot 2WD V6-3.5L (2006)
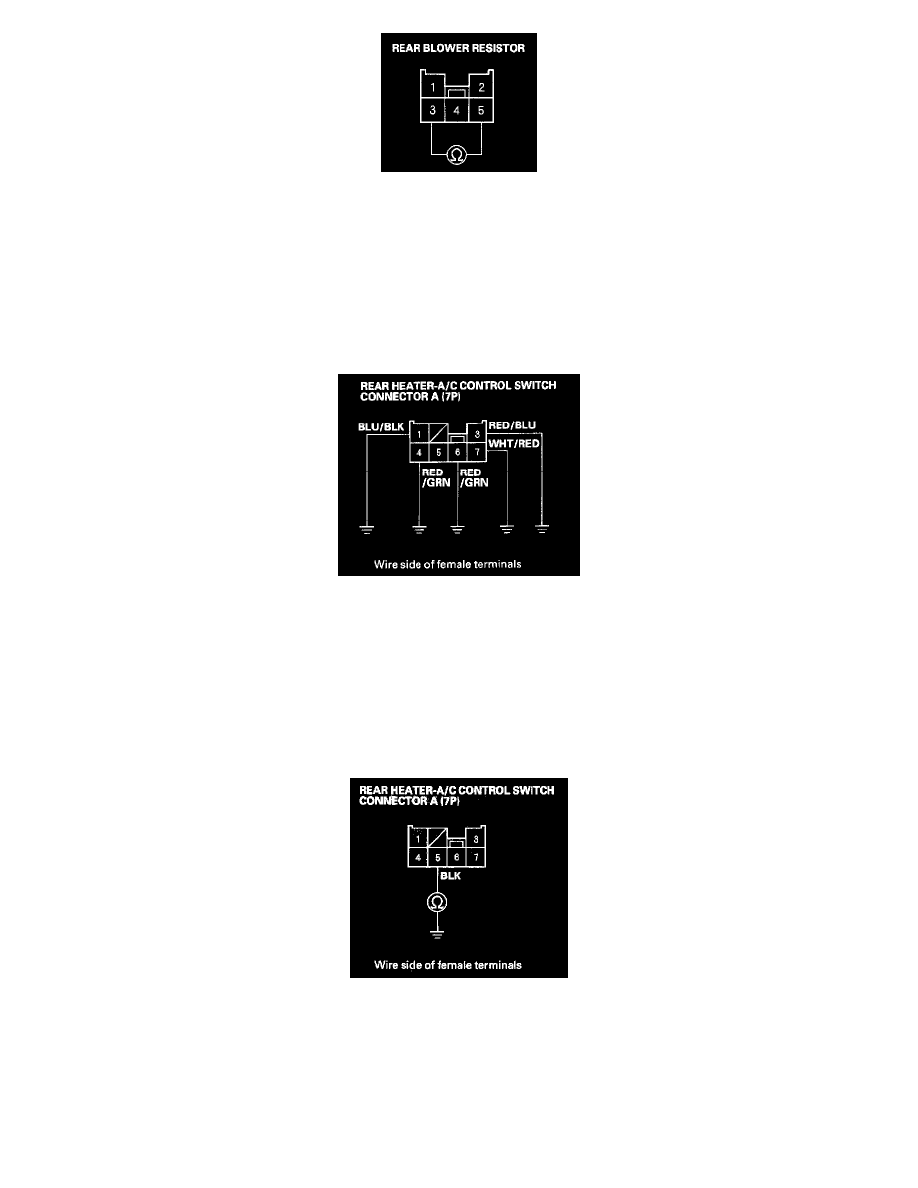
9. Measure the resistance between the No. 3 and No. 5 terminals of the rear blower resistor.
Is there about 4 - 5 Ohms?
YES - Go to step 10.
NO - Replace the rear blower resistor.
10. Disconnect rear heater-A/C control switch connector A (7P).
11. Reconnect the blower resistor 5P connector.
12. Ground each of the rear heater-A/C control switch connector A (7P) terminals individually in the following order: No. 7, 3, 4, 6 and 1.
Does the blower motor run at progressively higher speeds?
YES - Go to step 13.
NO - Repair any open or cause of excessive resistance in the appropriate wire(s) between the blower resistor and the rear heater-A/C control
switch.
13. Disconnect rear heater-A/C control switch connector B (10P).
14. Check for continuity between the No. 5 terminal of rear heater-A/C control switch connector A (7P) and body ground.
Is there continuity?
YES - Go to step 15.
NO - Check for an open in the wire between the rear heater-A/C control switch and body ground. If the wire is OK, check for poor ground at
G501.