
Pilot 2WD V6-3.5L (2006)
Control Assembly: Service and Repair
Climate Control
Climate Control Unit Removal and Installation
Climate Control Unit Removal and Installation
1. Remove the center panel.
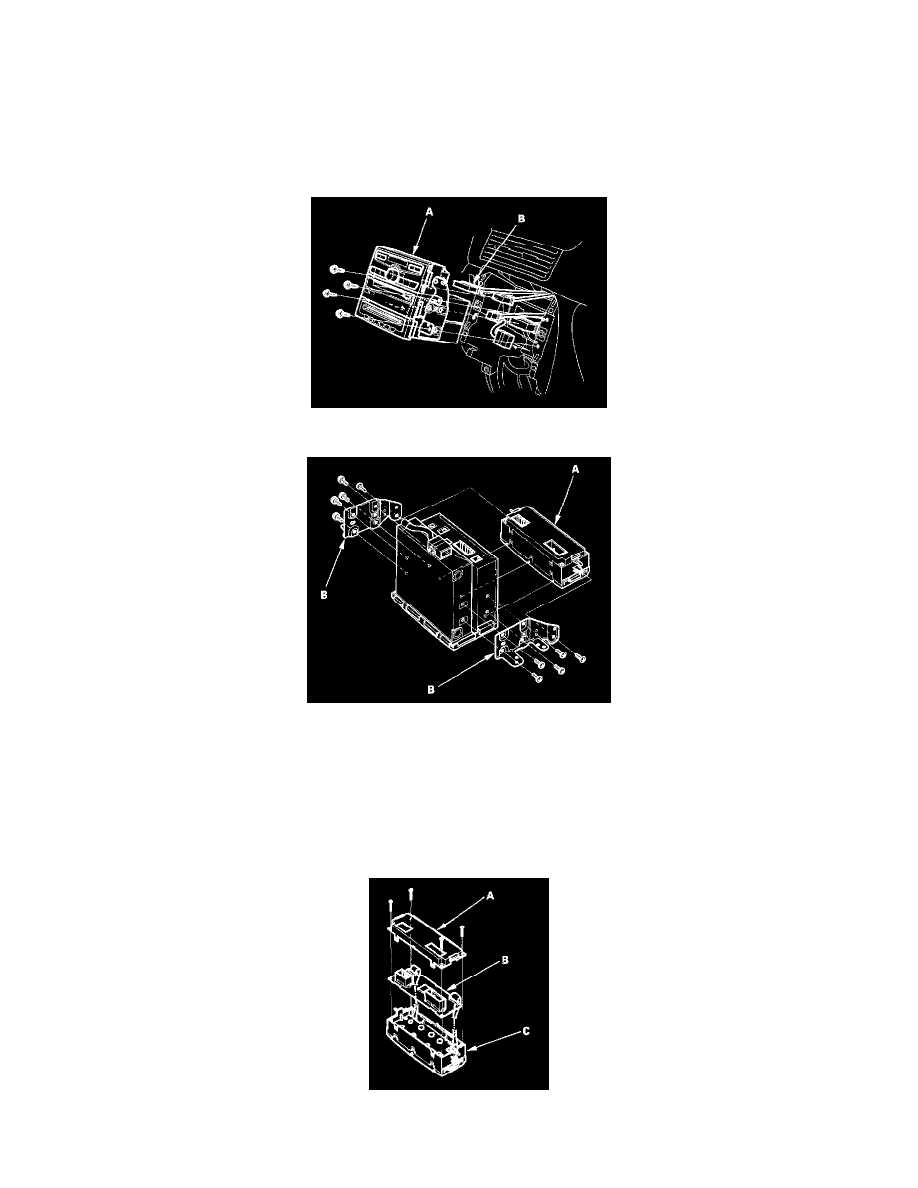
2. Remove the screws, and remove the climate control unit (A) with the brackets from the dashboard, then disconnect the connectors (B).
3. Remove the screws and the climate control unit (A) from the brackets (B).
4. Install the control unit in the reverse order of removal. After installation, operate the control unit controls to see whether it works properly.
5. Run the self-diagnostic function to confirm that there are no problems in the system.
Climate Control Unit Bulb Replacement
Climate Control Unit Bulb Replacement
1. Discharge the static electricity (which accumulated on you when you removed the climate control unit) by touching the door striker or other body
parts.
2. Remove the self-tapping screws, then carefully separate the climate control unit cover (A) and the control unit (B) from the control unit display
(C). Do not kink or pull on the wires between the display and the control unit. Do not touch the electronic components on the printed circuit board