
Pilot 2WD V6-3.5L (2006)
Engine Control Module: Service and Repair
PCM Replacement
PCM Replacement
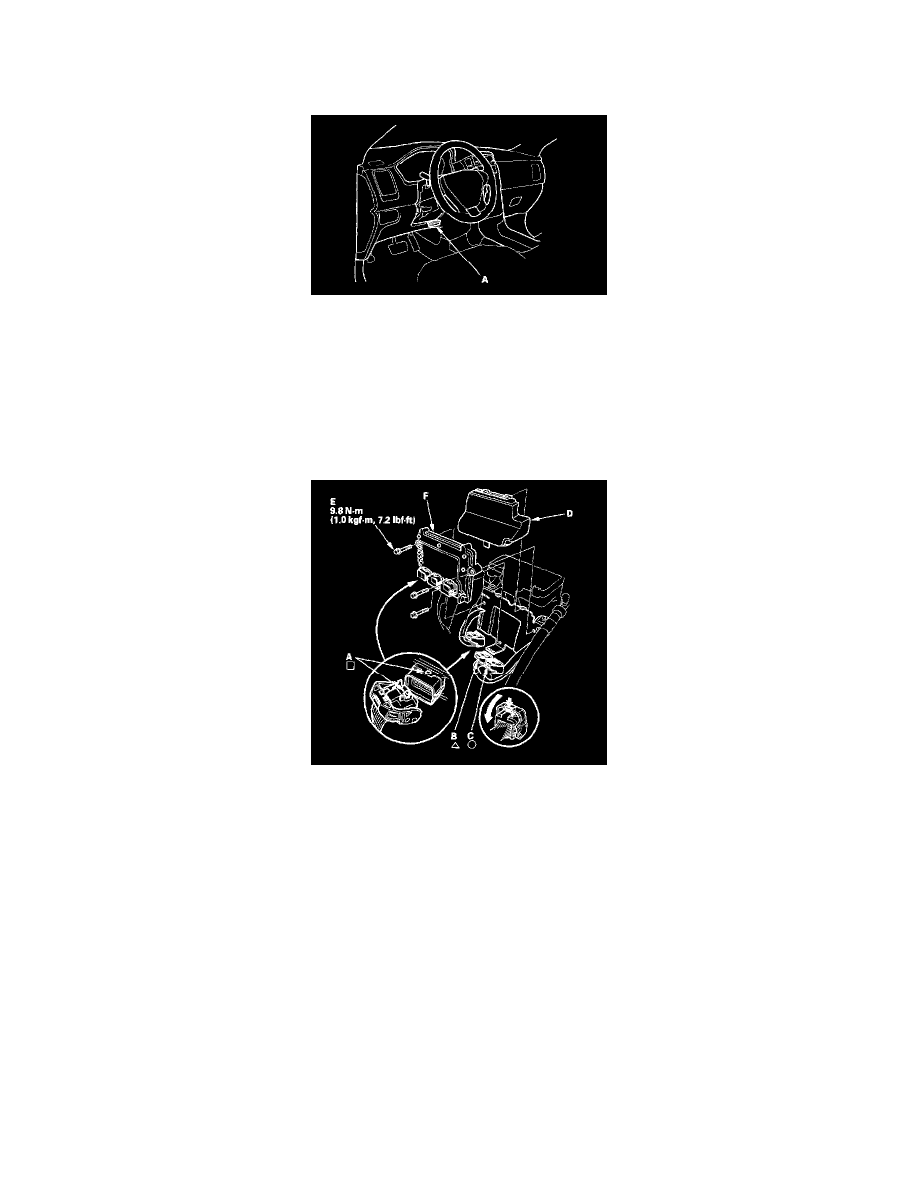
1. Connect the HDS to the data link connector (DLC) (A) located under the driver's side of the dashboard.
2. Make sure the HDS communicates with the ECM/PCM. If it doesn't, skip steps 4 to 6 and 16 and clean the throttle body and replace the engine oil,
then do this procedure.
3. Turn the ignition switch ON (II).
4. Select the INSPECTION MENU with the HDS.
5. Do the TP POSITION CHECK in the ETCS TEST.
6. Select READ DATA in the REPLACE PCM menu with the HDS.
7. Turn the ignition switch OFF.
8. Jump the SCS line with the HDS.
9. Remove the cover (D).
10. Disconnect the PCM connectors A, B, and C.
NOTE: PCM connectors A, B, and C have symbols (A=[], B=/\, C=O) embossed on them for identification.
11. Remove the bolts (E), then remove the PCM (F).
12. Install the PCM in the reverse order of removal.
13. Open the SCS with the HDS.
14. Turn the ignition switch ON (II).
NOTE: DTC P0630 "VIN Not Programmed or Mismatch" will be stored because VIN has not been programmed into the PCM. Ignore it, and
continue this procedure.
15. Input the VIN to the PCM with the HDS.
16. Select WRITE DATA in the REPLACE PCM menu with the HDS.
17. Rewrite the immobilizer code with the PCM replacement procedure in the HDS; it allows you to start the engine.
18. Reset the PCM with the HDS.
19. Do the PCM idle learn procedure.
20. Do the CKP pattern learn procedure.