Pilot 2WD V6-3.5L (2006)

Impact Sensor: Service and Repair
Side Impact Sensor (First) Replacement
Side Impact Sensor (First) Replacement
NOTE: Review the seat replacement procedure before doing repairs or service.
Removal
1. Disconnect the negative cable from the battery, and wait at least 3 minutes before beginning work.
2. Disconnect the appropriate side airbag 2P connector.
3. Remove the front seat assembly.
4. Remove the front side outer trim and the B-pillar lower trim.
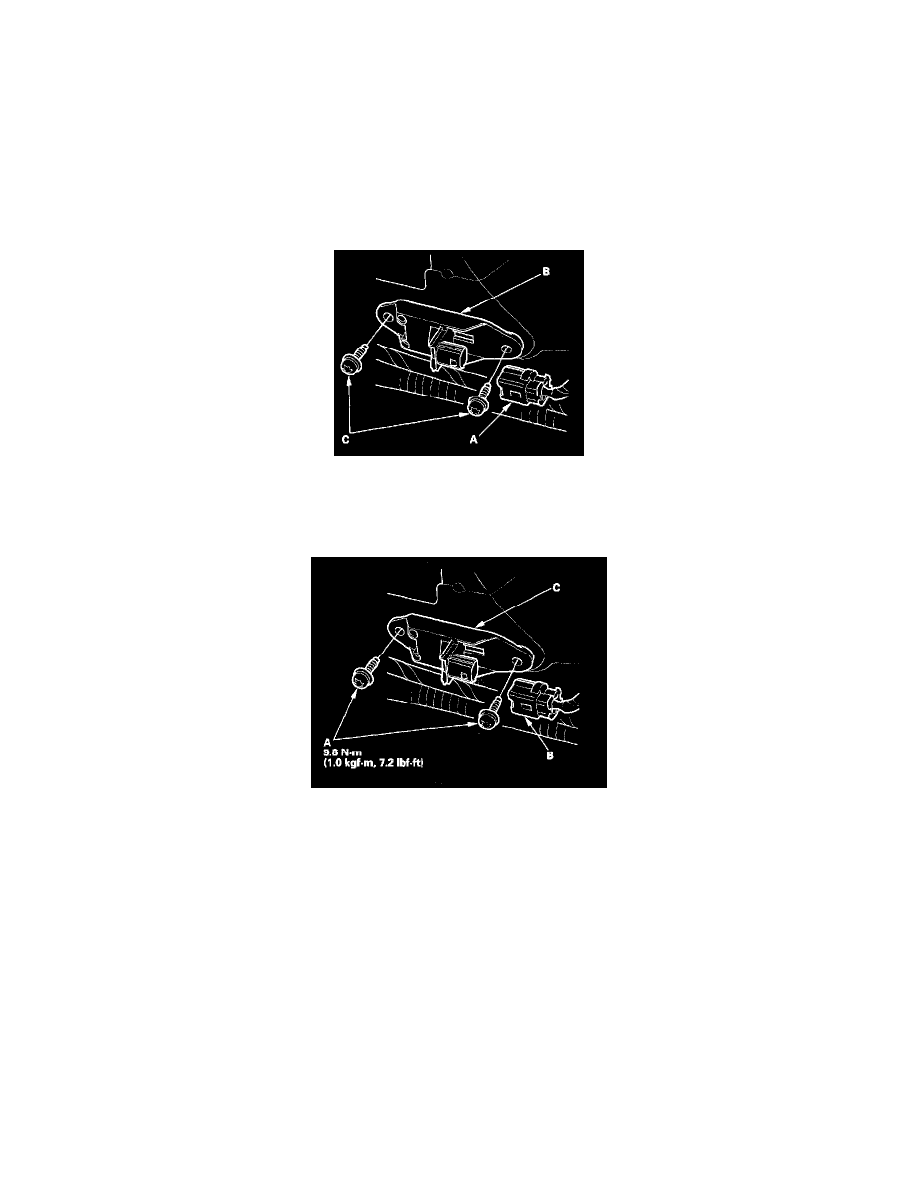
5. Disconnect the SRS harness 2P connector (A) from the side impact sensor (first) (B).
6. Using a Torx T30 bit, remove the Torx bolt (C), then remove the side impact sensor (first) (B).
Installation
1. Install the new side impact sensor with new Torx bolts (A), then connect the SRS harness 2P connector (B) to the side impact sensor (first) (C).
2. Reconnect the negative cable to the battery.
3. After installing the side impact sensor, confirm proper system operation: Turn the ignition switch ON (II); the SRS indicator should come on for
about 6 seconds and then go off.
4. Install all removed parts.
