
Pilot 2WD V6-3.5L (2006)
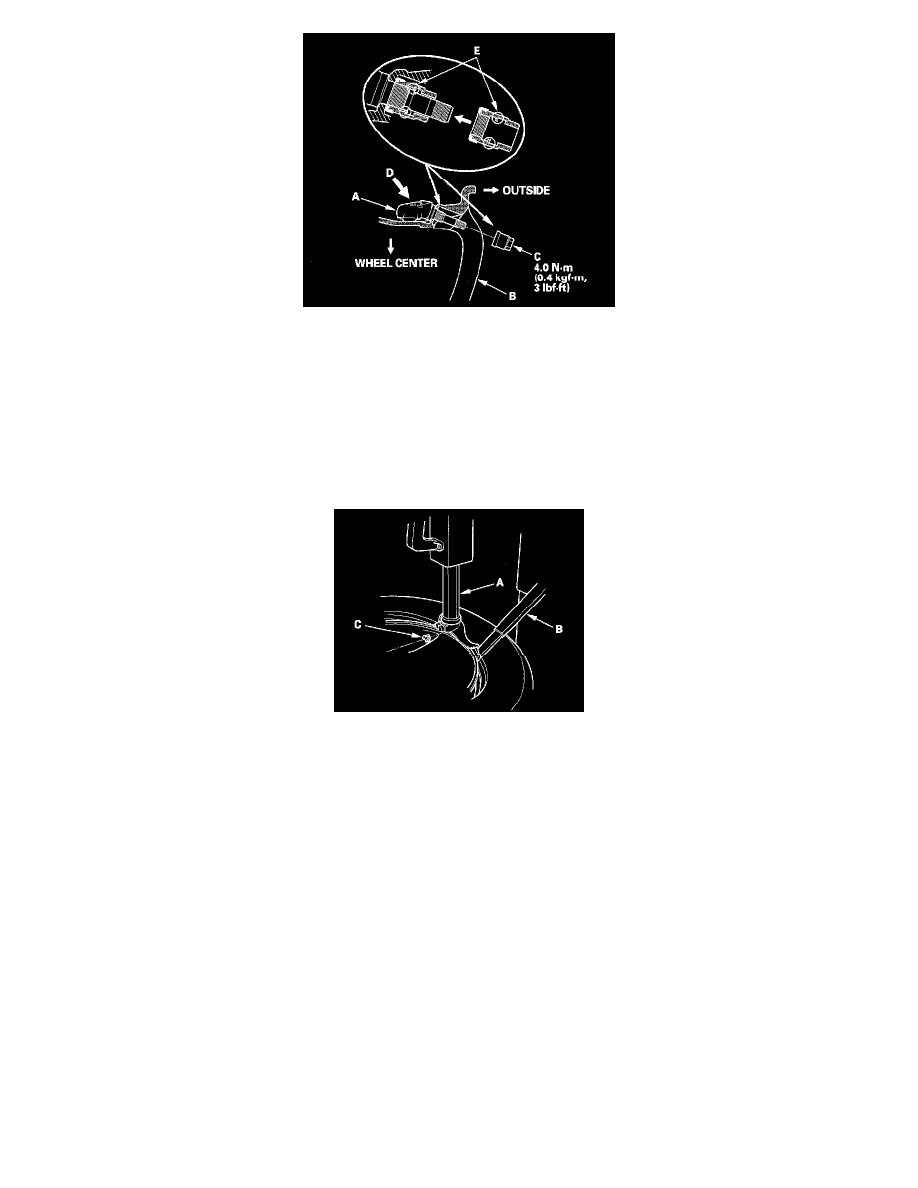
3. Install the tire pressure sensor (A) to the wheel (B), and tighten the valve nut (C) finger tight. Make sure the pressure sensor is resting on the
wheel.
4. Tighten the valve nut to the specified torque while holding the tire pressure sensor toward (D) the wheel. You may hear a snap or pop as you
tighten the nut. This is normal.
NOTE:
^
Do not reuse any nut that has been tightened, even one time, to the specified torque, as it is deformed inside (E).
^
Do not use air or electric impact tools to tighten a valve stem nut.
^
Tightening the nut above the specified torque can damage the nut.
^
Make sure that there is no space between the sensor and the wheel.
5. Lube the tire bead, and position the wheel so the tire machine (A) and tire iron (B) are next to the valve stem (C) and will move away from it when
the machine starts. Then install the tire onto the wheel.
6. Inflate the tire to 300 kPa (3.1 kgf/cm2, 44 psi) to seat the tire bead to the rim, then adjust the tire pressure to 220 kPa (2.2 kgf/cm2, 32 psi), and
install the valve stem cap.
NOTE: Make sure the tire bead is seated on both sides of the rim uniformly.
7. Check and adjust the wheel balance, then install the wheels on the vehicle.
8. Remove the jack stands, and lower the jack.
9. Connect the HDS and memorize the pressure sensor ID(s).