
Pilot 2WD V6-3.5L (2006)
Control Arm: Service and Repair
Rear Suspension
Upper Arm Removal & Installation
Upper Arm Removal/installation
Special Tools Required
^
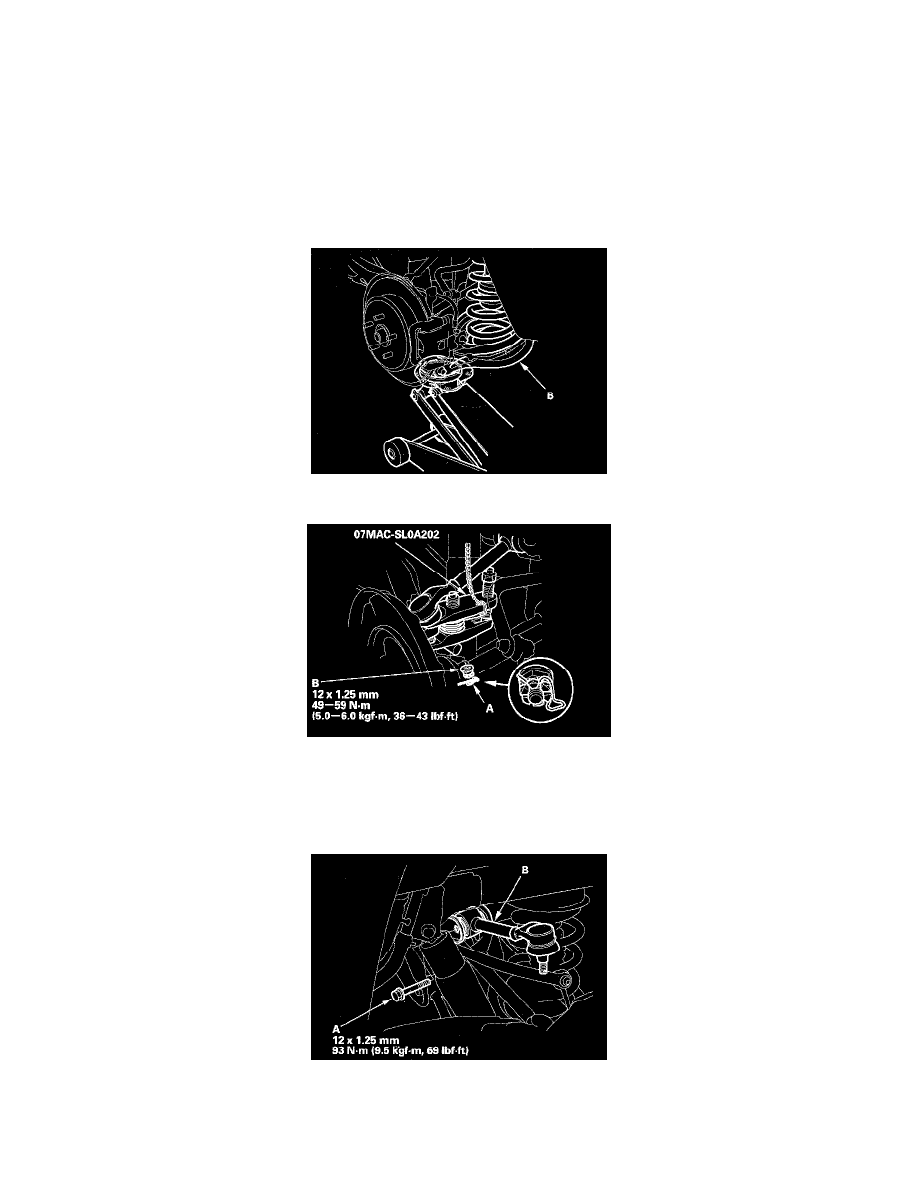
Ball joint remover, 28 mm 07MAC-SL0A202
1. Raise the rear of the vehicle, and support it with safety stands in the proper locations. Remove the rear wheels.
2. Place a floor jack at the connecting point of lower arm B and the knuckle.
3. Remove the lock pin (A) from the upper arm ball joint castle nut (B), and remove the nut.
NOTE: During installation, install the new lock pin after tightening the nut.
4. Disconnect the upper arm ball joint from the knuckle using the special tool.
5. Remove the upper arm bolt (A). Remove the upper arm (B) from the vehicle.
NOTE: During installation, install the new mounting bolt.