
Pilot 2WD V6-3.5L (2006)
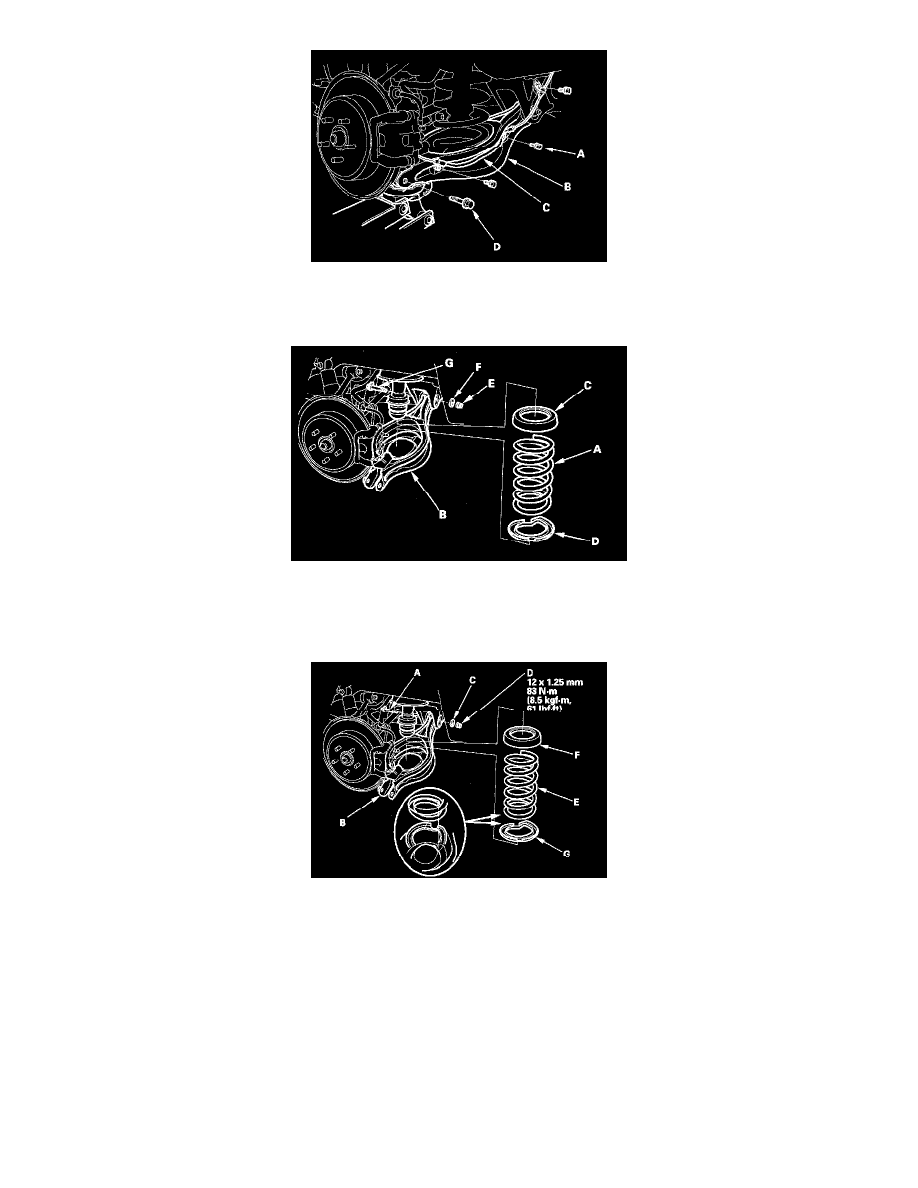
4. Remove the three flange bolts (A) and the wheel sensor harness (C) from lower arm B. Do not disconnect the wheel sensor connector.
5. Remove the flange bolt (D) that connects lower arm B and the knuckle.
6. Lower the floor jack gradually.
7. Remove the spring (A), upper spring seat (C), and lower spring seat (D).
8. Remove the self-locking nut (E), adjusting collar (F), and adjusting bolt (G), then remove lower arm B.
Installation
1. Position lower arm B, install the adjusting bolt (A), adjusting collar (C), and loosely install the self-locking nut (D).
2. Install the spring (E), and upper spring seat (F). Align the bottom of the spring and the lower spring seat (G) with lower arm B as shown.
3. Place a floor jack at the connecting point of lower arm B and the knuckle.