
Pilot 2WD V6-3.5L (2006)
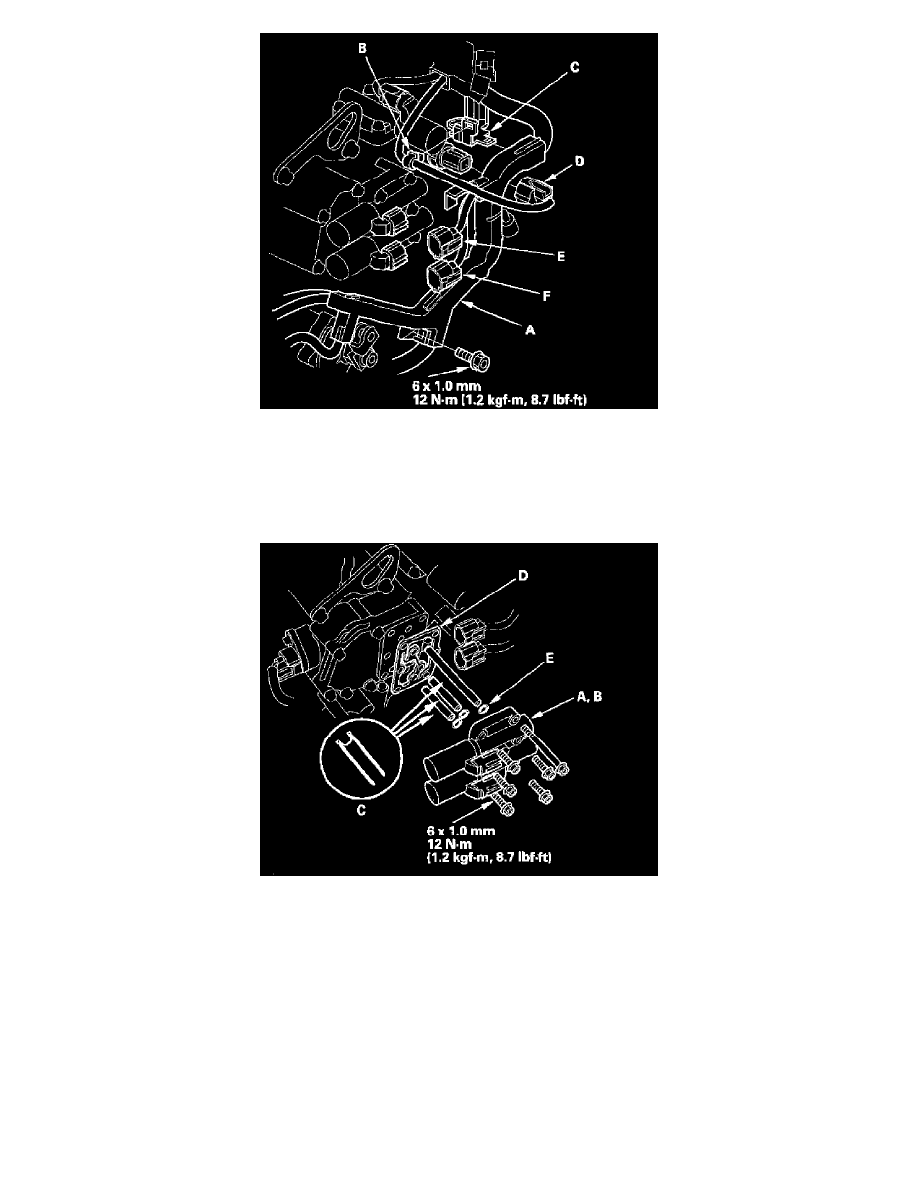
12. Remove the bolt securing the harness cover (A).
13. Remove the harness clamp (B) from the harness cover/clamp bracket (C), disconnect the 4th clutch transmission fluid pressure switch connector
(D), then remove the harness cover from the bracket.
14. Disconnect the A/T clutch pressure control solenoid valve A connector (E), A/T clutch pressure control solenoid valve B connector (F), solenoid
harness connector, transmission range switch connector, ATF temperature sensor connector, output shaft (countershaft) speed sensor connector,
input shaft (mainshaft) speed sensor connector, and 3rd clutch transmission fluid pressure switch connector.
15. Remove the A/T clutch pressure control solenoid valve A and B, ATF pipes (C), and gasket (D). Note the lengths and locations of the ATF pipes.
16. Replace the gasket and O-rings (E) with new ones when installing the A/T clutch pressure control solenoid valve A and B.