Pilot 2WD V6-3.5L (2006)

Transmission Position Switch/Sensor: Service and Repair
Transmission Range Switch Replacement
1. Get the customer's radio (and navigation) anti-theft codes, and write down the audio presets.
2. Disconnect the negative terminal from the battery, then disconnect the positive terminal.
3. Remove the battery hold-down bracket, and remove the battery and battery tray.
4. Remove the intake manifold cover and air intake duct.
5. Remove the battery base and battery base bracket.
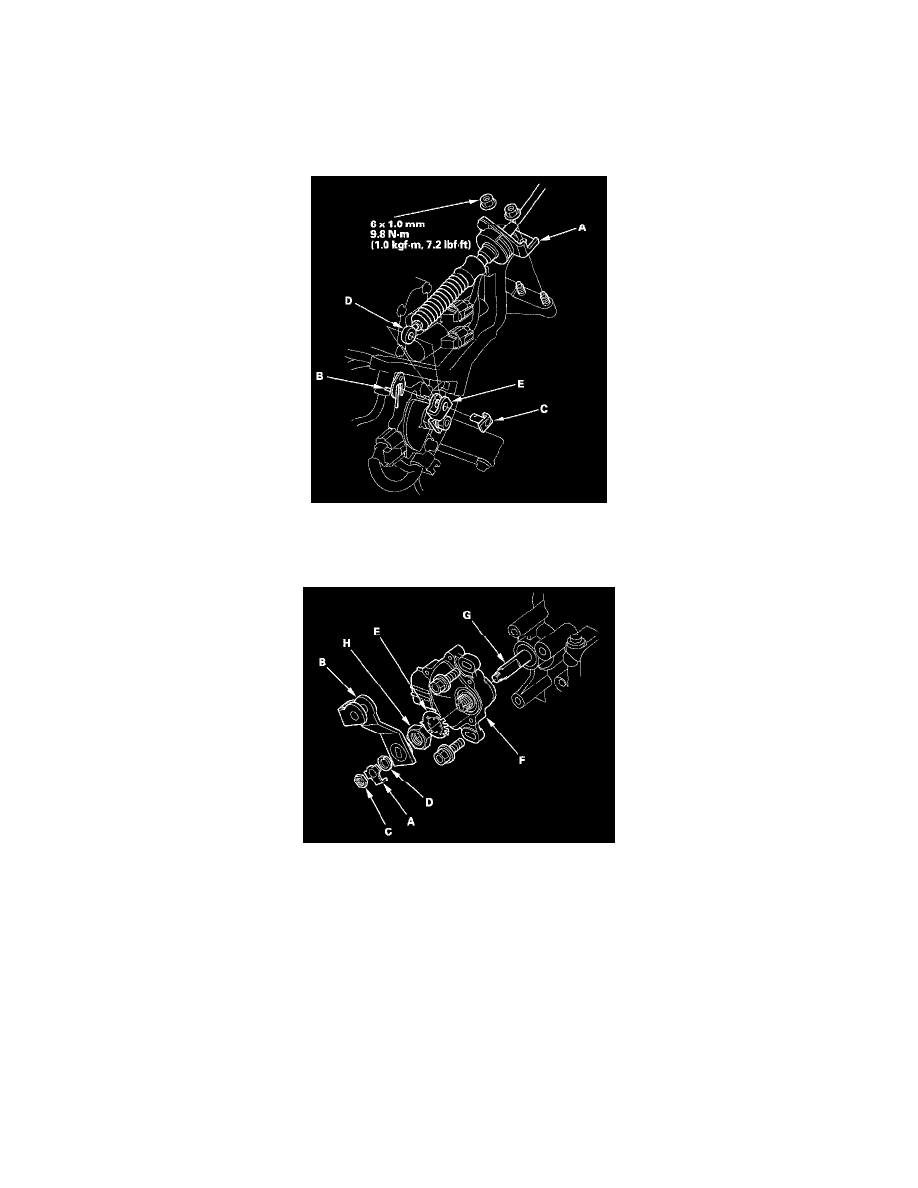
6. Remove the nuts securing the shift cable bracket (A).
7. Remove the spring clip/washer (B) and control pin (C), then separate the shift cable end (D) from the control lever (E).
8. Disconnect the transmission range switch connector.
9. Pry the lock tab of the lock washer (A) on the control lever (B), and remove the nut (C), lock washer, spring washer (D) and control lever.
10. Pry the lock tabs of the lock washer (E) on the transmission range switch (F), hold the selector control shaft (G) with a 6.0 mm wrench, and loosen
the locknut (H).
11. Remove the locknut and lock washer, then remove the transmission range switch (two bolts).
