
Pilot 4WD V6-3.5L (2008)
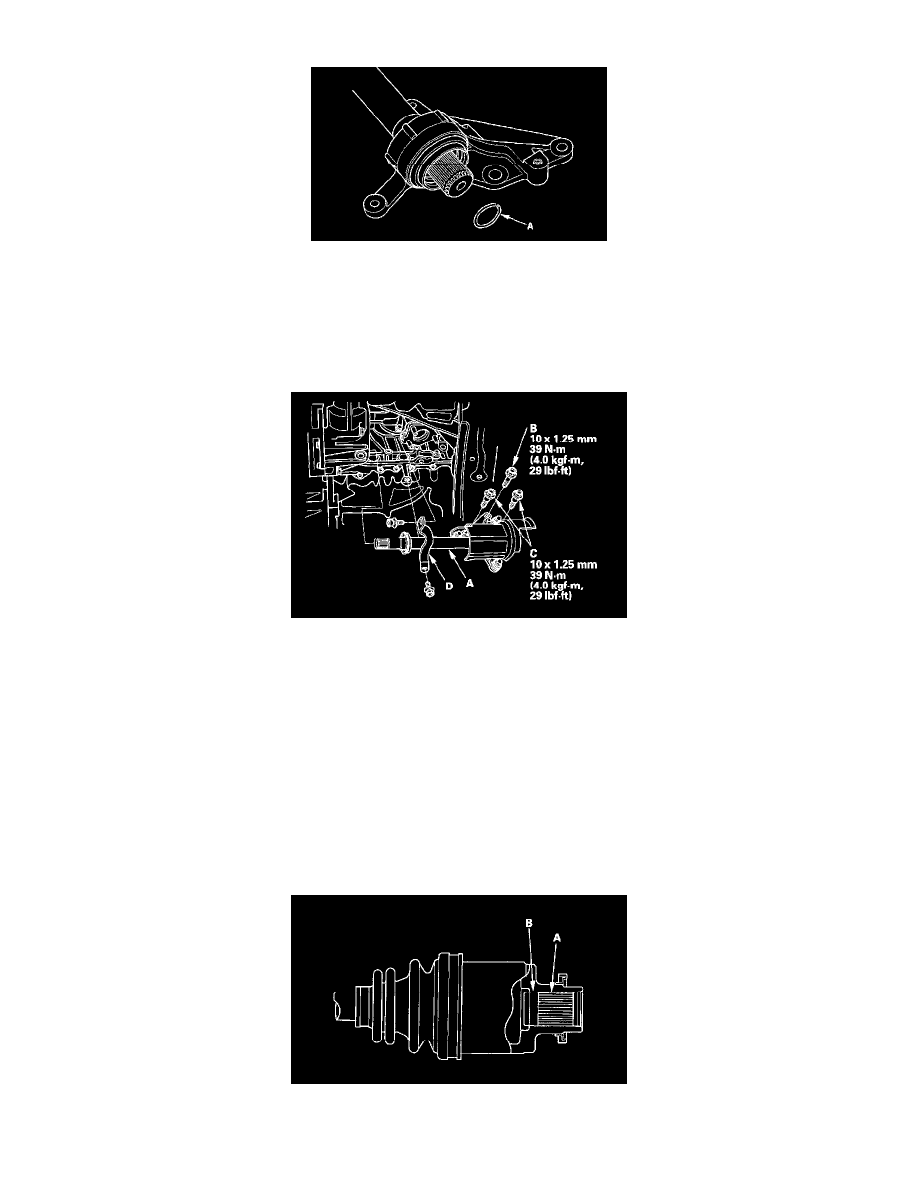
1. Install the new set ring (A).
2. Clean the areas where the intermediate shaft contacts the differential thoroughly with solvent or brake cleaner, and dry with compressed air.
NOTE: Do not wash the rubber parts with solvent.
3. Insert the intermediate shaft assembly (A) into the differential until the set ring locks into the groove.
NOTE: Insert the intermediate shaft horizontally to prevent damaging the differential oil seal.
4. Install the flange bolt (B), two dowel bolts (C), and rear WU-TWC bracket (D).
5. Install exhaust pipe A.
6. Install the subframe stiffener.
7. Install the right driveshaft.
8. Refill the transmission with the recommended transmission fluid.
9. Test-drive the vehicle.
Rear Driveshaft Installation
Rear Driveshaft Installation
NOTE: Before starting installation, make sure the mating surfaces of the joint and the splined section are free of dirt or dust.
1. Apply 1.5 - 2.0 g (0.05 - 0.07 oz) of grease to the whole splined surface (A). After applying grease, remove the grease from the splined grooves at
intervals of 2-3 splines and from the set ring groove (B) so that air can bleed from the differential.
2. Install a new set ring (A) in the set ring groove of the differential.