
Pilot 4WD V6-3.5L (2008)
20. Measure the resistance of each solenoid valve between the connector terminal and body ground.
Standard: 12 - 25 ohms
^
Replace the solenoid valve if the resistance is out of standard.
^
If the resistance is within the standard, go to step 21.
21. Connect the negative battery terminal to body ground, and connect the positive battery terminal to each solenoid valve terminal individually.
^
If a clicking sound is heard, go to step 22 and replace the solenoid harness.
^
If no clicking sound is heard, go to step 23 and replace the shift solenoid valve.
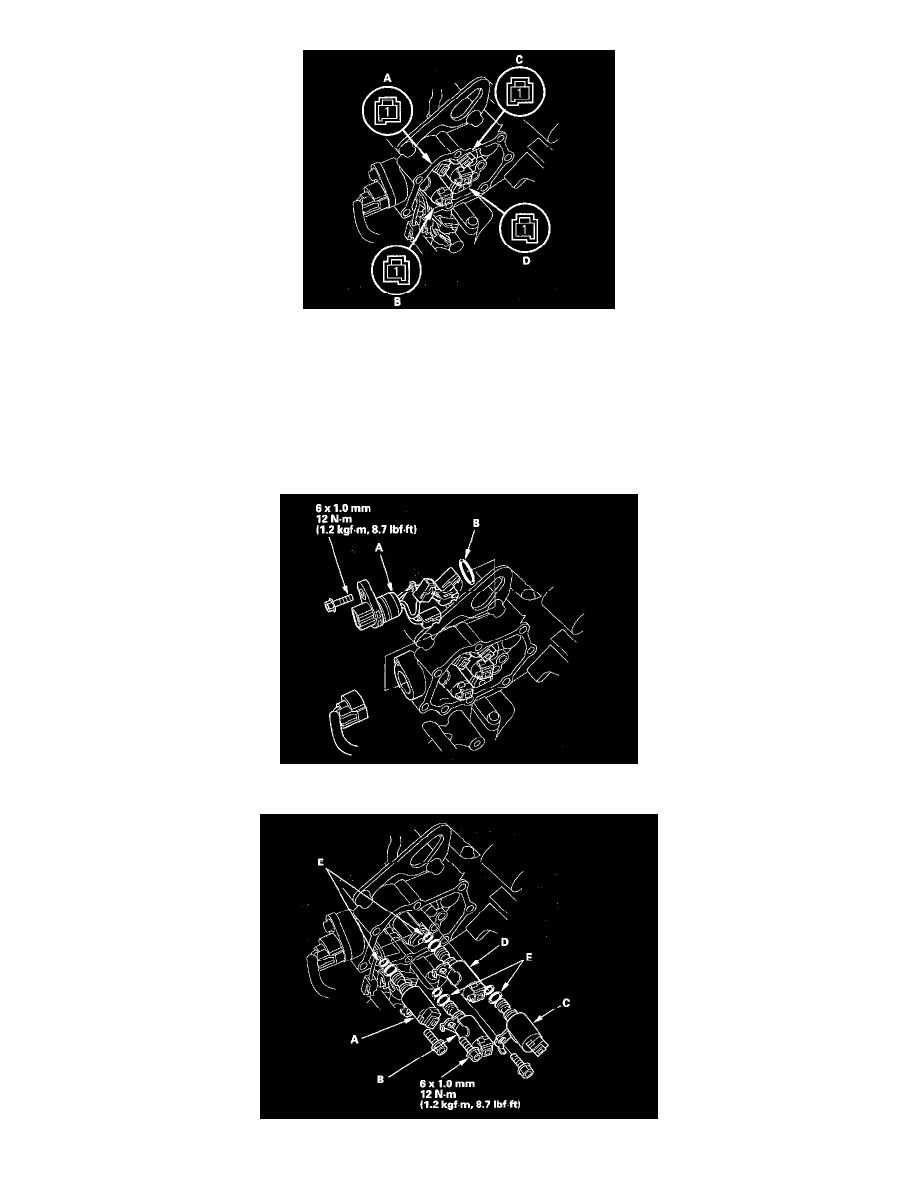
22. Remove the solenoid harness connector (A), and replace it. Install a new O-ring (B) on the solenoid harness connector, and install the connector in
the transmission housing, then go to step 29.
23. Remove the mounting bolts, then remove the solenoid valves.