Prelude L4-1955cc 2000 (1987)

1.
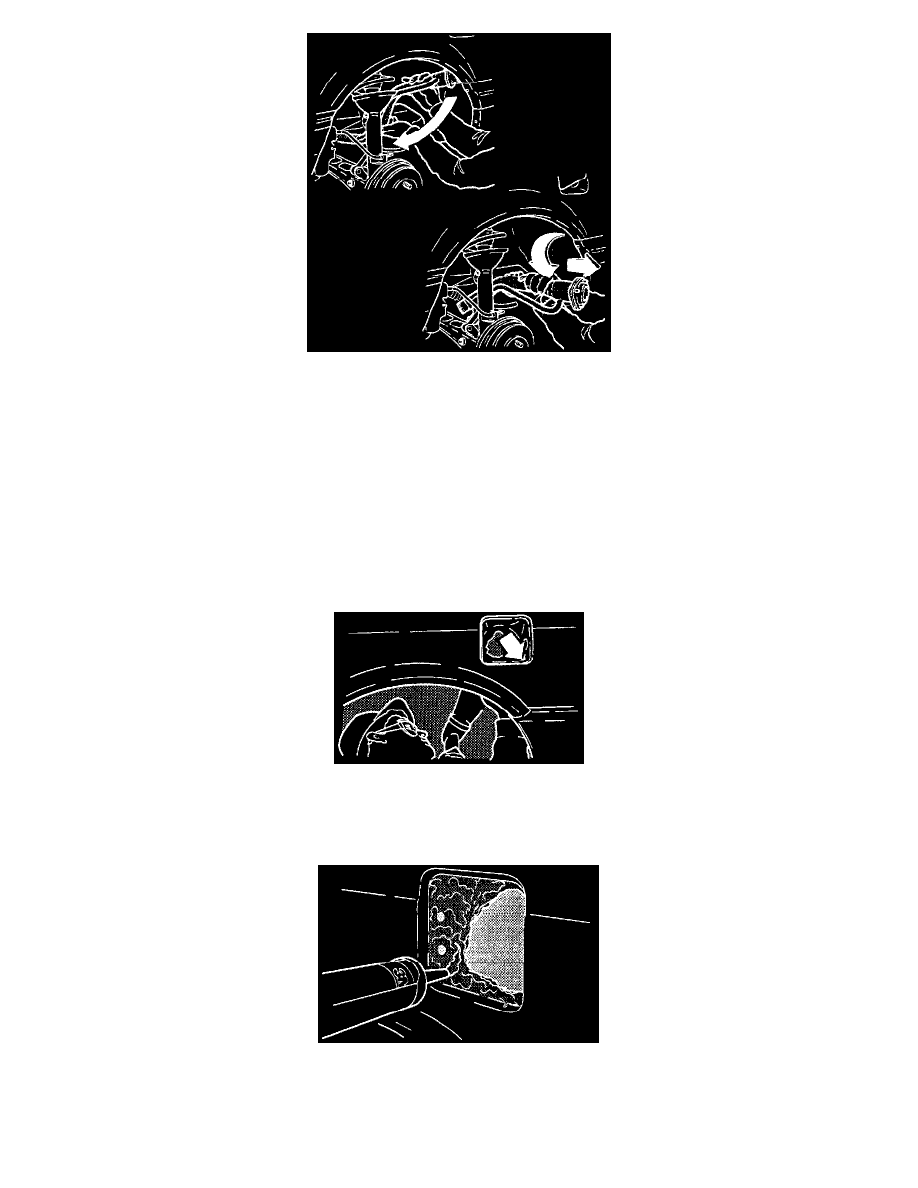
Disconnect both hoses from the fuel filler pipe. Remove the mounting bolt and three mounting nuts. Remove the pipe by moving the bottom end
forward and pivoting the top end down and out.
2.
Examine the filler pipe and fuel filler door attachment points in the fender to determine the extent of rust damage.
^
If any attachment point has rusted away, or is weakened by rust, go to ADAPTER PLATE INSTALLATION.
^
If all attachment points are in good condition, go to COMPLETION PROCEDURE.
Adapter Plate Installation
1.
Pull back the trunk liner, push out the fuel filler door striker.
2.
Remove the fuel filler door.
3.
From underneath the car, check the rear edge of the filler pipe mounting surface where it joins with the wheelwell. Look for signs of rust-through
into the trunk. Any holes will have to be sealed later in this procedure to prevent water leakage into the trunk.
4.
Use a wire brush to clean the rust out of the mounting cup.
5.
Coat the inside of the mounting cup with a 1/4" thick coat of 3M Ultra Pro Brushable Seam Sealer (see REQUIRED MATERIALS). Make sure
any rust-through areas you found in Step 3 are completely sealed.
6.
Place the adapter plate inside the mounting cup. Install the striker.
