
Prelude L4-1958cc DOHC (1989)
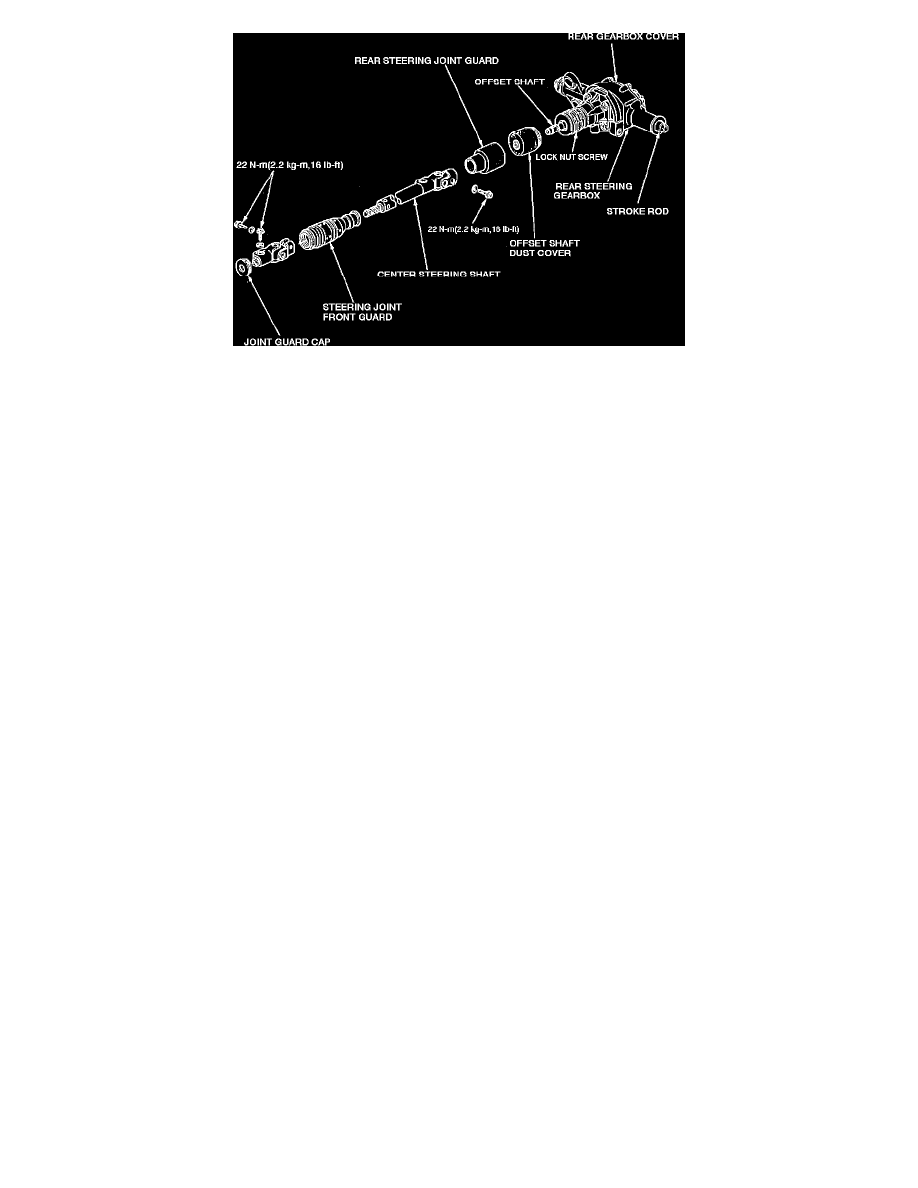
Fig. 19 Exploded View Of Rear Steering Gear Unit
Before conducting service on the front steering gear, clean gear unit using a suitable solvent. Thoroughly clean disassembled components. Always
replace O-rings and seals with new ones. Replace worn or damaged components as required. Do not dip O-rings and seals in cleaning solvent. Coat
O-rings and seals with suitable grease and ensure they stay in position during assembly. Refer to Fig. 18, for the front gear or Fig. 19, for the rear gear
when servicing steering gear unit.
Rear Steering Gear Unit Centering
After completing service on the steering gear, the rear steering gear must be centered as follows:
1.
Center the steering gear assembly and steering wheel by sight.
2.
Install center lock pin tool 07HAJ-SF1020A or equivalent into rear steering gear assembly.
3.
Using a suitable tool, remove steering gear unit cap bolt.
4.
Turn the steering wheel right or left slightly until the center lock pin completely seats.
5.
The red marking on the lock pin tool should not be visible.
6.
Do not turn the steering wheel quickly when the center lock pin is seated and do not force past the locking point after the pin is seated or the pin
may be damaged.
Rear Steering Gear Neutral Positioning
With the rear steering gear removed from the vehicle, adjust neutral position as follows:
1.
Using a suitable tool, remove cap bolt from the rear steering gear unit.
2.
Position the offset shaft with the cutout facing the underside of the steering gear unit and the flat area facing upward.
3.
Install centering pin 07HAJ-SF1020A or equivalent into the gear unit.
4.
Turn the offset by hand to ensure the steering gear is in the neutral position. If the gear is in the neutral position, the red marking on the pin should
not be visible and the offset shaft should be locked. If the red marking on the pin is visible and the offset shaft can be moved, adjust unit again.
Steering Gear
1.
With steering gear removed from vehicle, remove control unit. Refer to CONTROL UNIT
2.
Remove boot bands, then boots. Straighten tie rod locks, then remove tie rods using two 19mm wrenches.
3.
Push right end of cylinder rack into housing.
4.
Remove rack locknut and guide screw, then the 28mm snap ring securing pinion lower ball bearing.
5.
Remove pinion from gear housing.
6.
Remove 12mm snap ring, then separate lower ball bearing and pinion.
7.
Remove cylinder housing attaching bolts, then slide housing off rack.
8.
Remove rack bushing, cylinder spring and cylinder end seal from cylinder.
9.
Remove cylinder seal retainer, cap and steering rack from gear housing.
10.
Remove retainer washer and 46.5mm O-ring from gear housing.
11.
Remove pinion dust seal retainer bolts, dust seal and retainer.
12.
Inspect pinion upper bearing. Replace if worn or damaged.
13.
Remove cylinder and seal retainer from rack.
14.
Remove two 37.5 O-rings from cylinder cap.
15.
Remove 27.5mm O-ring and snap ring from seal retainer, then slide off cylinder cap.
16.
Remove cylinder end seal from retainer, then remove rack piston ring and 31.5mm O-ring.
17.
Prior to assembly, clean all disassembled parts, replace all O-rings and seals.
18.
Install 27.5mm or 31.5mm O-ring in rack groove, then piston ring using suitable tool.
19.
Install both 35mm or 37.5mm O-rings on cylinder cap, then slide cylinder cap onto seal retainer.
20.
Install snap ring and 24.5mm or 27.5mm O-ring on seal retainer.
21.
Grease surface of cylinder end seal, then install seal in seal retainer with groove side facing out.
22.
Install 46.5mm O-ring and retainer washer into gear housing.