
Prelude L4-1958cc SOHC (1988)
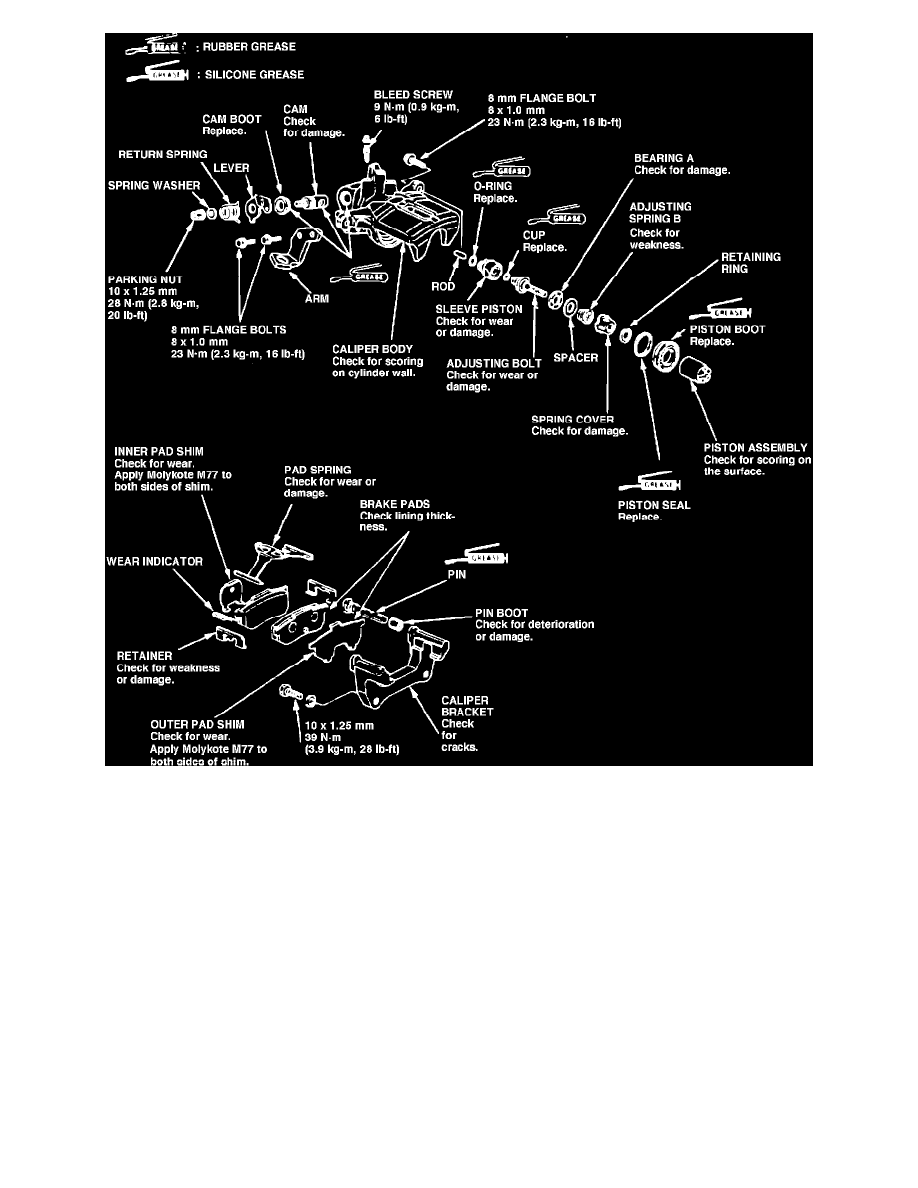
Fig. 16 Rear disc brake caliper exploded view. 1988 Prelude
6.
Slowly release spring compressor, then remove cover, adjusting spring B, spacer, bearing and adjusting bolt, Fig. 16.
7.
Remove piston sleeve, then remove pin from cam.
8.
Remove parking brake lever return spring, retaining nut, lever cam and dust boot.
9.
Clean all components with new brake fluid and wipe dry with lint-free shop towels.
10.
Coat parking brake cam boot with suitable lubricant and pack needle bearing cavity with silicone grease, then install cam boot and cam, taking
care not to damage boot when inserting cam.
11.
Install lever and tighten retaining nut, then install return spring.
12.
Install new O-ring on piston sleeve and insert pin into cam.
13.
Install piston sleeve with hole in bottom of sleeve aligned with pin in cam, and piston sleeve aligned with holes in caliper.
14.
Install new cup on adjusting bolt with groove facing bearing side of bolt.
15.
Install bearing, spacer, spring and spring cap over adjusting bolt, then position assembly in caliper.